First week
Getting to know the customer better and a city map prototype.
Week One. Monday.

|
Installing EA. Setting up my project, and reusing existing documentation to quickly build the first model. And discovering some nice features that confirm my choice for EA as a modelling tool. |
Installing EA
The installation of Enterprise Architect went smooth as a baby’s skin. After the installation, I added my license key via Help | Register and Manage License Keys…
A quick look at the start screen then showed me what I needed: Create a New Project. I chose not to add any models, since I had a good idea of the model I wanted to build, and it would be custom.
The first real work: creating packages to organize stuff
First, I changed the name “Model” in the Project Browser to “Vinimble City Map” since that would appeal to the customer more than the rather dull standard name. Then I started to create some packages underneath the project browser root: Strategy, Business Process and so on. I decided to use the icon for a “simple” view, but it’s easy to change that later via right click - “Set View Icon…”.
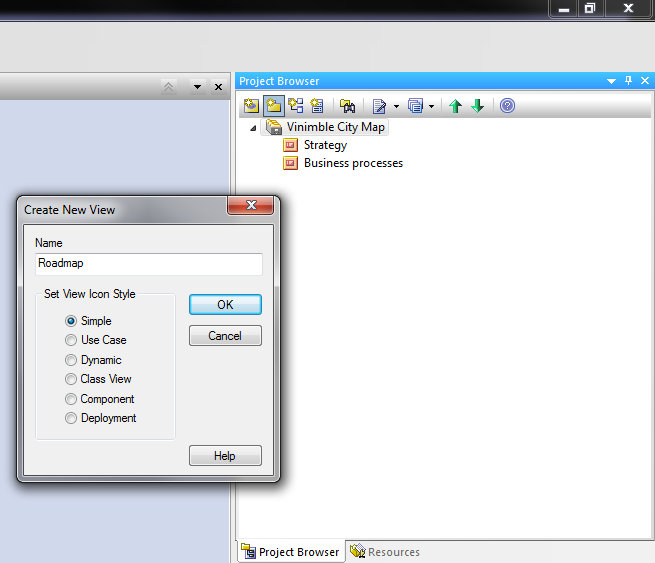
Adding packages under the model
Because these packages are directly under the project root, EA calls them “Views”. If you create a package under a view, it will be called just “package”.
Although you can reorganise packages later, it is worth the effort to think about the structure of your model beforehand. This will save you time. On top of that, it is useful to know that you cannot move a “view” (package directly under the root) to another view. You will get this error message:
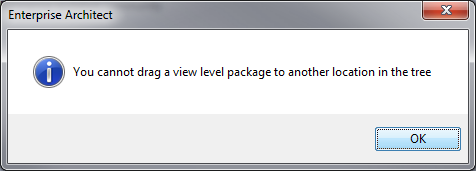
Error message when trying to move a “view”
Of course you can create a new package under the destination package, move the contents of the view to the new package, and delete the old view to get exactly the same result.
If you create multiple views, you will see they appear in the project browser in reverse order. Luckily, it’s easy to change that: just use the green arrow buttons at the top of the project browser to rearrange them one by one.
Repeating elements and connectors
Now creating packages would be rather useless if we wouldn’t create diagrams and elements. So that’s what we are going to do.
First, create a diagram under a package, using the “new diagram” button of the project browser.
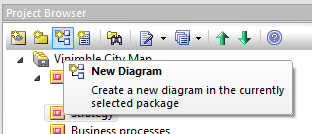
Creating a new diagram
Let’s start with making an overview of the Vinimble business processes. In the package “Business processes”, create a package “Overview” and add a diagram of the type “Strategy modeling - Strategy Map”.

A business process overview diagram
A recent EA feature I really like is the ability to create “hand drawn” diagrams that appear to be pictures of a whiteboard. Especially if you talk to nontechnical people, this type of diagram can take away their fear of technical mumble-jumble.
So let’s turn this business process overview diagram to whiteboard, hand drawn mode. Righ click the diagram, choose “Properties” and go to the tab “Diagram” and tick the checkboxes “hand drawn” and “whiteboard”.
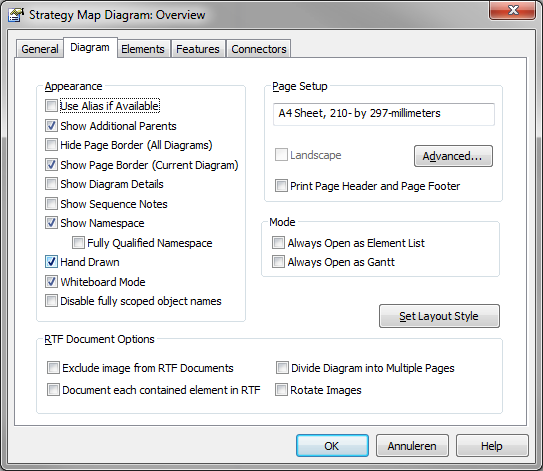
Hand drawn, whiteboard mode
You’ll see the diagram turns white instead of the usual blue.
Then add a few business processes by clicking the “process” element type in the strategy map toolbox. Give each business process an appropriate name and you have a diagram like this.
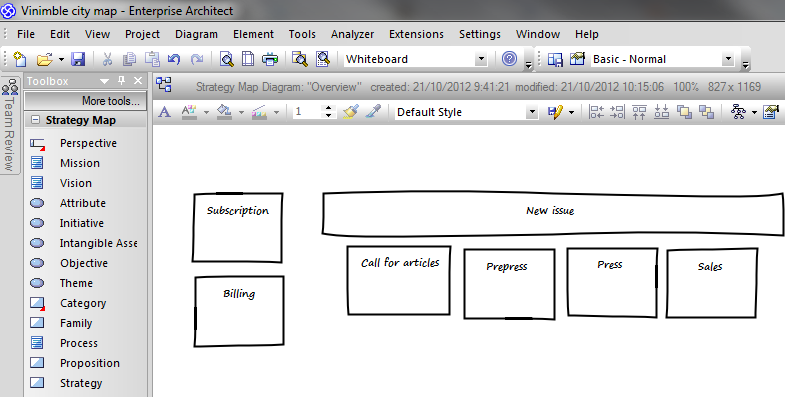
The resulting diagram

|
ctrl + click on the diagram creates a new element of the same type as the last element you created. |
Is it clear from the diagram that the “New Issue” process is actually a group of processes? If you are just writing on a whiteboard, it might be enough to put them like this. But as an architect, I would rather like to formalize the relation between the “New Issue” process and the subprocesses like “call for articles” and “prepress”.
That’s were connectors come into play. From the “More tools” bar on top of the toolbox, choose “Extended - Custom” to open the toolbox “Custom”.
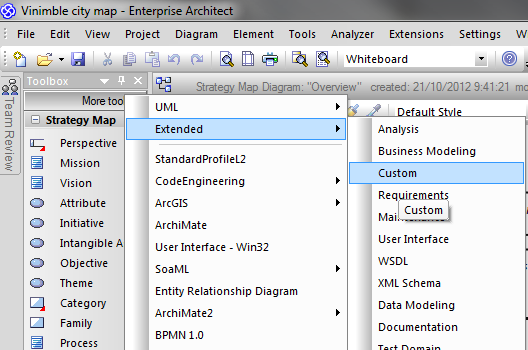
Opening a toolbox
Click on the “aggregate” relationship (it looks like a diamond on a stick). Then click a subprocess and drag to the main process “New Issue”.
|
|
F3 repeats the last connector: press F3 then click a subprocess, drag to the main process without going to the toolbox. |
The diagram now looks like this:
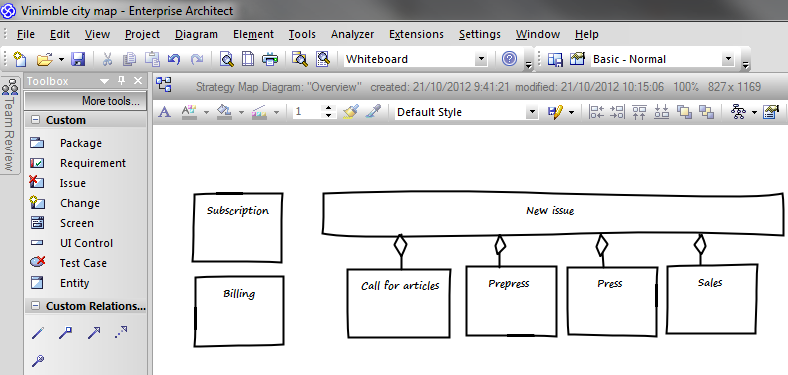
Diagram with connectors
Nesting and parent-child relationships
The business process overview so far looks OK for those who know the “aggregate” relationship. So typically not those who will review this diagram.
So we will use a more informal way of saying that the subprocesses belong to the main process, and that is by nesting them.
To achieve that, just drag the handles of the main process until the subprocesses fit.
Enterprise Architect will automatically
- make the “aggregate” relationships disappear
- adapt the z-order of the elements so that the main process doesn’t cover the subprocesses
- indicate that the subprocesses belong to the main process by adding the text “New issue:” before each subprocess
- rearrange the elements in the project browser so that the subprocesses are hierarchically under the main process. (this only happens when support for composite elements in the “Tools | Options” window is on)
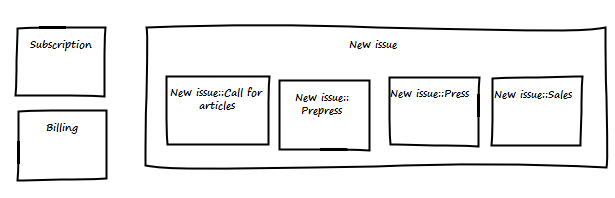
Diagram with implicit connectors
Of course, the aggregate relationships are not gone: confirm this by dragging a subprocess out of the main process. The aggregate relationship reappears.
If you find the “New issue:” marker before each subprocess name disturbing, you can put it off by right clicking the diagram and ticking the checkbox “Disable fully scoped object names”.
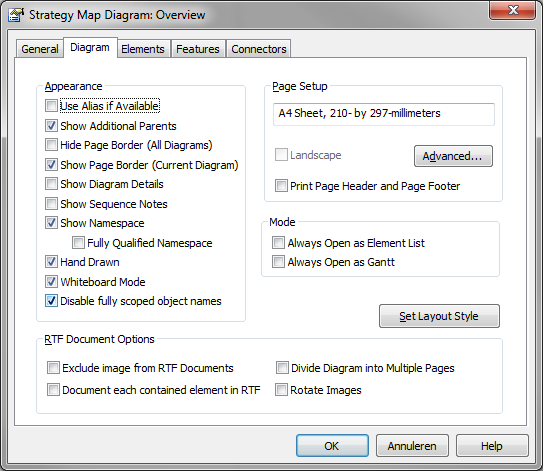
Removing the name of the parent
Docking elements
Nice diagram, but we can still improve it. Suppose our business process overview is complete and it consists of nearly hundred processes and subprocesses. It would hardly fit on one sheet of paper, wouldn’t it?
Apart from resizing the elements so they take up less space, we can also prevent space getting lost between the elements. We will use the docking feature for that:
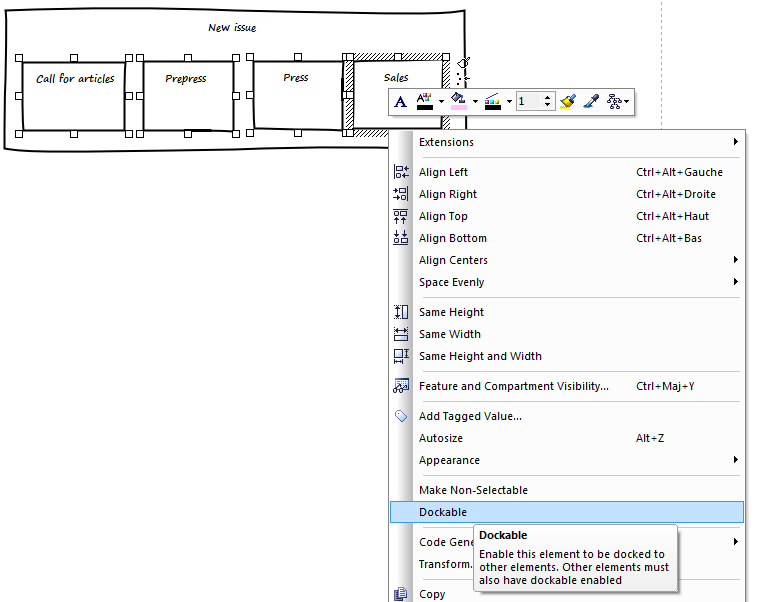
The docking menu
- First, select the elements to dock (ctrl+click will select multiple items)
- Then, right click and choose “Dockable”
- Last, drag the element one by one to their neighbor.
The resulting diagram looks like this.
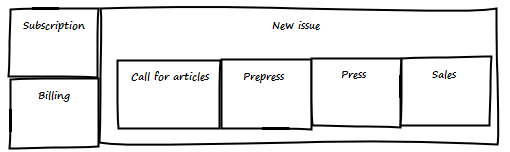
Docked elements
|
|
Phew, hard work for the first day! Now getting some well-deserved sleep… |