
Table of Contents
- Introduction
- Sleeping
-
Transit
-
JR Pass
- Types of JR Passes
- How to buy a JR Pass
- Using a JR Pass for JR Trains
- Dear Google: PLEASE Add a “JR Pass Only” or “Exclude Nozomi and Mizuho” Option to Google Maps
- Dear Google: While You’re At It, Japanese is Not Chinese
- Other Places to use a JR Pass
- How To Use a JR Pass
- Why You May Not Want a JR Pass for Tokyo
- Suica (or Pasmo) Card: Get One Immediately
- Google Maps is Essential
- Metro and Trains
- City Buses
- Highway Buses
- Taxis
-
JR Pass
- How & What to Pack
- Convenience Stores, Vending Machines & Bank Machines
- Food
- Shopping
- Laundry
- Goshuincho and Goshuin
- Etiquette
- Communicating Without Speaking (Much) Japanese
- Itinerary Advice
- Hiking
- Temples and Shrines
- Castles and Gardens
- Kabuki and Bunraku
- Onsen
- Museums
- Festivals (Matsuri)
- Advance Preparation
Introduction
I Love Japan
I love Japan.
There’s so much to see and do in Japan – there’s tons of culture and history to see (not just in Kyoto), the food is both great and varied (not just sushi, although it can be amazing), the cities are interesting and alive (especially in Tokyo and Osaka), the countryside is stunningly beautiful, and the people are extremely nice, friendly, polite and helpful.
There are three secrets about visiting Japan, however:
- It can be a lot cheaper than you expect, especially with the exchange rate on the yen and if you use Hotwire.
- It can be a great family vacation, if your kids are in middle school or high school. Japan is clean and safe–probably cleaner and safer than where you live.
- The JR pass is the best deal ever, but you don’t need it for the days you’re staying in Tokyo.
Now, you can make Japan as expensive as you want. Also, visiting Japan can be a great solo trip, or a great trip with your partner. And you can visit Japan without speaking any Japanese. But those aren’t exactly secrets now, are they?
Every day I’m in Japan I find something new to love about it. I once asked a JR employee if a specific Shinkansen train was for Yamagata or Sendai. He was very polite and helpful, even though I was asking in English. Then I realized, as I was asking, that his shirt said Driver. He was literally a Shinkansen driver. I politely thanked him (in Japanese) for his help, and walked on. About 30 seconds later, long after the interaction had ended, he came running up to me and clarified that the train I was looking at was, in fact, the Shinkansen for Yamagata, not Sendai, and that cars 16 and 17 were the non-reserved cars. He even walked with me a bit toward the end of the train, effectively ensuring I knew which was car 16 before leaving me…
Who is This Book For?
This book is for you if you…
- have never gone to Japan, and
- are considering going to Japan, either solo or with your partner and/or your kids, and you
- either haven’t started or aren’t done planning your trip.
Who is This Book NOT For?
If you haven’t been to Japan, but you’ve already fully planned your trip, booked all your hotels and ordered your exchange orders for your JR passes and read one or more guidebooks, many parts of this book are irrelevant. However, other parts may still be useful.
If you’ve already been to Japan, chances are you’ve learned much or all of what’s in this book already, maybe some of it the hard way. This book is not called Your Second Trip to Japan or A Complete Japan Guidebook, after all. However, you still may get your money’s worth just from the Hotwire tips section.
Finally, while this book is primarily intended for people who are going to Japan for a vacation, parts of it can also be useful for you if you’re going to Japan on business. Obviously the JR pass stuff won’t apply, nor will many of the itinerary suggestions.
What Does This Book Try to Accomplish?
The big idea for this book is this:
Imagine we are both stuck at a party for the next couple hours, with no one else interesting to talk to. You told me that you were considering going to Japan, and I replied that I’d been there twice, spending over 8 weeks in total. You can then use the next couple hours to learn as much as possible from my experience. Everything I would have told you, and more, is in this book. (Also, there are more pictures.)
So, this book tries to be helpful to you, both in preparing for your trip and in the trip itself.
In preparing for your trip, it focuses on the big questions, as it tries to help you…
- Decide whether to go, by reducing the amount of uncertainty. Really, that’s the biggest thing. After you read this book, you should feel a lot more comfortable.
- Plan an itinerary, whether you’re travelling alone, with your partner and/or with your family.
- Pack, whether you’re taking a backpack (preferred) or a suitcase, if you’re travelling in the summer.
- Book hotels, both in the major destinations (Tokyo, Kyoto, Osaka) and in the more remote areas.
- Decide whether you need a JR pass, and for how long. (Hint: it might not be for the whole trip.)
- Get a rough idea of costs, so you can decide whether the trip you’re planning fits your budget.
- Get inspired (or get your partner and/or kids inspired) with movies, video games and (gasp!) even other books.
During your trip itself, it tries to help you with some of the basics of daily life, including how to…
- Pay for things. (Hint: usually with cash, and without ever tipping. Really.)
- Get places, taking trains (JR and non-JR), the metro (which you should use in Tokyo, Kyoto, Osaka), buses (it’s different than in Canada or the US) and taxis.
- Avoid a number of the basic etiquette mistakes you might make while eating or visiting cultural sites.
- How to communicate effectively enough, even if you don’t speak essentially any Japanese.
- How to pronounce the romanized Japanese (with the same alphabet that is used for English) that you read.
- Get cash from bank machines.
- Do laundry.
This book also contains a very small set of recommendations regarding cheap but tasty food (especially for those travelling with kids), and regarding sights to see.
Frankly, for many people, the Hotwire tips or JR pass tips sections may be worth the price of the book.
What Does This Book NOT Try to Accomplish?
While it’s reasonably straightforward to list what this book is trying to accomplish, it’s impossible to list everything this book is NOT trying to accomplish–there’s just so much that I’m not trying to do.
However, it’s fun to pick some highlights, so that you’re not disappointed when you find them omitted.
This book is NOT trying to be…
- A comprehensive guidebook. The Lonely Planet Japan book is about 1000 pages, and even it omits things. This book is trying to be less than 150, and that’s with a lot of pictures. I want you to be able to read the entire thing in one sitting when you’re planning, and then have it as a reference on your phone when you’re actually in Japan. Your time is limited. Your time to plan your vacation is limited, and your time in Japan will be even more limited.
- Unbiased. Since I’m not trying to be comprehensive, I don’t even have pretend to be unbiased. This book reflects my biases. I hope that they’re helpful for you, regardless of whether you agree or disagree with them, I want to be helpful and transparent about what they are.
- An archaeological, cultural, political, literary, social or religious history of Japan or analysis of present-day Japan. I don’t know enough, and it’s not my place. Occasional references to literature or history will be sprinkled throughout the book, but from the perspective of enhancing your enjoyment of your trip, not to be scholarly.
- A guide to nightlife. I’m highly unqualified: not only am I married, I stopped drinking a couple years ago. Thankfully, in terms of nightlife recommendations, whatever your preferences or orientations are, the Lonely Planet books have a lot of recommendations to offer, as does the internet. Also, if you do drink, cold sake can be tasty, and good Japanese whiskey is amazing, even better than many brands of single malt scotch.
- A guide for parents with children under 8. If you have a limited budget and kids who are under 8, I strongly recommend waiting until they’re older. Seriously. Chances are you’ll only take them to Japan once or twice, and if they’re too young they won’t enjoy much of it or remember any of it–and you’ll possibly just remember how miserable you were.
- A guide for all seasons. The focus is on the summer time, not on spring, fall or winter. There is a simple reason for this: this is probably when you’re going to Japan, and it’s when I’ve been to Japan.
A New Guidebook in 2018?
Of all the things to do in 2018, writing a brand new travel guidebook about Japan seems like a singularly bad idea.
Much of what a travel guidebook does is now partially or entirely obsolete, thanks to the internet and the smartphone. With the combination of iPhone or an Android phone and Google Maps, Google Translate, Trip Advisor, Hotwire and Booking.com, you can now go many places in the world and be totally fine, without even thinking of reading a guidebook.
This list of places definitely includes Japan. You can go to Japan without reading a guidebook or speaking a word of Japanese and have a good enough time.
Furthermore, there are already excellent guidebooks for Japan. Specifically, the Lonely Planet guidebooks, Japan, Tokyo and Kyoto are all first-class. I’ve used all of them in my trips to Japan.
So, why would I write a brand new guidebook about Japan now?
First, I want this guidebook to help you have a great time, not just a good enough time.
Second, this book has a very specific set of skills. It knows what it is and is not trying to be, and it acknowledges its place in the ecosystem. So, it can be a lot smaller and more focused as a result.
Since this book is being created from scratch in 2018, I don’t have to write all the bits which are obsolete, let alone keep them current in future. If information is better found on Google Maps, Trip Advisor or Japan Guide, I don’t have to duplicate it. Instead of pretending those services don’t exist or only offering minimal links, I will embrace them, providing a bunch of clickable links. (These won’t be affiliate links, either: if I link to something it’s because I hope it’s helpful, not because I hope to earn a commission.) This will save you time when you use these services, both to plan in advance, and when you’re looking things up on your phone when you’re actually in Japan.
Also, since I’m publishing the book on Leanpub, I have complete control of it–I don’t have to write something because my publisher says the book needs to be a certain length, or contain things which are traditionally provided.
Next, despite the fact that there are excellent guidebooks for Japan, such as the Lonely Planet ones, the “getting started” information tends to be scattered throughout them, and the absolute basic stuff can be glossed over. So, it’s easy to make a number of avoidable mistakes, involving food, trains, buses, etc.
Another reason is that I’m a co-founder of Leanpub, a publishing startup focused on in-progress publishing. Most of our books are computer programming books, but I think that travel guidebooks are one of the ideal uses for our platform: since they can be easily updated, publishing a new version with one click, an author can keep them current a lot more easily than with other approaches. So, I’m putting my spare time where my opinion is, and writing a travel guidebook myself, in the hope that it inspires a bunch more self-published travel guidebooks on Leanpub.
Obviously, I think there’s a huge opportunity here, not just for travel guidebooks in general, but specifically for this book. I don’t do things hoping they will fail.
Finally, sincere gratitude. I have greatly enjoyed my trips to Japan, both with my family, and when I stayed afterward for some solo adventures. I want to share some of what I’ve learned and enjoyed. Furthermore, the Japanese people have been so nice to me. If this guidebook helps save them from some number of other gaijin making some of the same silly mistakes that I did, this will by my small contribution toward things being more harmonious for them. (However, my wife and I especially feel for the Japanese people with the upcoming Tokyo 2020 Olympics! Sorry in advance on behalf of our fellow Canadians…)
Are You Qualified to Write This Book?
I am not an “expert” on Japan.
First, I’m not Japanese. It’s debatable whether any non-Japanese person can truly “know” Japan. (This is actually a more complex idea than it sounds: since you are a foreigner, less is expected of you. So, even if you moved to Japan and hypothetically learned everything that a Japanese person knew, it would apply differently to you–for better, and for worse.)
Second, I don’t even live in Japan. At the time I’m writing this sentence, I’ve only spent about 8 weeks in Japan, six weeks with my wife and son and two weeks by myself. This was over a three and a half week trip in summer 2016 (when our son was 12), and a five week trip in summer 2018 (when our son was 14).
Third, I don’t even speak Japanese. I muddle by at not much better than “basic tourist” level. I took Japanese 100 in university a long time ago, but I’ve forgotten most of what I had learned.
Fourth, I don’t have a deep understanding of Japanese culture. In university, I took a second year level Japanese Culture class, writing essays comparing the Man’yoshu and Kokinshu and discussing existentialism in the works of Natsume Soseki. But these were all read in translation because, again, I don’t speak Japanese. Similarly, I’ve read Matsuo Basho in translation. I’ve also watched a reasonable amount of Japanese film, especially starring Toshiro Mifune or directed by Akira Kurosawa or ‘Beat’ Takeshi Kitano, but my knowledge of anime and manga is almost nonexistent.
So, compared to the authors of other Japan guidebooks, I am a total beginner when it comes to Japan. And because of this, I’m not qualified to write a traditional guidebook.
However, this is exactly why I am qualified to write this guidebook: there needs to be a guidebook which truly has a “beginner’s mind” about Japan.
If you’re reading this, chances are you also don’t speak Japanese or live in Japan, and chances are you’ve never been to Japan. But you are probably considering visiting Japan, either solo, with your partner, or as a family trip. Well, I’ve been there and done that.
This is where my experiences can help you. Between my trips in 2016 and 2018, I’ve made a number of mistakes, and still had a great time. But many of the mistakes, including situations which were embarrassing or where offense was inadvertently caused, were entirely avoidable. This book can help you learn from my mistakes. More important than simply avoiding mistakes, however, is to learn from the things which went well. I have lots to share there as well.
I’ve spent about 3 weeks in Tokyo, over a week in each of Kyoto and Osaka, as well as having visited Himeji, Kochi, Kanazawa, Mount Koya, Miyajima, Matsumoto, Lake Kawaguchi, Nikko, Sendai, Yamadera, Zao Onsen, Tottori, etc. I’ve walked from Magome to Tsumago along the Nakasendo, and I’ve climbed Mount Misen on Miyajima in 37 degree Celsius heat. I’ve also climbed the full Yoshidaguchi trail of Mount Fuji.
My experiences are especially relevant if you are planning a family vacation. My wife and I have taken our son to Japan when he was 12 and 14, so I have lots of experiences to share here.
My goal for this book is to give you advice which significantly improves your trip and saves you more money than the price of the book.
Now, I plan to spend a lot more time in Japan in future. But I’m writing this guidebook now, before I get too good at things, and totally forget what it’s like to be clueless. After I’ve spent a lot more time in Japan I’ll certainly know a lot more, but I may have written a worse book…
This is a Short Book
I’ve written a number of books. Over time, as I’ve gotten older, my books have gotten shorter. My first book, Flexible Rails, was almost 600 pages. My goal is for this book to be under 100 pages, and that will include a number of pictures. The simple reason for this is that it’s a travel book. Not many people have the time or inclination to read a 600 page (or 1000 page!) travel book before their trip, and during your trip you’ll be too busy.
The Photos in the Book
The photos in the book, including that on the cover, were all taken by me, on my iPhone, during my trips in 2018 and 2016. In this book, the pictures are of places, not people (unless they’re selfies)–when I take pictures of people, I try to ask their permission first, but there’s a huge difference between “some tourist took my picture” and “now I’m in an ebook”. So, some of the angles are a bit wonky, or some of the crops are a bit weird, in order to crop out people who would be surprised to find their pictures in this book!
The Prices in the Book
Where relevant, I’ll try to say what something cost, in Japanese yen (JPY). I will sometimes convert this price to what the US dollar (USD) was in 2018. I’m Canadian, but many more people have an intuitive sense of what a US dollar is worth than a Canadian dollar (CAD). In late summer 2018, 1 JPY was about 0.0090 USD, meaning that 1 USD was about 110 JPY.
Sleeping
There are a number of different ways to sleep in Japan. Besides western-style hotels, there are also…
- traditional Japanese inns (Ryokan)
- smaller, family-run establishments (Minshuku), similar to a “Pension” in Europe or a bed & breakfast in North America
- hostels, which can be clean, nice and quiet
- capsule hotels, which is something unique to Japan
There’s also still Airbnb, somewhat. However, this book does not discuss anything to do with Airbnb, due to recent events, and since I have never stayed at an Airbnb in Japan.
Types of Accommodation
Hotels
Hotels are the typical western-style hotels that you’re used to in other countries. In major cities, you can score great deals booking these with Hotwire. In smaller cities, sites like Booking.com or Orbitz work well. See the discussion of Hotwire below.
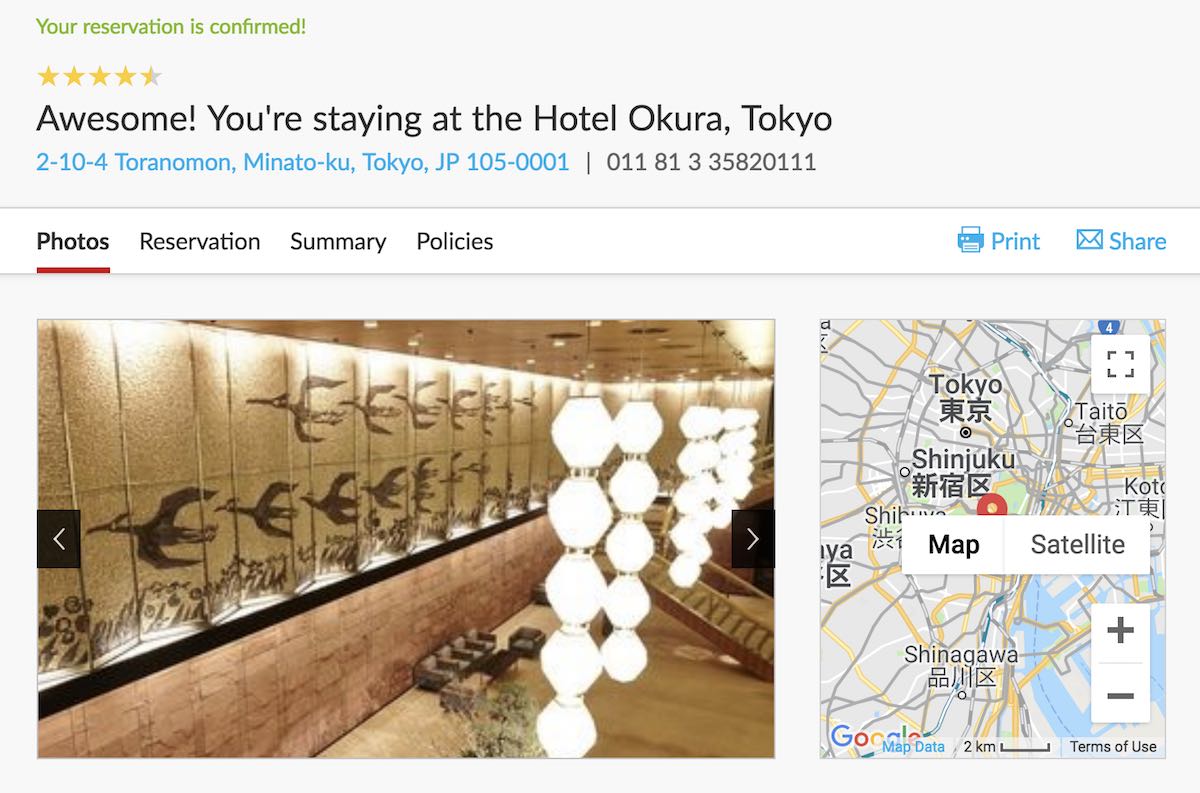
Hotel Okura in Tokyo
Thanks to Hotwire (discussed below), I’ve managed to stay at the Hotel Okura in Tokyo three times, for twelve nights in total. It is amazing, and it would have been way out of my budget without Hotwire.
Even though the Main Wing was demolished in 2015 (they’re building two new enormous wings of it, in preparation for the 2020 Tokyo Olympics) and you are now staying in the South Wing–you feel like a cross between James Bond and Don Draper. (I’ve seen photographs of the old Main Wing, the South Wing is very similar–the South Wing was built in 1973, whereas the Main Wing had been built in 1962, but it seems that some of what was loved about the Main Wing has been moved into the South Wing before the Main Wing was demolished.)

I normally hate swimming pools in general, and hotel swimming pools in particular, but even their swimming pool is fantastic. In terms of their attention to detail: they have two digital thermometers on the wall, the temperature of the air and the temperature of the water. These were kept within one degree each other whenever I was there.
Ryokan
These are traditional Japanese inns. Ryokan often come with dinner and breakfast. Dinner can be simple and delicious in a common dining area, or it can be a fancy kaiseki affair served in your room. I highly recommend that you stay in a ryokan at least once in Japan.
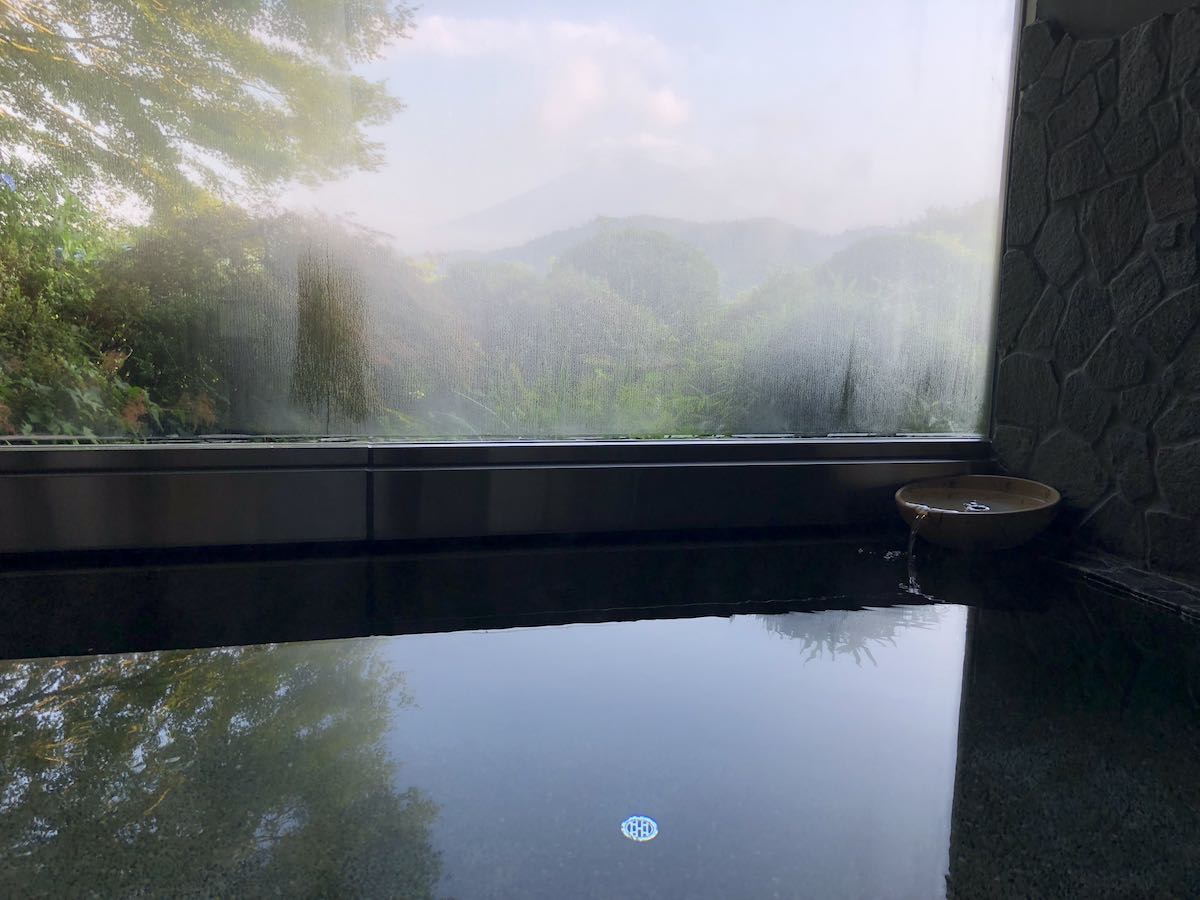
One of the best things about ryokan is that many feature an onsen (a public bath for use by the guests), typically either segmented with one area for male guests and another for female guests, or else done in a way where you and your partner can reserve the onsen for yourselves for, say, a half hour period.
For example, we stayed at the amazing Guesthouse Sakuya in the Lake Kawaguchiko area near Mount Fuji, and we had the onsen to ourselves for half an hour. This is the view of Mount Fuji from the onsen.
Minshuku
These are the similar to a “Pension” in Europe or bed & breakfast in North America. I tried to book a number of these for a planned hike of the Nakahechi route of the Kumano Kodo, but I picked the wrong week (Obon, a week for honouring one’s ancestors, and when many Japanese travel home) to try to do it! Minshuku are smaller than a ryokan and typically don’t feature an onsen, but the hospitality is supposedly really good.
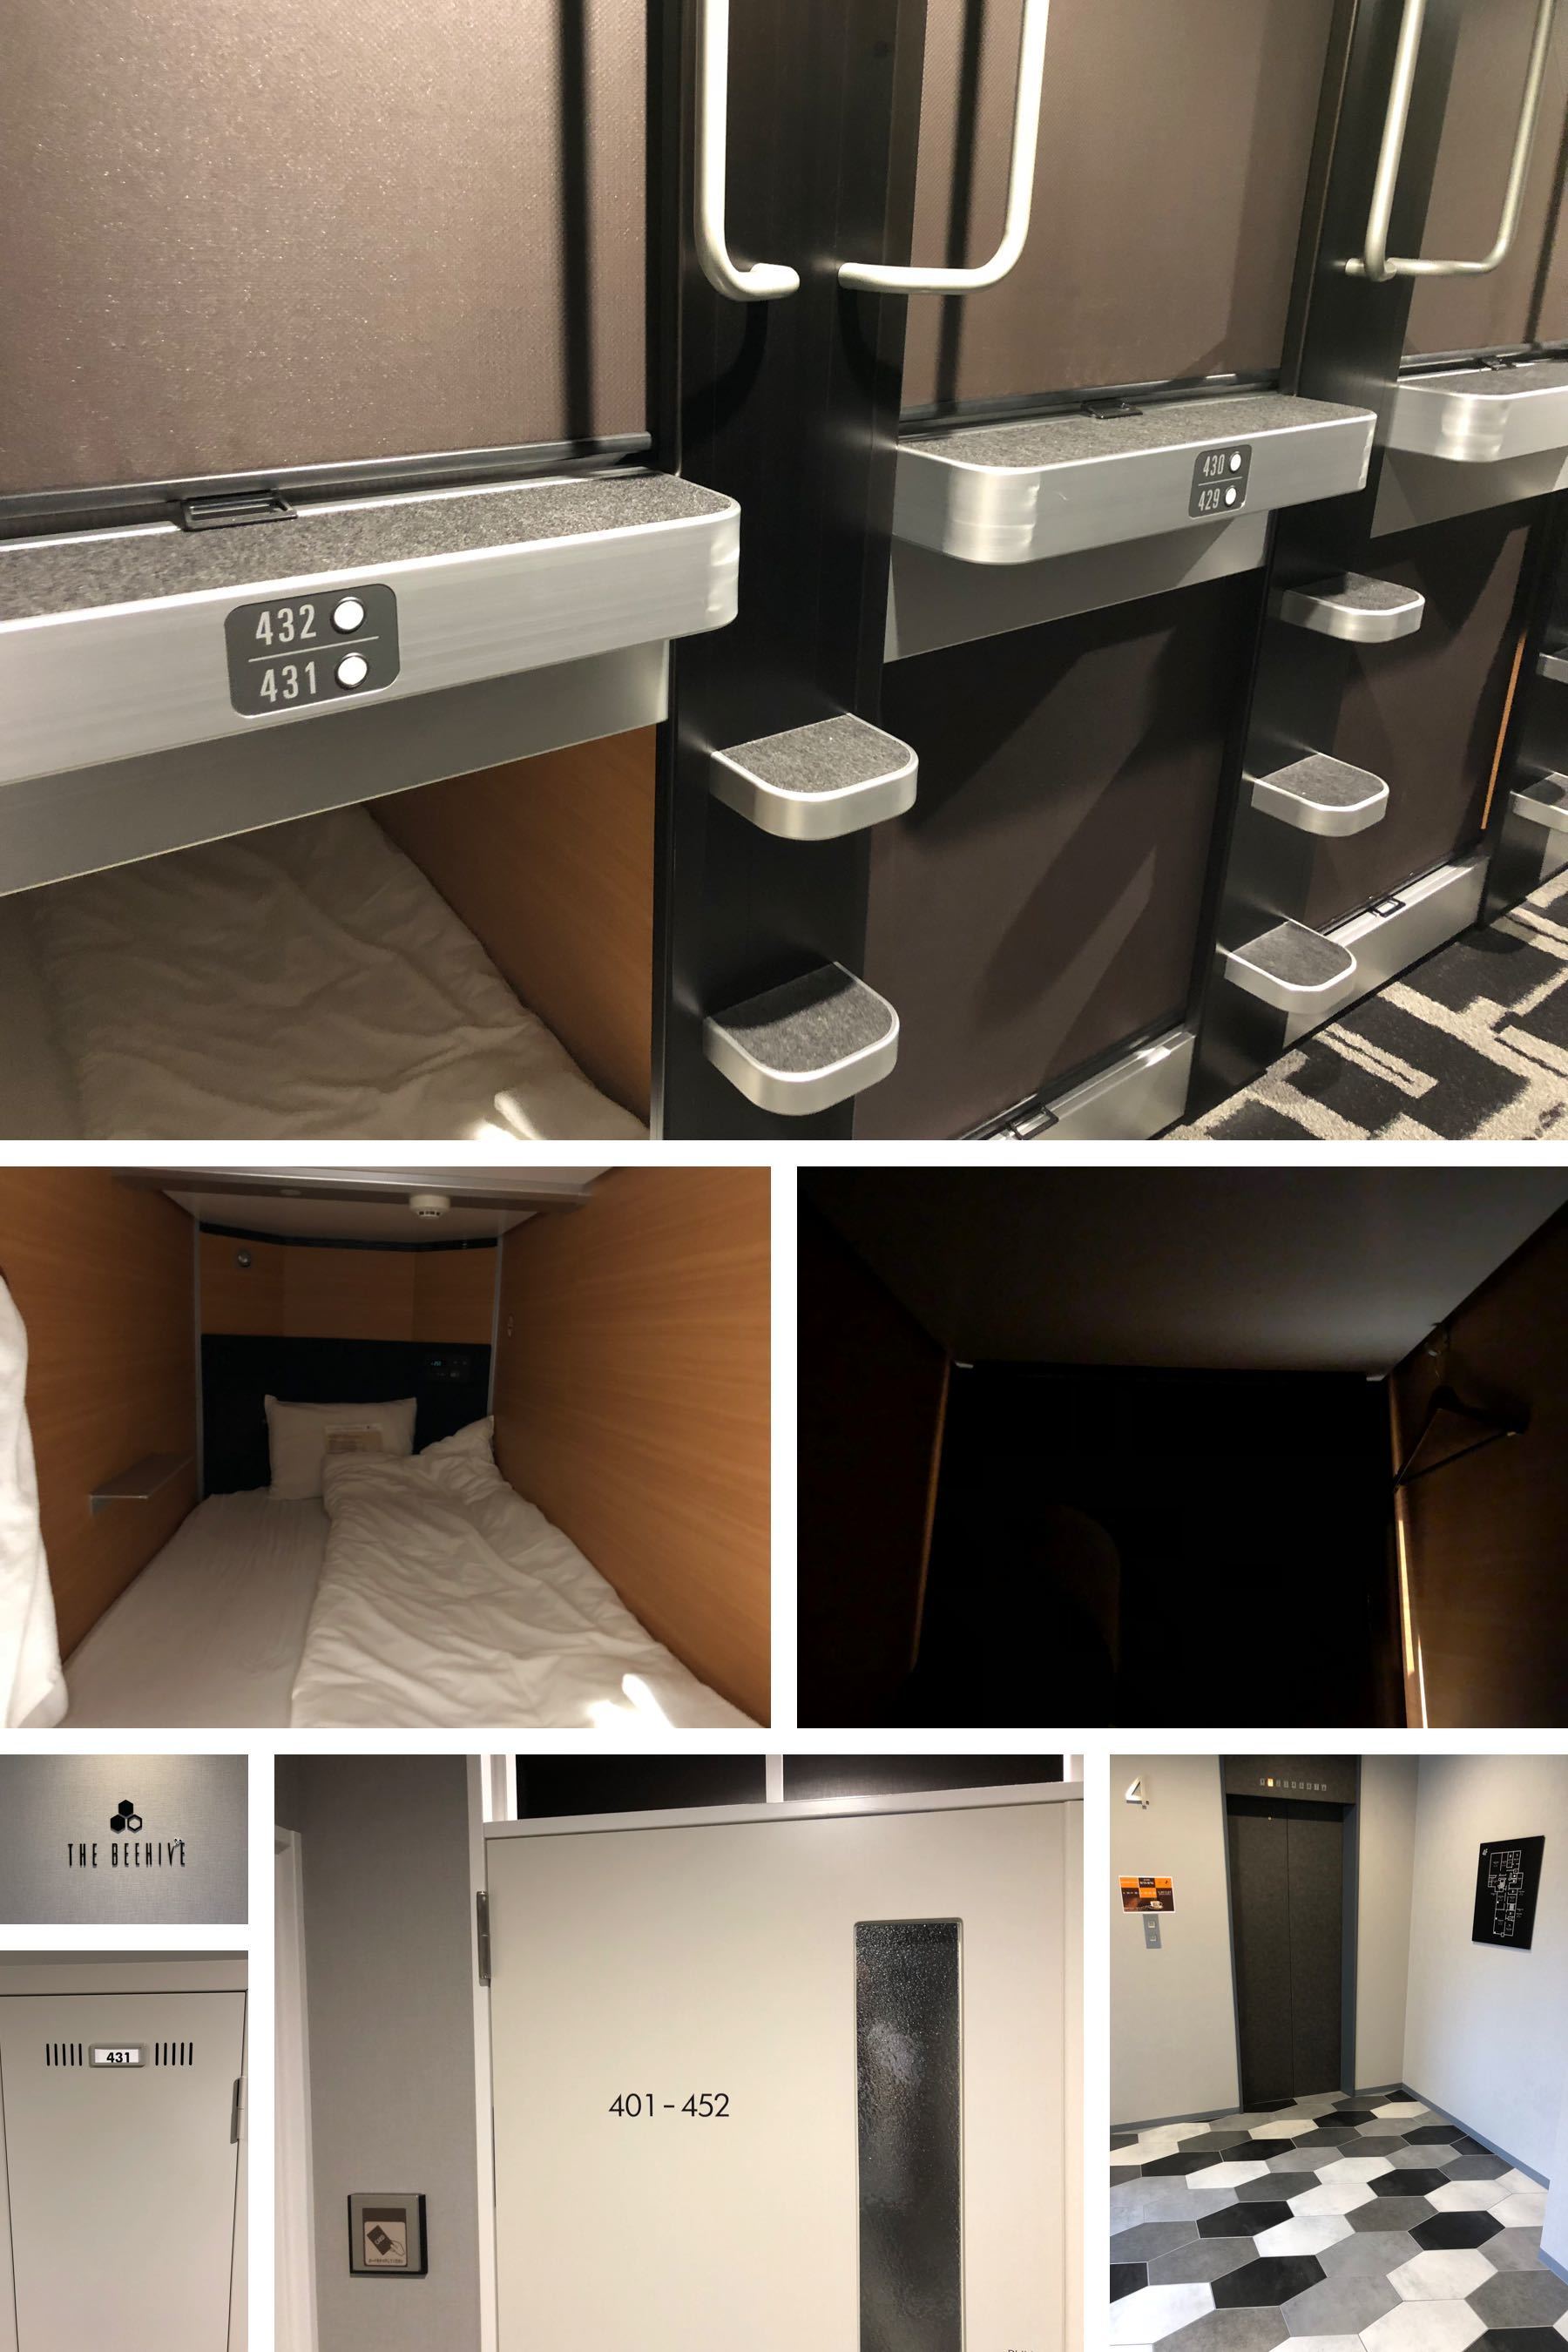
Capsule Hotels
Capsule hotels are a Japanese invention, and they are something that work well in Japan. I’m not sure how well they would work outside Japan.
The pods are stacked two or three high, with a number in a room. You have a sleeping pod for yourself, and a locker in a separate room for your stuff.
I stayed in a capsule hotel fittingly called The Beehive in Tottori. The cost was about 2500 yen (about $23 USD), which is a very good value. (They sold extra things like face masks and ear plugs, but I had my own.) The room I was in had 52 pods in it (the sign on the door said 401-452).
It was actually very clean, quite comfortable and quiet. (I always sleep with earplugs, so this helped.)
There is a screen by your feet, which keeps most of the light out. (I also always sleep with a facemask, so this was totally fine.)
The bathrooms were nice, kind of like what you would find at a nice health club.
Overall, a capsule hotel is fine for a solo one-night stay somewhere, and it’s definitely an experience which is almost unique to Japan.
Hostels
Japan is clean and safe, and that includes hostels. Some have private rooms. My family stayed in a private room in the Thank You Hippopotamus Hostel in Matsumoto, and it was really nice for a hostel. The owner was friendly and helpful, he had produced a hand-drawn map of the town with restaurant recommendations, and there was even laundry to use and air conditioning in the room. (The bathroom was shared, but the door locked.) Also, the location couldn’t be beat: we were basically across the street from Matsumoto castle.
Booking Accommodation
Hotwire: Great for Hotels in Major Cities
In major cities in Japan, Hotwire can be amazing, for two simple reasons:
- Hotwire can save you lots of money. Hotwire has saved my family thousands of dollars in our trips to Japan.
- Hotwire can get you into hotels you would not have afforded otherwise. If it wasn’t for Hotwire, my family would never have stayed in the Hotel Okura in Tokyo.
So, I always look at Hotwire first when booking in a major city in Japan.
One issue with Hotwire is that they often don’t serve smaller cities and towns. However, they do serve Fujikawaguchiko, for example–we booked our stay in Guesthouse Sakuya via Hotwire.
Note, however, that there are a couple of larger issues with Hotwire, which are more of a problem in Japan than, say, Canada or the USA. These are booking with children, and smoking rooms.
Booking With Children
This issue happened when my wife and I used Hotwire to book hotels throughout Japan, both in 2016 and 2018. It’s not an issue with one specific hotel. I don’t think this is so much a problem with Hotwire as a cultural disconnect between Hotwire and Japan.
So, when you book a hotel in Japan on Hotwire for 2 adults and one child, you can often get one queen bed or two double beds. This may have worked when our son was a baby, but it absolutely did not work when our son was 12 or 14–he’s now almost 6 feet tall!
Now, when this happened, the hotels were almost always accommodating, and could typically find a rollaway bed to quickly set up or change the room assignment. However, it was a systemic problem. Maybe by the time you read this it will be fixed, who knows.
However, there’s a simple solution here: if you are booking a room for 2 adults and one child, book it for 3 adults. This way, you will almost always get 3 single beds, or get 2 beds and a rollaway bed already set up. Now, sometimes there’s a cost discrepancy between the 3 adult price and the price for 2 adults and one child, but in that situation, chances are the beds may have been gotten wrong with the 2 adults + one child situation anyway.
If you are travelling as 2 adults and 2 children, you can either search for 4 adults or try your luck with the 2 adults and 2 children combination.
If you are travelling with more than 4 people, such as 2 adults and 3 children, then you need to book 2 rooms: Hotwire only works for a maximum of 4 people in one room.
Smoking Rooms and Non-Smoking Rooms
In Japan, some hotels have smoking rooms and non-smoking rooms. These are segmented by the floor of the hotel.
Now, with Hotwire, they can list non-smoking rooms as an amenity of the hotel. However, just because a hotel has non-smoking rooms does not mean that all its rooms are non-smoking–just that some of them are. When Hotwire books a room, it can often be booked as a smoking room. (At the time of this writing, there is no ability on Hotwire to require that a room be non-smoking.)
In some nicer hotels this is not really an issue, but in some smaller and cheaper hotels this can be terrible. And sometimes, when you show up, the hotel may be completely out of non-smoking rooms for that night. Or, for a longer stay, they may be out of non-smoking rooms for a few nights.
In one situation (not at the Okura), I booked a hotel room for 10 nights, and the hotel only had a non-smoking room for the last 6 nights. Ironically, I had never booked a room for that length of time with Hotwire before, and it was the most smoky Japanese hotel room I had ever been in. I suffered through the first night, and then I just went somewhere else for the next 3 nights, before checking back in to the non-smoking room for the last 6 nights. So, at the end of the day, the cost savings were totally wiped out on that reservation.
So, if you are concerned about this, presumably you can simply phone the hotel later in the day after you make the reservation, to kindly request that your reservation be for a non-smoking room.
Booking.com: Great for Everything
If you can’t find what you want on Hotwire, or if you just want more certainty, Booking.com works great for almost everywhere in Japan. The only time I couldn’t find something suitable on Booking.com were for certain parts of the Kumano Kodo, an ancient pilgrimage route. (However, it turned out that during that week those just weren’t available with any service I tried, so it may be that Booking.com would have worked then as well.)
Besides western-style hotels, I’ve used Booking.com with capsule hotels (e.g. the Beehive in Tottori), hostels (e.g. Thank You Hippopotamus Hostel in Matsumoto) and Ryokan (e.g. Itoya in Zao Onsen).
Orbitz
If, for some reason, you can’t find something suitable on Hotwire or Booking.com, Orbitz also works well in Japan. Also, if you fly a lot, you may have Orbitz’s reward points (“Orbucks”) to use. So, my advice would be to do all your Hotwire bookings first, and then use your Orbucks to book something that you otherwise would have booked on Booking.com. What you don’t want to do is just waste Orbucks on something you could have gotten possibly much cheaper on Hotwire…
Using Rewards Points, like SPG and/or Marriott Points
If you do a lot of business travel, you may have accumulated rewards points with one or more hotel chain. If you’re serious about points, there’s a high probability that this is Marriott and/or SPG. (They’re being combined soon, but it’s not done yet, and I don’t know what the name of the points will be.) Now, until recently, I had a decent amount of Marriott/SPG points. There are both expensive and cheaper places to use these points.
On the luxury end, if you have a ton of points, there are some very nice options in Tokyo where you can possibly get the most bang for your points buck. On the non-luxury end, the Courtyard Shin-Osaka Station is probably the most convenient hotel of them all. Osaka is a great base for day trips as close as Kyoto (12 minutes by Shinkansen), farther away as Himeji and Nara, and even as far as Miyajima and Ise. If you’re planning to do a bunch of day trips from Osaka and have a medium amount of Marriott or SPG points to spend, staying at the Courtyard Shin-Osaka can be a great choice: you literally are attached to the Shin-Osaka station by an overhead walkway.
In terms of how to use rewards points, it kind of varies based on your budget. There are two valid ways to do the math:
- How much dollar value am I getting for my points? (This way is the most fun, and “saves” you the most money.)
- How much am I saving compared to what I actually would have spent? (This way is less fun, but can be the correct way based on your budget at the time.)
Sometimes these result in the same decision, other times they result in different decisions. Both decisions have their merits, and you absolutely shouldn’t go through life only making decision #2!
Time Zones
I live in Victoria, BC, Canada, This means I’m normally on Pacific Time. If you’re also on Pacific Time, jet lag can work in your favour for sightseeing in Japan. When I’m in Japan, I wake up naturally between 5 AM and 6 AM, and it’s like I’ve slept in. So, you can hit the ground running, and see some sights before it gets too hot.
Now, returning back home is tougher, however. I messed it up this most recent time, even though I tried my usual trick of fasting before and during the flight.
Transit
JR Pass
The JR pass is one of the world’s great deals. However, there are two caveats:
- You don’t need it for the days you’re staying in Tokyo. This is discussed later.
- You can’t use it on Nozomi or Mizuho trains. So, you’ll still be riding bullet trains (Shinkansen), but they’ll be the slightly slower ones (e.g. Hikari and Kodama) which make more stops along the way.
Types of JR Passes
There are actually many different types of JR pass. If you are staying in a reasonably small area, you can possibly save money by buying a regional JR pass. In my trips to Japan, I’ve been traveling for long enough, and in a large enough area, that I just bought the Nationwide JR pass. In fact, the Nationwide JR pass is typically synonymous with “JR pass” for most visitors. Unless you’re planning a very short, very small trip, it’s what you want. So, in this book, when I say “JR pass”, I mean the Nationwide JR pass.
If you are doing any meaningful amount of travel outside of Tokyo, the JR pass is almost certainly for you.
Ordinary vs. Green JR Passes
Finally, there are two types of Nationwide JR pass: Ordinary and Green. The Ordinary gets you access to the ordinary cars; the Green gets you access to the ordinary and green cars.
Neither gets you access to the Nozomi and Mizuho trains. (If there was, I’d pay a few hundred dollars extra for one of those magical passes!)
Anyway, the JR trains are so nice, just save your money and get Ordinary. There’s not that much difference between the cars (I’ve walked through a Green car, just to see), and even the Ordinary cars on many Shinkansen have power outlets. Also, the big reason to just get Ordinary is that booking seats is a hassle, and it’s much simpler and easier to just show up and get a seat in a non-reserved car. But all the non-reserved cars are Ordinary, not Green, so if you use your Green JR pass to sit in an Ordinary car you’re just wasting your money.
Some Trains (e.g. Hayabusa from Tokyo to Hakodate) Are Only Reserved Seats
The JR pass works on all trains except Nozomi or Mizuho trains, and normally you just walk onto a non-reserved train car.
However, there are some trains like the Hayabusa from Tokyo to Hakodate (specifically, to Shin-Hakodate-Hokuto in Hokkaido) which are entirely composed of reserved seats. (That’s a fantastic train, by the way: from Tokyo to Hokkaido in just over 4 hours!)
So, if you have a JR pass and want to go to Hokkaido, make sure you get a Reserved Seat Ticket from a JR ticket office or travel service center. If you know your itinerary, you may want to do this when you convert your exchange order into a JR pass, to save a trip. (If you change your mind about the ticket, make sure you hand in your old ticket when getting a new one, so as to not cost JR a seat.)
How to buy a JR Pass
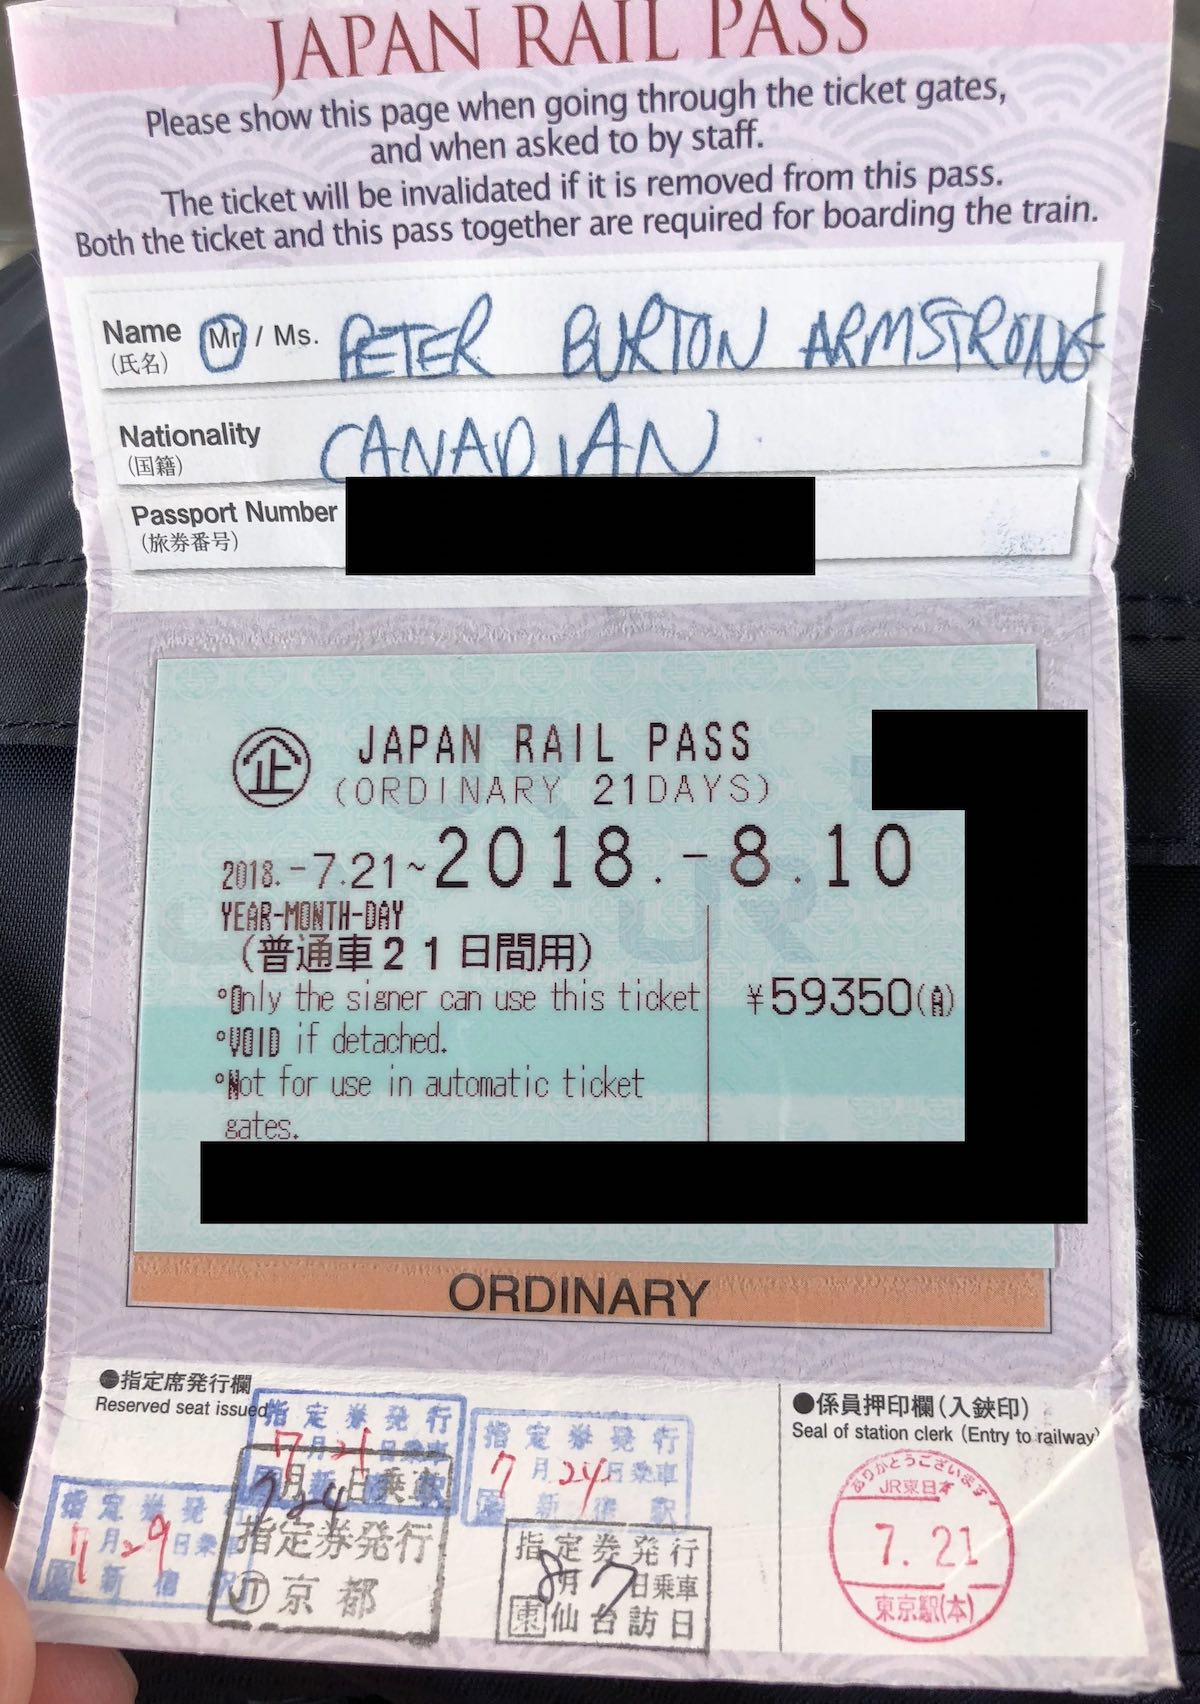
A JR pass can only be bought before you arrive in Japan. Here’s how you buy a JR pass:
- Buy an exchange order up to 3 months beforehand. You get this from a travel agency on the internet. The one I always use is JTB. I’m Canadian, so the website I used was this one; their US website is here. If for some reason you don’t want to use JTB, there are other choices. Note that you MUST turn in the exchange order within 3 months of ordering it. For example, an Exchange Order which was issued on April 22, 2019 would need to be turned in for a JR pass by July 21, 2019. So, don’t try to order your JR pass 4 or 5 months in advance! (If you do try to order your JR pass, say, 4 months in advance, a good travel agency such as JTB should tell you to wait and try again. However, the better thing to do is just wait until, say, 2 months in advance before ordering your JR pass exchange order.)
- Your exchange order will be sent to you. Do NOT forget to bring it with you to Japan!
- After you arrive in Japan (and have gotten a good sleep and gotten cleaned up), you go to one of the larger JR stations to exchange the exchange order for an actual JR pass. Everyone who is picking up a JR pass will need to show their passport, so if you’re travelling with your family, the act of getting the JR passes will be something you do together. If you’re picking up your JR pass in Tokyo, a good place to do it is the JR Shinjuku station. Not only is there a convenient office there, but you’re also near lots of shopping–including BAKE cheese tarts!
Note that it’s at the point that you exchange your exchange order for your JR pass that you pick the exact days that your JR pass will be valid for. You don’t need to choose this when getting your exchange order. However, whether you’re getting a 1-week, 2-week or 3-week pass, they need to be consecutive. Note that you do NOT need to have your JR pass have its first day be the day you pick it up. You can pick it up on the first day of your trip, but have its first day start, say, a week later. (If you’re going to spend your first week in, say, Tokyo, this is probably the best idea.) A JR pass is smaller to carry around than the exchange order, so you might as well.
Make sure to keep your JR pass safe–if you lose it, it cannot be replaced. It’s a bit big to fit in a normal wallet, but if you have a passport wallet you can fold it a bit and be fine.
Since the days of a JR pass need to be consecutive, and since you’re probably flying to Japan into and out of Tokyo, you’ll want your JR pass to end when you return to Tokyo and fly home. However, when your JR pass starts is a different matter–it could be that the best first day for your JR pass is the last day that you’re in Tokyo, not the first day of your trip.
Using a JR Pass for JR Trains
Obviously, the main things you use a JR pass for is to ride JR trains. This includes all the normal JR trains, and many of the Shinkansen. However, you can’t use the JR pass on two best types of Shinkansen: the Nozomi and Mizuho trains. (Note that I say “JR trains” since there are a number of smaller railway companies in Japan, and the JR pass does not work for them.)
So, when you go to a JR train station, you’ll be choosing a Shinkansen (e.g. Hikari and Kodama) which makes more stops along the way. Or, if you’re going somewhere off the beaten path, you’ll take a normal (non-Shinkansen) train. There are lots of different types of non-Shinkansen trains. Some are still amazingly fast and nice (e.g. the Super Azusa), others are old and slow. Google Maps is your friend here: it will route you on the fastest routes, and suggest the fastest trains to take.
This is usually a good thing, with one enormous caveat.
Dear Google: PLEASE Add a “JR Pass Only” or “Exclude Nozomi and Mizuho” Option to Google Maps
I love Google Maps. It’s essential for a trip to Japan. However, one absolutely infuriating thing about it is that you cannot exclude Nozomi and Mizuho trains.
As you now know, you can’t take them with a JR pass. But Google doesn’t know this. All it knows is that these are the best trains, since they make the fewest stops. So, Google Maps will happily route you on Nozomi and Mizuho trains. Worse, since these routes are so clearly the best routes, Google Maps will often not even show you the Hikari and Kodama trains that you can take, since there is a better Nozomi or Mizuho option.
What to do? Well, there’s a site called HyperDia which lets you choose every possible transport option, and exclude Nozomi and Mizuho trains, etc. It’s amazingly powerful and complex. It’s so complex, in fact, that using it takes a long time.
So, what I actually did was simple: I just assumed that if there was a Nozomi or Mizuho train, there would also be a worse one later, and just went to the train station and figured it out when I got there. (They run a lot of Shinkansen in Japan.)
Dear Google: While You’re At It, Japanese is Not Chinese
Here’s another random Google Maps complaint: when you’re getting directions to somewhere, and that place name is written only in Kanji, Google Maps will often assume it is Chinese, and start speaking the name in Mandarin or Cantonese.
Now, making this 100% accurate is presumably very difficult (since there would be false positives with place names which actually were in Chinese), but right now Google Maps gets it wrong in a lot of situations where it could get it right.
Other Places to use a JR Pass
JR does even operate some ferries, for example the one to Miyajima, and the JR pass does work on those.
Finally, to state the obvious: the JR pass works on the local trains which JR operates. So, if you do have a JR pass, you can find lots of ways to use it, even in the Tokyo area. It’s not just for travelling between cities.
How To Use a JR Pass
Using a JR Pass with Reserved and Non Reserved Seats
There are two ways to use a JR Pass:
- Get (free) reserved tickets for trains. You get your JR pass first, and take it to the ticket office to get tickets. They stamp the bottom of your JR pass when you do this. This is almost always a total waste of time, as there are so many Shinkansen to choose from on a given day. Basically, do this if your partner wants you to, or for the first one or two Shinkansen trips if you don’t feel like a pro yet. (Or, if you want to pick a specific side of the train to sit on–say if you want to try to get a glimpse of Mount Fuji from the Shinkansen–you can get a reserved ticket for this purpose as well.)
- Show up and take non-reserved cars in any train. Every train has non-reserved cars, and you can just show up and almost always find a seat. In a non-reserved car, anyone can sit in any seat. (Even if you can’t find a seat on a train, you can stand.) This is what you should do. The hassle of getting a reserved seat is not worth it. Again, all the non-reserved cars are Ordinary–you don’t have to worry about sitting in a non-reserved Green Car: those don’t exist.
What To Do at the Station
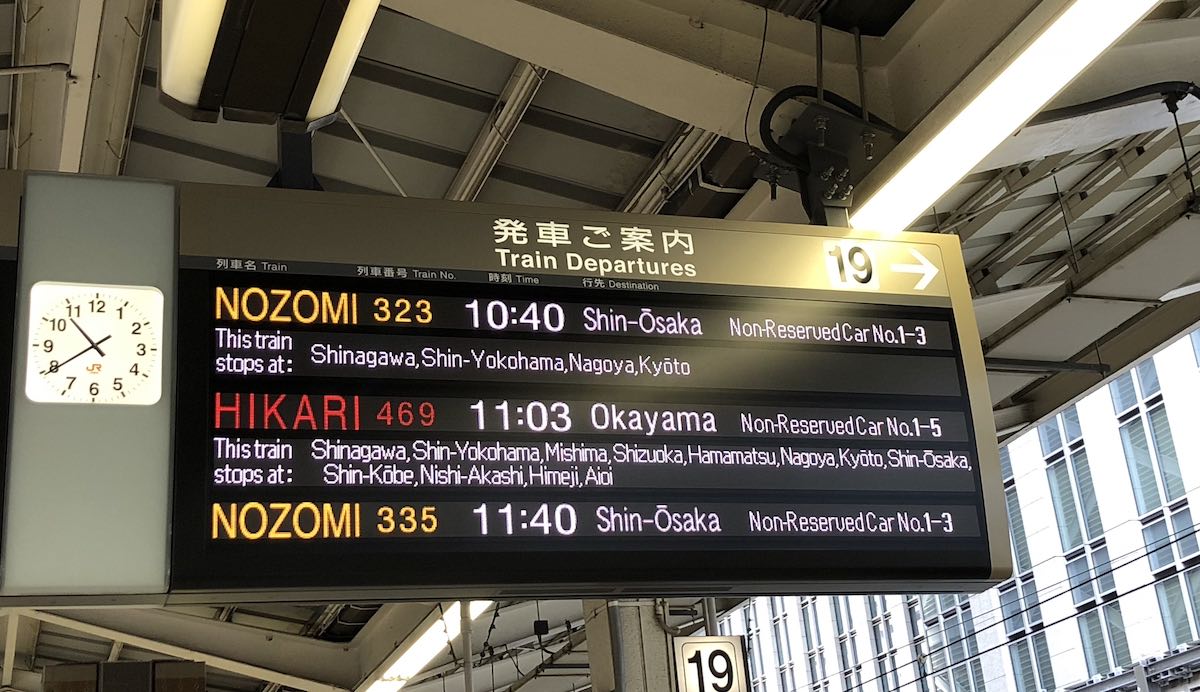
Instead of walking through the turnstiles or using your Suica card (discussed later), what you do is you walk up to the manned booth on one of the sides of the turnstiles. Just show your pass to one of the helpful attendants there, and walk through. Note that some station entrances don’t handle JR passes; you may need to take a short walk. Also, there can sometimes be a small line of a few tourists showing their JR passes and being confused, so it can take a couple minutes to get through here.
If you do not know which train you are catching (because Google Maps is showing you only hours of Nozomi trains, for example), what you can do is ask. For example, in Tokyo Station you can just show your JR pass to the person and say “Osaka?” and they will quickly look at a complex book or sheet and say something like “Platform 22”. The platforms are clearly numbered, so you can just head right there. Or you can go look at a sign board to see the time that your Shinkansen or normal JR train is leaving. You may even have enough time to get some rice triangles and iced coffee.
At the Platform
First, make sure you get to your platform on time–some of the larger train stations can, in fact, be large, and it can take a number of minutes to get through them.
Second, many train platforms have vending machines, and many of the Shinkansen platforms have mini convenience stores in them. So, if you need an iced coffee, water or a rice triangle to keep going, you can get one right on the platform. So, get to your platform a few minutes early.
Finally, every train car has a separate separate line for it. Each car is either reserved or non-reserved. Every Shinkansen has a few cars of non-reserved seating. These are either at the front or the back of the train (not both). Which cars are non-reserved is indicated on the sign for the train. If you have a reserved seat, then line up by your car. If you have a non-reserved seat, go to the group of non-reserved cars and line up at the shortest line. Note that this can take a minute of walking just on the train platform–some of the Shinkansen have 16 cars!
Why You May Not Want a JR Pass for Tokyo
The JR pass is one of the world’s great deals. However, you don’t need it for the days you’re staying in Tokyo.
In Tokyo, there are three main ways to get around on underground and above-ground train tracks:
- The Tokyo Metro
- Toei subway
- JR train lines
If you just use Google Maps on your phone and select the public transit option, it will conveniently route you for the most convenient and fastest way to where you are going.
However, the JR pass only works on JR train lines, not on the Tokyo metro or Toei subway. For those, you need a Suica (or Pasmo) card. (Yes, technically you can buy paper tickets to stick into the machines. Don’t do that. It’s way more convenient to use a Suica card.)
Now, you could mess around and try to find the JR lines instead of the Tokyo Metro or Toei subway, but that’s a waste of time to save not much money.
Furthermore, using a JR pass is a bit awkward at some JR gates in Tokyo–it’s a lot faster to just walk through the turnstiles by swiping your Suica card, just like everyone else.
So, if your Japan itinerary starts with Tokyo, my recommendation is the following: get a JR pass, but have its first day be the day you are leaving Tokyo.
On my first trip to Japan, I got a JR pass which started on my first day in Tokyo. On my second trip to Japan, I got a JR pass which started on my last day in Tokyo.
With almost any advice, there are exceptions, however. If, say, you are planning a 2-week trip to Japan, and you are spending just the first 4 days in Tokyo, then just get a 2-week JR pass and pick it up on the first day. You will still want a Suica card, and you won’t use the JR pass much in Tokyo, but you will still want a 2-week JR pass, since you don’t want to be paying for Shinkansen a-la-carte. So, in that case, you might as well pick up your JR pass on the first day–having one will save you some yen, so you might as well.
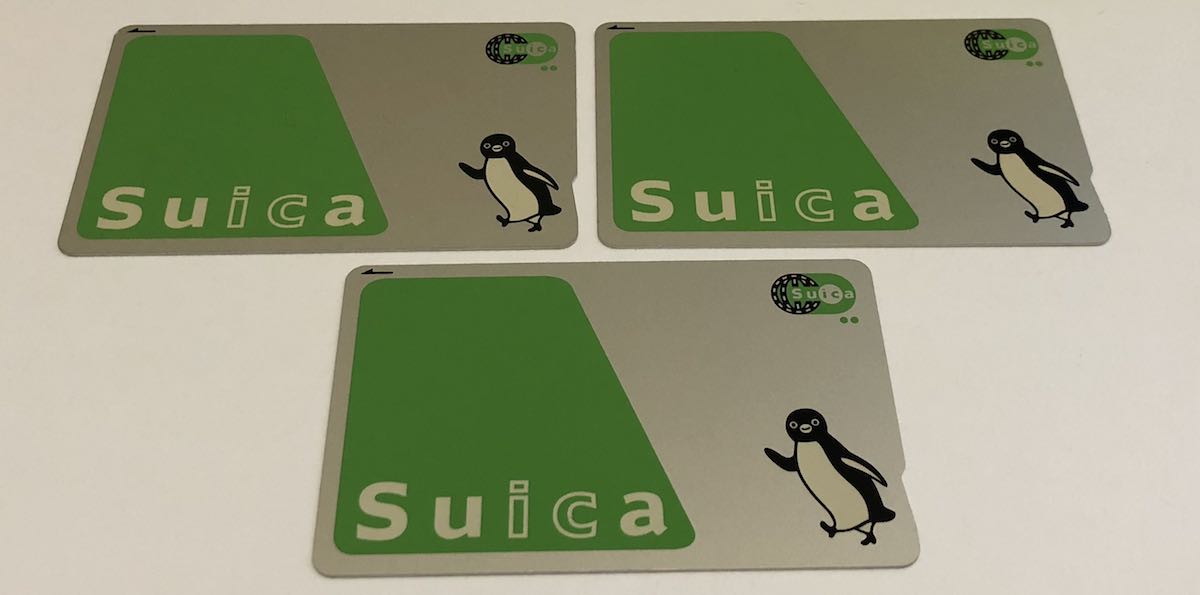
Suica (or Pasmo) Card: Get One Immediately
I got a Suica card, and it worked everywhere that took an IC card. (An IC card stands for Integrated Circuit, i.e. it’s a chip card. You use them by tapping, not swiping, just like a credit card with a chip.)
The alternative to Suica is Pasmo. Both work basically everywhere that takes an IC card, but if you’re way out of the major urban centers, Suica might be a bit better for you, so I got one of those. In this book I’ll just say Suica card instead of IC card.
Getting a Suica card is reasonably straightforward.
You can use a Suica card tons of places. It works with the various metros and the various JR and non-JR trains in Tokyo, Kyoto and Osaka, of course. It also works with many buses, lockers, vending machines, convenience stores and even taxis. Really. (However, as discussed later, always carry enough cash that you can pay for something with cash!)
(Yes, you can technically use paper tickets with the various metro and train lines, but seriously: don’t do it. The Suica card is so much more convenient than paper tickets, and it’s also supposedly a bit cheaper per ride. With paper tickets you need to figure out how far you are going, and pay accordingly, and this means you lose a few minutes each time you need to buy paper tickets. Even if you’re only going to be in Japan for a week, you seriously need to buy a Suica card.)
Typically you’ll want to load between 5000 and 10,000 yen on it. Since you can pay for so much stuff with it, typically you’ll be reloading it more than you expect.
Treat it like cash, and don’t lose it. Use it for all travel that you can’t pay for with a JR pass.
Everyone In Your Family Needs Their Own Suica
The way you use a Suica card is you tap it at a turnstile in the subway or train station. On each turnstile, there’s a large IC rectangle that you tap your Suica card on. You tap when you enter, and tap again when you exit.
Because of this, every person in your family needs their own Suica card. No, you cannot share and tap twice–this would not work. (Speaking of things that don’t work, if you tap your Suica card to go through a turnstile, and then realize you went to the wrong place, don’t try to tap your Suica card at the same station to get out. This also won’t work, and you’ll need to talk to an attendant to explain what happenend and get let out.)
Google Maps is Essential
Despite the fact that Google Maps does not know how to exclude Nozomi and Mizuho trains, it’s essential. Just choose to start at your current location, say where you want to go, choose transit, and you’re done.
You can also choose to depart at a certain time, which is useful for planning your next day. And if you’re out and about, it’s useful to say that you’re departing sometime in the evening, to see when the last train back from somewhere is. (This can be wrong, however, so check at the station if you’re concerned.)
Google doesn’t get everything exactly right, so you still need to pay attention when travelling. However, it gets most things right. It’s worth it to have an iPhone or Android phone with a data plan in Japan just for Google Maps.
Metro and Trains
Trains and subways are excellent in Japan. However, they are a patchwork of local metro, JR and non-JR trains.
Your Suica card will work on all of these. Your JR pass only works on JR trains.
Sometimes with special trains, like some of the Mount Fuji trains from Otsuki to Mount Fuji station, you will need to purchase an additional ticket as well as swiping your Suica card or showing your JR pass. Also, sometimes on some (non-Shinkansen) trains which you think are entirely JR, there are portions of the route which need a separate ticket. If you get on to the train using a JR pass, you can typically buy this extra ticket on the train from the conductor, so have cash.
Pay Attention to the Exits
When leaving a subway station or train station, pay attention to the exits–especially in Tokyo. One subway station can have, say, 14 exits. Taking the right one can save 5-15 minutes of walking in the heat outside. Sometimes there are helpful signs, which list a lot of the popular destinations in both Japanese and English, and show the exit you should take. Here’s an example from the Ginza line; note how exits 1, 2 and 9 are in one direction, whereas exits 3-8 are in the other direction:
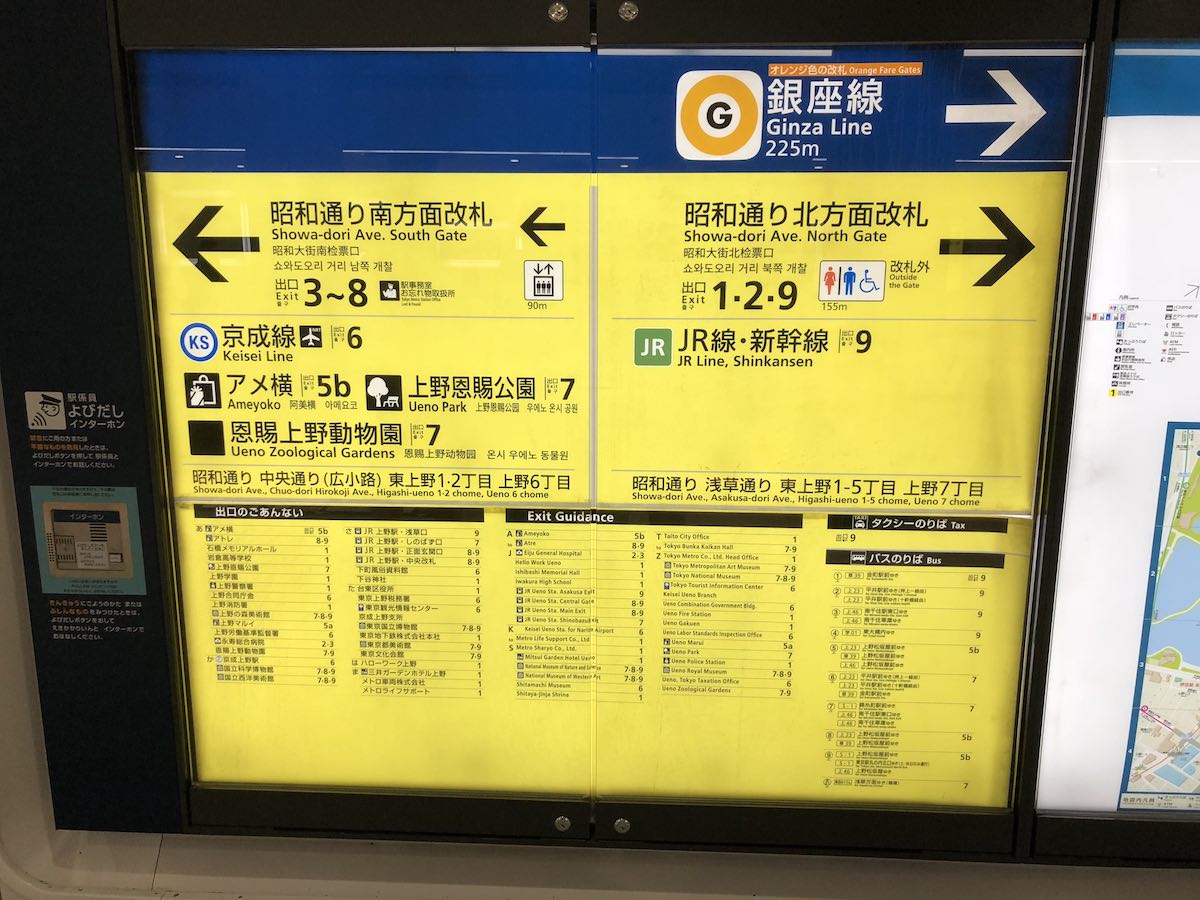
If you’re often using a subway station near your hotel, you’ll end up remembering which exit it is. Or, if you are concerned, just take a picture of the exit number with your phone when you enter, and look at it when you return.
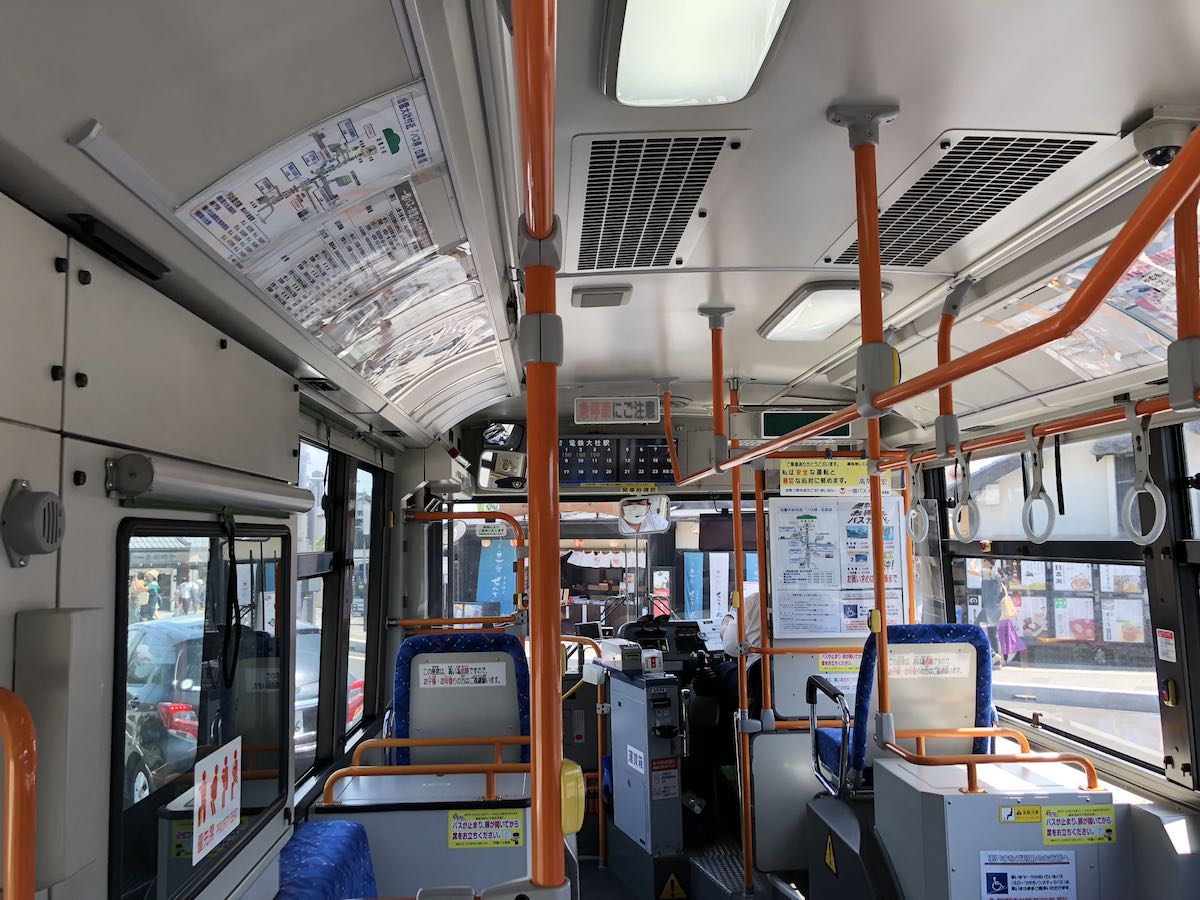
City Buses
City buses are a good way to get around parts of Kyoto and other smaller cities. Specifically, for Kyoto, many of the temples or shrines you’ll want to see are (deliberately) near the outskirts of Kyoto, presumably so the monks could get some peace and quiet. (City buses do exist in Tokyo and Osaka, but I’ve never taken them there–everything I needed to get to was a short enough walk from a metro or train station.)
City buses, like basically everything else in Japan, are clean and safe. They work exactly backward from in North America, however, as they are based on honesty (the system assumes that people will pay) and intelligence (the system assumes that people will have the cash to do so):
- You get on in the back door, and leave out the front door.
- You pay when you leave, not when you board.
The way this works is when you board, you take a ticket, which has a number on it. The number is for the stop that you boarded. Then, when you leave, you put the ticket in the machine at the front of the bus. It will tell you the fare, and you pay it.

Now, you don’t need to wait until you are leaving to figure out the fare. Instead, as the bus is moving, it shows each stop, and the current price you will pay if you get off at the next stop, having boarded at each stop. These numbers increase as the bus trip continues.
Finally, as with any bus, if you sit above the wheels you have a bumpy ride.
Highway Buses
These can be cheaper than trains, if you don’t have a JR pass. They are also more convenient than trains in certain situations. For example, if you book in advance, the highway bus to and from Mount Fuji can be a good choice; from Shinjuku station to Mount Fuji, it can be cheaper and faster than trains. Go to https://highway-buses.jp/ to book tickets for Mount Fuji from Shinjuku, and arrive early at the train station to find the buses.
I actually took the train from Tokyo to and from Mount Fuji–it was a bit slower (because you need to make a connection to a slower train halfway through the journey) and a tiny bit more expensive, but I enjoy riding on trains more than buses, and I was staying far enough from Shinjuku in Tokyo that the train made sense. Also, I didn’t want to have to book my return ticket, because I wasn’t sure of my itinerary. I did try to get a highway bus back to Tokyo from Mount Fuji, but the tickets were all sold out when I asked at the train station.
Highway buses are typically taken from the train station, but they make other stops. You buy a ticket in advance for them–you don’t just show up and take a number, like a city bus. There are multiple highway bus lines, not just https://highway-buses.jp/; I took some different branded one from Yamagata to Zao Onsen, and I just bought a ticket for it with cash when boarding the bus, since I was getting it at a roadside stop, not at the train station. On the way back, I bought the ticket in advance at the Zao Onsen bus station, using the machine.
Taxis
Taxis can be really expensive. However, for short distances (e.g. in Kyoto) or Osaka they can be not that much worse than transit for a family. Basically, in Tokyo you should take the metro or train everywhere, or walk. But for Kyoto, especially for a family going to a temple or shrine in the heat, a taxi can be a smart exchange of money for time.
For fun, I asked how much it would cost to get a taxi from Mount Fuji’s Fuji Subaru Line 5th Station down to the train station at Lake Kawaguchiko. The answer was over 12,000 yen, or over $100 USD. Thankfully there was excellent highway bus service, for about 10% of that price. That bus ride takes a surprisingly long time, by the way–almost an hour, even though it makes hardly any stops.
How & What to Pack
Take a Backpack, Not a Suitcase or Rollaboard
You should take a backpack, preferably a good one, by Osprey, Deuter or Gregory.
In the absolute worst case, take a rollaboard. Don’t take a larger suitcase.
In our trips to Japan, I took a backpack, and my wife and son both took rollaboard style suitcases. (They’re both as stubborn and opinionated as I am!) Now, for normal business travel, a rollaboard (either the one true version with 2 big wheels, or the 4 wheel spinner version) is obviously a good solution. When travelling, it’s always nicer to never check luggage.
However, for a vacation in Japan, you’re much better off with a smaller backpack, like Osprey’s Farpoint 40 or Fairview 40, than a rollaboard. (Both have been advocated for by women, but the Fairview is the women-specific version of the Farpoint.
There’s a really simple reason why you should take a backpack instead of a rollaboard:
Trains and subways.
Trains and subways are not magical things which you teleport into from your hotel room. Instead, you walk to them. So, while it’s fine to take a rollaboard on a business trip, since you typically take a cab from the airport to and from your hotel, in Japan you really don’t want to be lugging a rollaboard around. Even if you only go to Tokyo, the trains and subways are so good that you will even want to use them to get to and from the airport, regardless of whether you’re flying out of Haneda or Narita. Now, a rollaboard is superior in the airport terminal, but it is decidedly inferior in, say, a 600m or 800m walk from a metro station to your hotel. Pulling a rollaboard over that type of distance can result in a sore shoulder!
Now, if you are actually visiting multiple places in Japan, you will be much better off with a backpack than a rollaboard. Train and subway stations typically have multiple floors, and you will need to get between those floors. There are typically escalators in the larger stations, but not always, especially in the smaller stations. Quite often you will encounter 10-30 stairs. Yes, there will be elevators, but you waste a lot of time having to find them and wait for them. They are typically small and slow, and there are often a lot of tourists with suitcases waiting for them as well. So, you’re stuck either carrying your rollaboard or waiting for an elevator–and in both cases, wishing it was a backpack.
In terms of specific backpacks, I have two Osprey packs, a Farpoint 40 and an Atmos 65. The Farpoint 40 fits in carry-on, and the Atmos 65 does not. However, I took the Atmos 65 on my 2018 trip instead of the Farpoint 40 for three reasons:
- I would have to check my luggage anyway, as I was bringing trekking poles. You can’t bring trekking poles in carry-on luggage.
- I do all the laundry when we travel (I wake up early), and my Atmos 65 would have more room for 3 people’s clothes than my Farpoint 40 would.
- Between my technical clothes for the Mount Fuji hike and the lighter summer clothes for the rest Japan, it was easier to fit everything. The Mount Fuji clothes occupied the entire bottom section of the Atmos 65, so in reality, I was travelling pretty light once you exclude that. (This is especially true since I was going to be in Japan for a month, so I also needed my laptop in order to stay in touch with my team effectively.)
With no laptop and/or no Mount Fuji, it would have been really easy to just bring a Farpoint 40. This would have been especially true if I had packed correctly for the summer season–see the Clothing section later.)
Bring a Daypack
I have a collapsible nylon/polyester backpack from MUJI called the Paraglider Cloth Collapsible Backpack, which serves as a really great daypack. It weighs almost nothing and collapses into a size of a fist when packed, but expands into a 21 liter pack when in use. It’s the perfect daypack–especially if you’re doing things like buying 2L water bottles at 7-11 or Family Mart, and carrying things like an extra shirt (in case you sweat through your first one), hat, sunglasses, etc.
My wife just carried a purse instead of a daypack, since she didn’t want to go full tourist. But when you’re in Japan, and you’re not Japanese, trust me: you look like a tourist. (Or, if you want to look like an expat with an office job, wear dark grey or black dress pants, a white undershirt and a white dress shirt. But that’s a bad idea, since people may speak Japanese to you and expect you to understand it!)
Clothing (Summer Edition)
Summer is hot and humid. I typically dress in “west coast Canadian” (e.g. Lululemon cotton blends), which turns into “stinky sweaty gaijin” in a Japanese summer. Thankfully there are lots of Uniqlo locations in Tokyo, so if you don’t have appropriate clothes or a Uniqlo in your city, just pack very light and go shopping when you get there. (There are also lots of MUJI locations and, of course, a million other stores too.) In Tokyo, you can do all your shopping in Shinjuku or Shibuya. If you’re fancy, you may want to go to Ginza.
In terms of specific recommendations, I will make recommendations which apply to men in the summer:
- Japanese men wear long pants; shorts seem to be for children only. So, if you have a couple pairs of very light, breathable pants, bring those. Now, since you’re a tourist, you can also wear shorts of course. If you don’t have any light, breathable pants, you can buy some at Uniqlo. However, when buying clothes, make sure you try them on.
- It’s hot and humid, so if you are wearing heavy cotton T-shirts, you will sweat through them. So, wear light T-shirts (synthetic or blended) that you expect to sweat in. If everything you own is heavy and gets sweaty, Uniqlo is your best choice: they sell tons of T-shirts, polo shirts and linen shirts. Also, Uniqlo’s Airism brand is particularly suited to the Japanese summer, and is for everything from T-shirts, underwear, athletic wear and dress pants.
- It is warm even in the evening. Unless you are climbing Mount Fuji, you actually don’t need to bring any warm clothing. Imagine you’re packing for Hawaii. (If you are climbing Mount Fuji, then you will be packing two separate sets of clothes: your hot summer clothes, and your Mount Fuji clothes.)
I wouldn’t dream of making clothing recommendations for women, other than to pack light. (Well, I’ll make one: bring a pair of comfortable shoes–you’ll be doing a lot of walking!)
Trekking Poles
If you are going to climb Mount Misen or especially Mount Fuji, you absolutely need trekking poles.
Also, even if you think trekking poles are self-explanatory, you need to watch this video on how to use trekking poles correctly. I watched this video before climbing Mount Fuji, and I realized I had both been holding my poles wrong, and using them wrong.
In Tokyo, there’s a store called L Breath in Shinjuku which has a good selection. I bought an amazing pair of Black Diamond FLZ aluminum poles there. I highly recommend these poles: they worked perfectly for me on Mount Fuji. I chose aluminum poles, since carbon fiber poles can snap, and I absolutely did not want that to happen halfway up Mount Fuji.
Finally, make sure the trekking poles fit your height! I’m 6’3”, and in Japan it’s reasonably difficult to get trekking poles which are long enough. Most of the poles, even in L Breath, were a maximum of 120 cm. These poles went from 120 cm to 140 cm in length, which was perfect for my height: it was very helpful to shorten them to below 125 cm on parts of the ascent, and then to have them above 135 cm on parts of the descent.
Insoles
I swear by my Superfeet blue insoles; my wife and son love their Samurai insoles. You will do a lot of walking in Japan, so premium insoles are worth the money.
Medicine (including Immodium)
Some medicine which is easily available over the counter in North America is hard to find in Japan.
This is especially true of Immodium (loperamide), so bring a supply to save yourself the hassle of trying to find alternatives in case the need arises. My son got some nasty food poisoning on our first trip to Japan (ironically, from Indian food), and it was made far worse by not being able to find suitable medicine. (We were in a fairly remote area, and got some herbal thing which helped a little bit, but he still suffered for a while.)
It’s also difficult to find Polysporin. However, even if you do bring Polysporin, you may wish to pick up some Oronine at a drugstore, since it’s good for a lot of things.
Deodorant
Pack enough deodorant for your entire trip. Japanese deodorant does not work very well, since it is made for Japanese people who don’t stink when they sweat nearly as much as I do when I sweat. I’m serious, by the way–it turns out there are two types of sweat glands, the stinky kind attached to hairs and the not stinky kind, and there are genetic differences here. (I have lots of the stinky kind.)
Power Adapters
Japan has largely 2-prong outlets, and the voltage is 100 volt, not 120 volt like North America.
So, bring an adapter, if you’re bringing anything electrical which is not 2 prong. Also, ensure that it can handle 100 volt power.
If you have a Mac laptop with the power configuration for North America, this is the one time where the 2 prong connector to the power brick will actually be useful, and the 3 prong extension cord will be useless. So, just bring your 2 prong connector, and leave the 3 prong one at home.
If you have an iPhone / iPad / Android phone or tablet, chances are the 2 prong plug will just work and handle the 100 volt power just fine. But in the case of Android, check. I have no idea.
Finally, a note: there are power outlets on the Shinkansen, so if you’re doing a day trip somewhere, consider bringing a power cord for your phone to charge it.
Convenience Stores, Vending Machines & Bank Machines
Convenience Stores
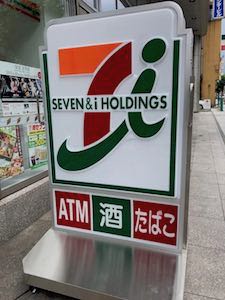
In Japan, the convenience stores are great. The three most prominent ones are 7-11 (aka SEVEN & i HOLDINGS), Family Mart, and Lawson Station (aka Natural Lawson). All three of these typically have cash machines in every branch, which you can use to get cash from your credit card. Now, not every bank machine will work with every credit card; I’ve found the 7-11 bank machines to work best with my credit cards.
Besides getting cash at convenience stores, you can also get quick food at them, especially rice triangles (Onigiri). If you are running around seeing things, getting cash and some rice triangles from 7-11, Family Mart or Lawson Station is a great and quick way to refuel. For me, lots of my walks in Japan have been after my wife, son and I have done some sightseeing and they wanted a break. So, I’d just go to 7-11 or Family Mart and then head out on an adventure.
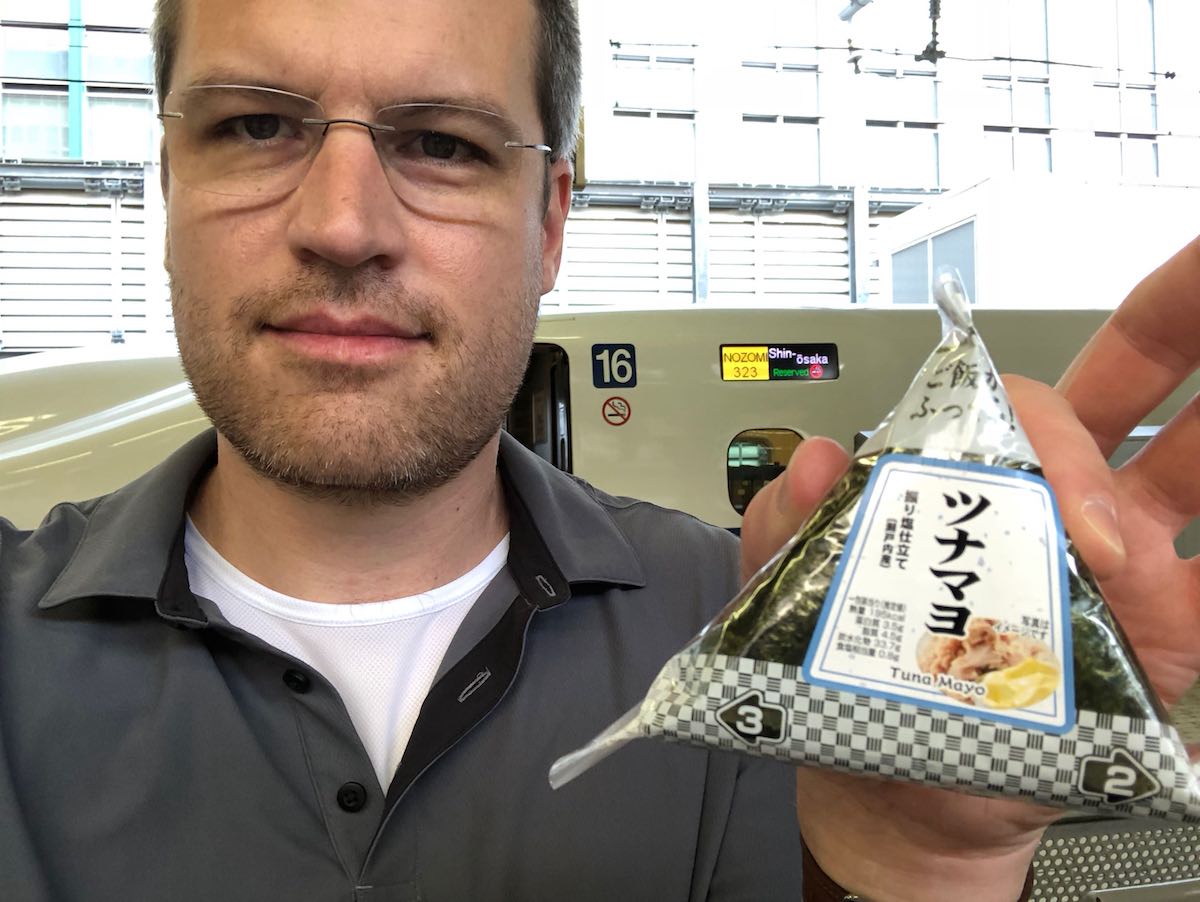
(Ironically, the train behind me in the photo is a Nozomi, which is one of the kind you can’t take with a JR pass!)
You can also get bottles of iced coffee and water at convenience stores, as well as sparkling water, iced green tea and (non-alcoholic) cider such as Mitsuya Cider.
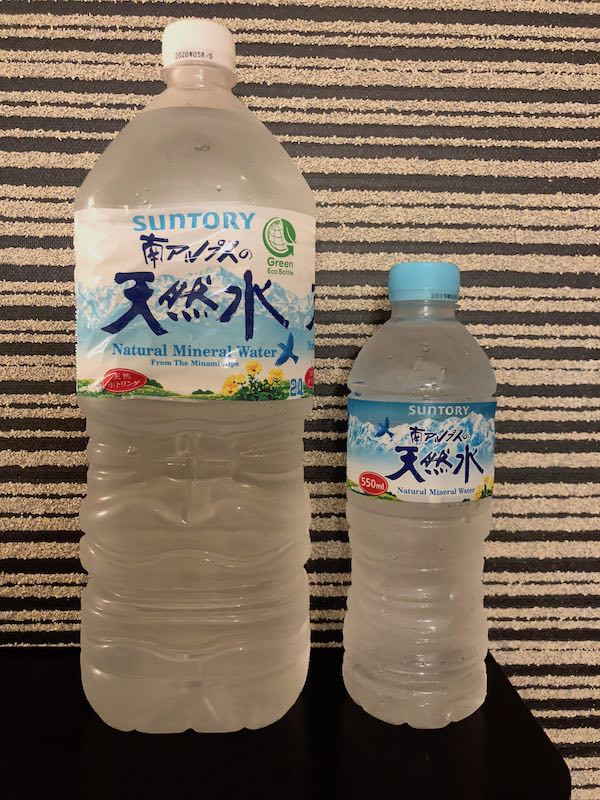
The price of iced coffee isn’t much different than at a vending machine (typically between 100 and 140 yen for an iced coffee. However, if you want to save money and are wearing a small backpack as a daypack, you can save money on water: at both Family Mart or 7-11, the 2 liter size of water is typically cheaper (about 93 yen) than the 500ml water (about 100 yen). So, if you buy a 2L bottle and carry it around, you’re saving over 300 yen compared to four 500 ml water bottles.
Besides food and beverages and cash, in a pinch you can also buy things like clothes: you’ll often find undershirts and dress shirts at 7-11, Family Mart, and Lawson Station. Sometimes these are house brands, but other times they’re MUJI. However, note that the sizes are very Japanese: I have long arms, and the MUJI XL dress shirts absolutely do not fit my arms.
Getting Cash from Bank Machines
A credit card cash advance is the simplest way of getting cash in Japan. The best bank machines, in terms of accepting your credit card, are at 7-11. Family Mart and Lawson Station can work too, but can be hit & miss.
Take out as much cash as you can at a time. There is a small fee (about 100 to 250 yen) for cash advances at the machine, and your bank may also charge you a surcharge for each credit card cash advance, so you want to minimize the number of transactions. Depending on your daily cash advance limit and what the machine will dispense, this may be something between 40,000 yen and 100,000 yen.
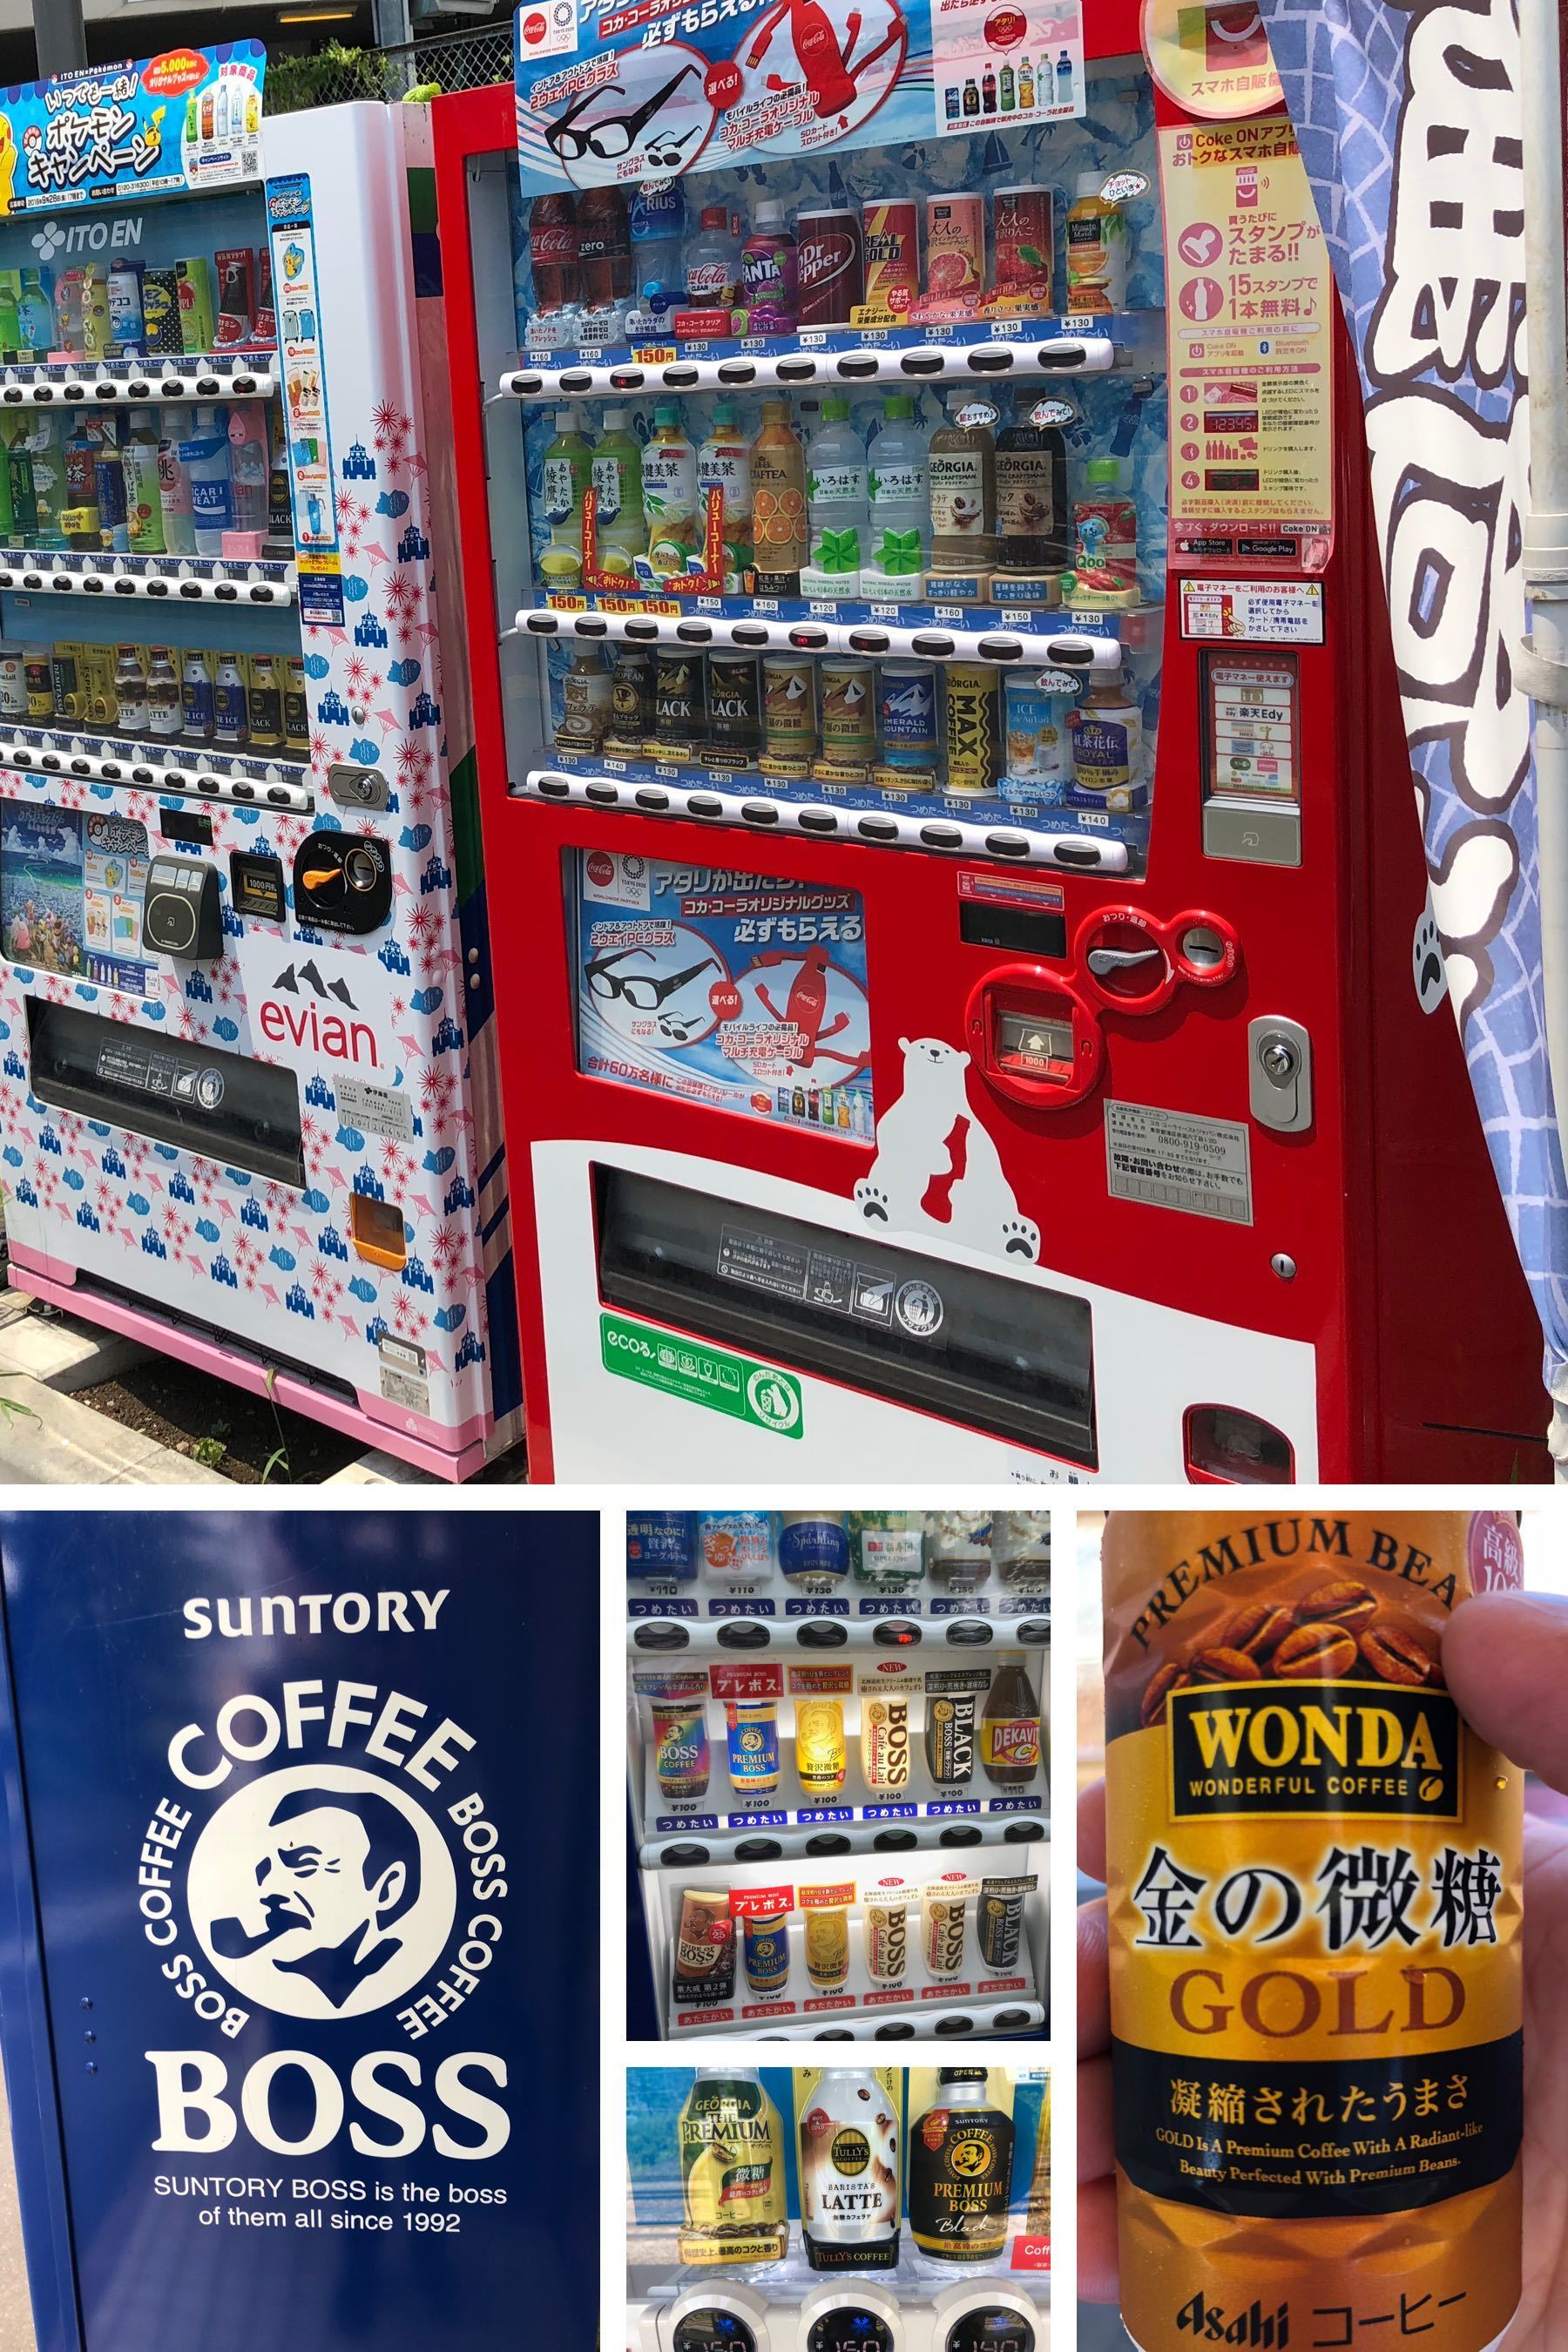
Vending Machines
Vending machines selling cold water, sports drinks, iced coffee and iced green tea are everywhere in Japan.
They take 1000 yen notes, as well as 10, 50, 100 and 500 yen coins. So, they’re great for quenching thirst and getting laundry change. They’re also a great way to get rid of the handful of 10 yen coins you’ll inevitably accumulate.
Iced Coffee
There are a number of brands of iced coffee in Japan. The most prominent is, of course, Suntory BOSS. Now, there are many types of BOSSes.
Like all iced coffee, it’s sweetened unless it says BLACK. My personal go-to was the “PREMIUM BOSS Black”, but it may be an acquired taste–I like my coffee cold and bitter.
If you’re new to vending machine coffee, I recommend trying the BOSS Rainbow Mountain Blend or Wonda Gold. (Wonda is made by Asahi, and anything with ‘Beat’ Takeshi Kitano promoting it has to be good, right?)
There’s also Tully’s (by Keurig) and Georgia Premium (by Coca-Cola), both of which are reasonably good.
Iced Green Tea
You’ll find lots of iced green tea in vending machines and convenience stores. Ito En has good unsweetened green tea, either in the normal or rich (stronger taste) flavour. There’s also a rich green tea by Kirin which is good.
Water
I don’t need to explain water. There are lots of brands of water in Japan, including ones such as Suntory and Asahi which you might associate with beer (Asahi) or whiskey (Suntory). All the flat water tastes good, of course, but the Suntory water (“from the Minami Alps”) is particularly refreshing.
One thing to note is that vending machines typically only sell flat water. So, if you want sparkling water or larger sizes than 500 ml or 600 ml, you’ll need to go to 7-11, Family Mart or Lawson Station.
Sports Drinks
There are a few brands of sports drinks you’ll find throughout Japan, both at vending machines and convenience stores:
- Pocari Sweat - This is similar to Gatorade, but more subtle in taste. (It contains 25 calories per 100 ml, so a 500 ml bottle is 125 calories.)
- Pocari Sweat Ion Water - This is the low-calorie version of Pocari Sweat, which still gives you the electrolytes you need. (It contains 11 calories per 100 ml, so a 500 ml bottle is 55 calories.)
- Aquarius - This is a competitor to Pocari Sweat, made by Coca-Cola.
- Kirin Loves Sports - Breweries like Kirin also make sports drinks.
Pocari Sweat and Ion Water are actually really good, and so is Aquarius. Summer in Japan can get very hot and humid, and heat stroke is a concern. In 2018 we were in Kyoto during a newsworthy heat wave, and temperatures climbed to 38 degrees Celsius for multiple days. During that heat wave especially, it was important for us to drink lots of sports drinks as well as normal water, as well as to use common sense.
Food
There’s lots of delicious food in Japan. Before I get into it, one important tip:
Bring Enough Cash When You Go to a Restaurant
You should assume that all restaurants are cash-only. Many are. You don’t want to be short of cash at a restaurant. My wife and I did this once (we both assumed each other still had enough cash), and after stuffing ourselves with delicious food, I had to sprint around Kanazawa looking for an ATM which worked. (The nearby Lawson Station one did not, but the 7-11 one did.)
Sushi
You can get great sushi in Japan, of course. However, in case you were worried: no, Japanese food isn’t all sushi. In fact, you can travel to Japan and not eat sushi once.
Now, that would be a shame, of course, because sushi can be amazing! You don’t need to go to Tokyo’s Tsukiji market for great sushi. (Frankly, many places in Tsukiji’s outer market are tourist traps in comparison to sushi in other places in Tokyo.)
Sushi Yuu
The best sushi I have ever had, not just in Tokyo but in my entire life, was at a small restaurant called Sushi Yuu, located in a dark backstreet in Roppongi. This isn’t somewhere you take kids: reservations are required, and it’s certainly not cheap. But if you like real sushi, go there and you won’t be disappointed. (You don’t order specific food, you just sit at the counter and trust chef Daisuke (who speaks fluent English) to present you with about ten of the best pieces of sushi of your life, each served in its own artfully-prepared course.)
Ramen
There is amazing ramen all over Japan.
Besides the fact that it’s amazing, ramen is also cheap. A bowl of ramen at Ichiran with no toppings or extras is only 890 yen (about $8 USD), and it might be the best ramen of your life. (With the typical extras, it will cost you about 1500 yen, or $13 USD–still a bargain!)
To get you started, however, I’m going to highlight two of the best ramen chain restaurants in Japan: Ichiran and Ippudo. Both of these chains are Hakata style ramen (Hakata is the alternate name for Fukuoka, on Kyushu). Both of these have locations in Tokyo, Kyoto and Osaka. If your itinerary starts as Tokyo ⇒ Kyoto ⇒ Osaka, my advice would be to go to Ichiran in Tokyo and Ippudo in Kyoto. (The Kyoto Ippudo location is right in the train station.) In Osaka, you may be busy eating other things.
Ichiran
Ichiran may or may not make the best tonkotsu ramen in the world, but it’s certainly the best tonkotsu ramen from a chain.
It’s all they do. There are no other types of ramen at Ichiran. Just tonkotsu. There is no other food at Ichiran, either–just tonkotsu ramen, and toppings for it.
Seriously. They don’t even make gyoza. I love gyoza, but this single-minded focus on perfecting one thing is truly laudable.
Since Ichiran is so great, and has locations in Shinjuku, Roppongi and Shinbashi, it should be your first choice for ramen in Tokyo. (However, if you do go to Ichiran, skip the Asakusa location. Ichiran is all about eating ramen at a counter booth, and the Asakusa location has a combination of tables and booths. If you are in a group, as I was with my wife and son in August 2019, chances are you’ll end up at a table. The problem with eating Ichiran at a table is that you’re surrounded by annoying, noisy tourists, and the kaedama extra noodle service takes a lot longer than at a counter booth. Since you need to save some soup for the kaedama, this means you’re eating half a bowl of lukewarm soup.)
Note that tonkotsu is pork broth, so if you’re vegetarian, don’t go to Ichiran. There’s literally no point, since every customer must order tonkotsu ramen.
The way that eating (and it’s definitely eating, not dining) at Ichiran works is unique:
First, you line up. At busy times, the line often spills out the restaurant and up the stairs to the outside.
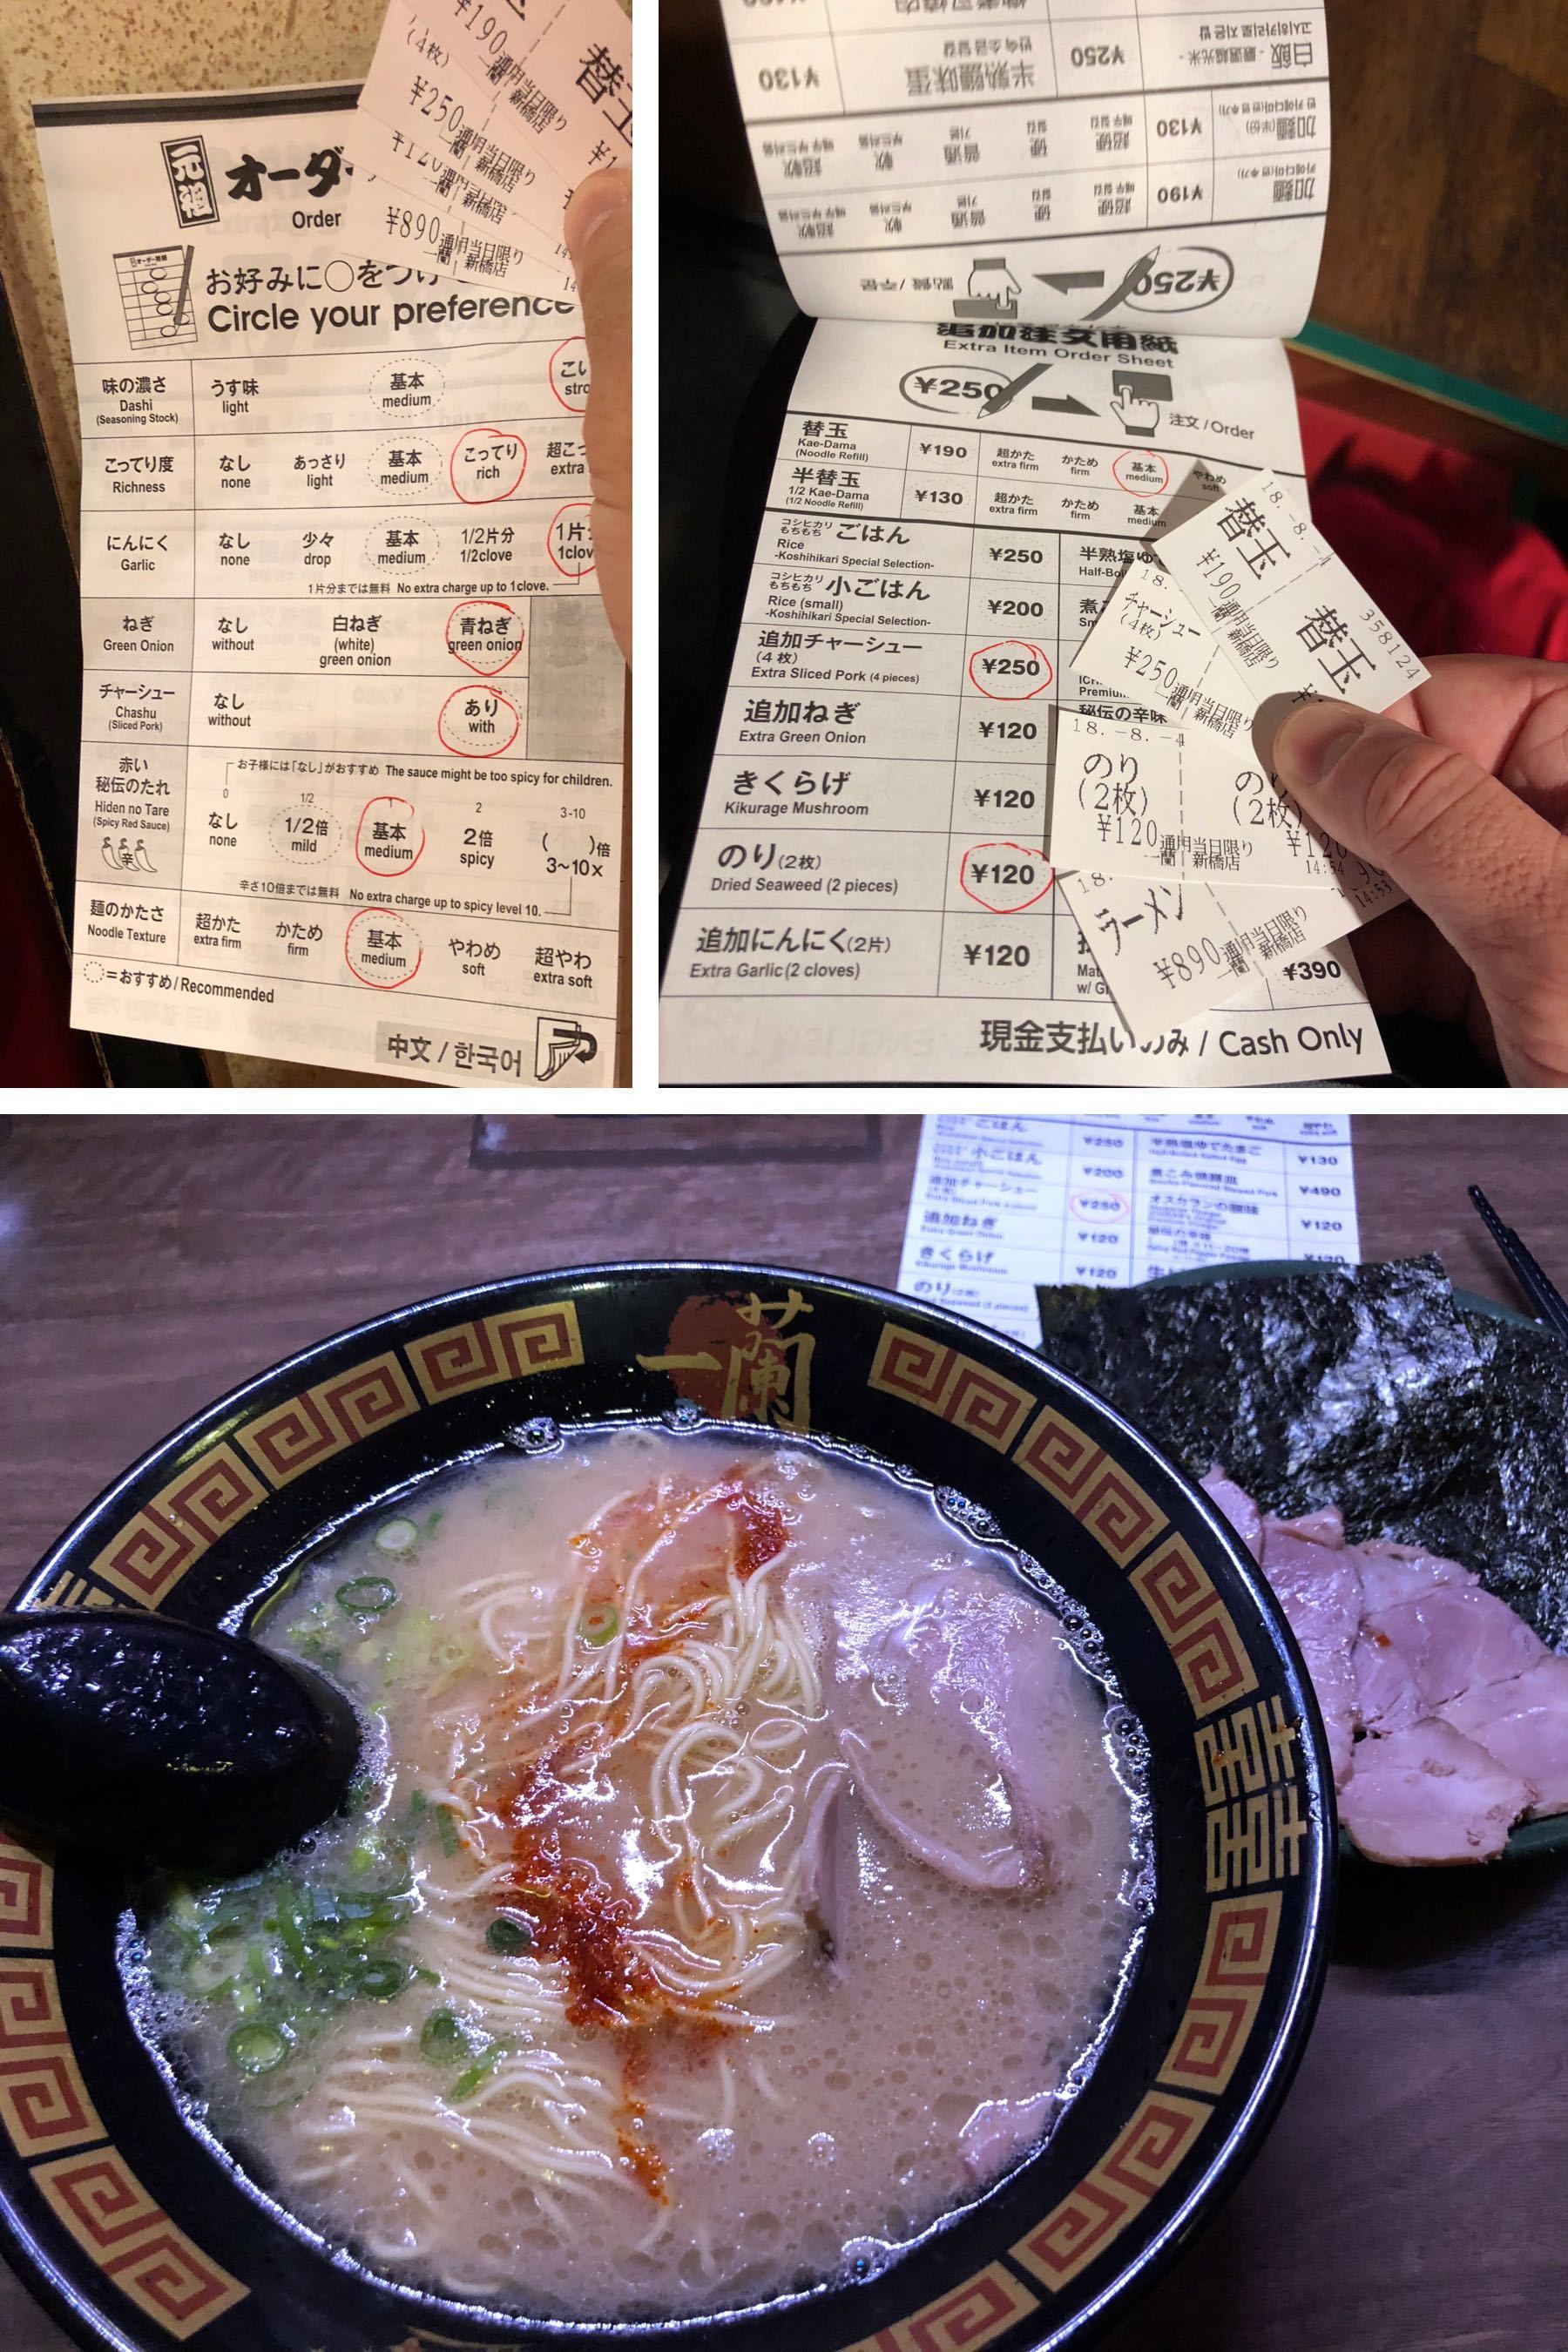
Next, you buy tickets using cash at a vending machine. Everyone must purchase the “Ramen” ticket, for 890 yen. You then buy other tickets for toppings or for “Kaedama” (extra noodles).
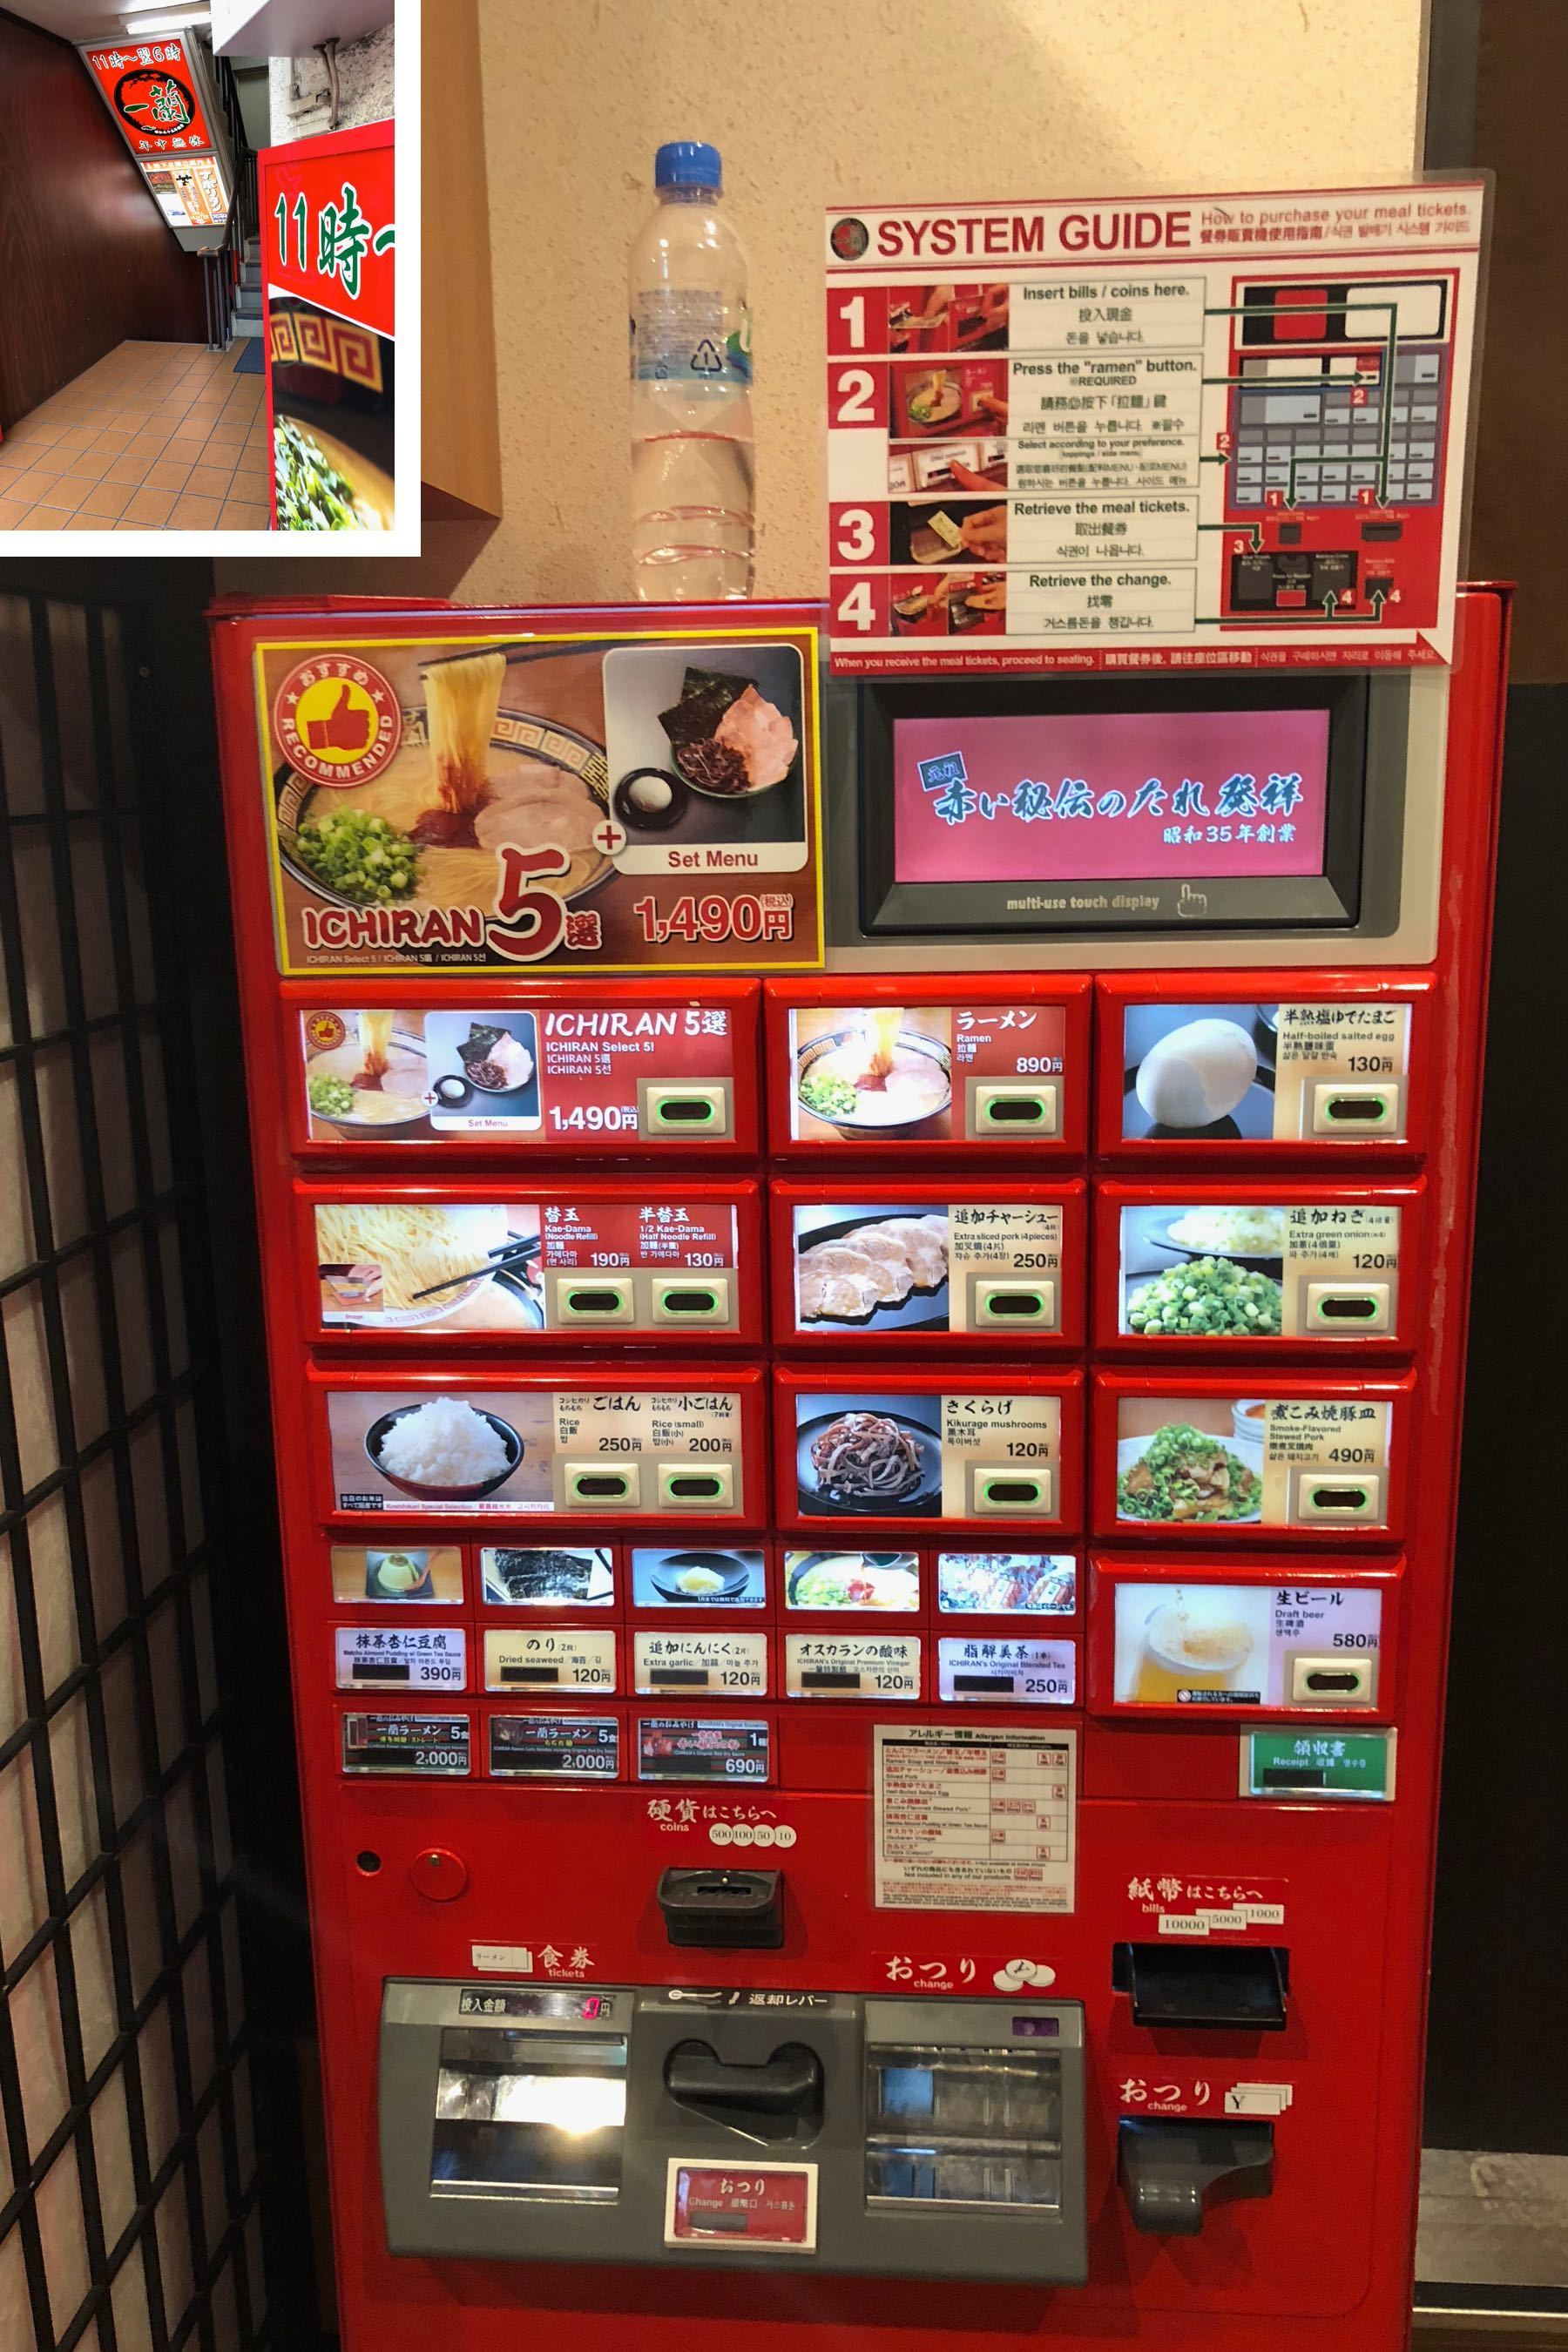
Typically before you get to the vending machine, you will indicate your preferences by circling choices on two pieces of paper. Every person gets their own sheets of paper for preferences, since every person’s preferences are different. There are staff in the line who will give you the paper and help you with this. You indicate how rich you want your broth, how firm you want your noodles, etc. (Pro tip: if you choose different firmness for the Kaedama noodles and the normal noodles, say if you are trying two types of firmness, the staff will just assume you made a mistake and give you the firmness that you chose with the original noodles.)
Make sure to buy all the tickets which correspond to what you selected on page 2 of the preference sheet!
Everyone eats in individual cubicles. This way there’s no talking or socializing, just a single-minded focus on the ramen. (Hey, they have been focusing on perfecting it for decades, they want you to pay attention!) There’s even a tap of cold water in each cubicle.
There is a screen in front of you. It is initially raised, so that you can give your tickets and preference sheet to the staff member. They take it, say some stuff to you (no need to understand or respond), and then they close the screen. A couple minutes later, the screen is raised, and you will get probably the best bowl of ramen you’ve had in your life.
(Note that the red sauce is normally artfully in the center. I started to stir it in, before remembering I needed to actually take a picture of it for once!)
Next, you eat! Slurp your noodles. You need to do this since the soup is piping hot, and you need to start eating right away so the noodles are at the correct firmness. (If you have ordered extra toppings like extra pork or seaweed, it is presented to you on a side plate. Just add it to the bowl of ramen right away, and dig in.)
If you have ordered Kaedama (either a half-order or a full order), make sure to prioritize eating noodles over soup, so that there is enough broth for the Kaedama. When you have about 1/3 of your noodles left, push the button in front of you. A staff member will raise the screen, and take your Kaedama token. About 30 seconds later, you’ll have a plate with your extra noodles, at the correct firmness. (The reason that Kaedama is done this way is that if all the noodles were added to the soup at the beginning, they wouldn’t be at the correct firmness by the end of the bowl.)
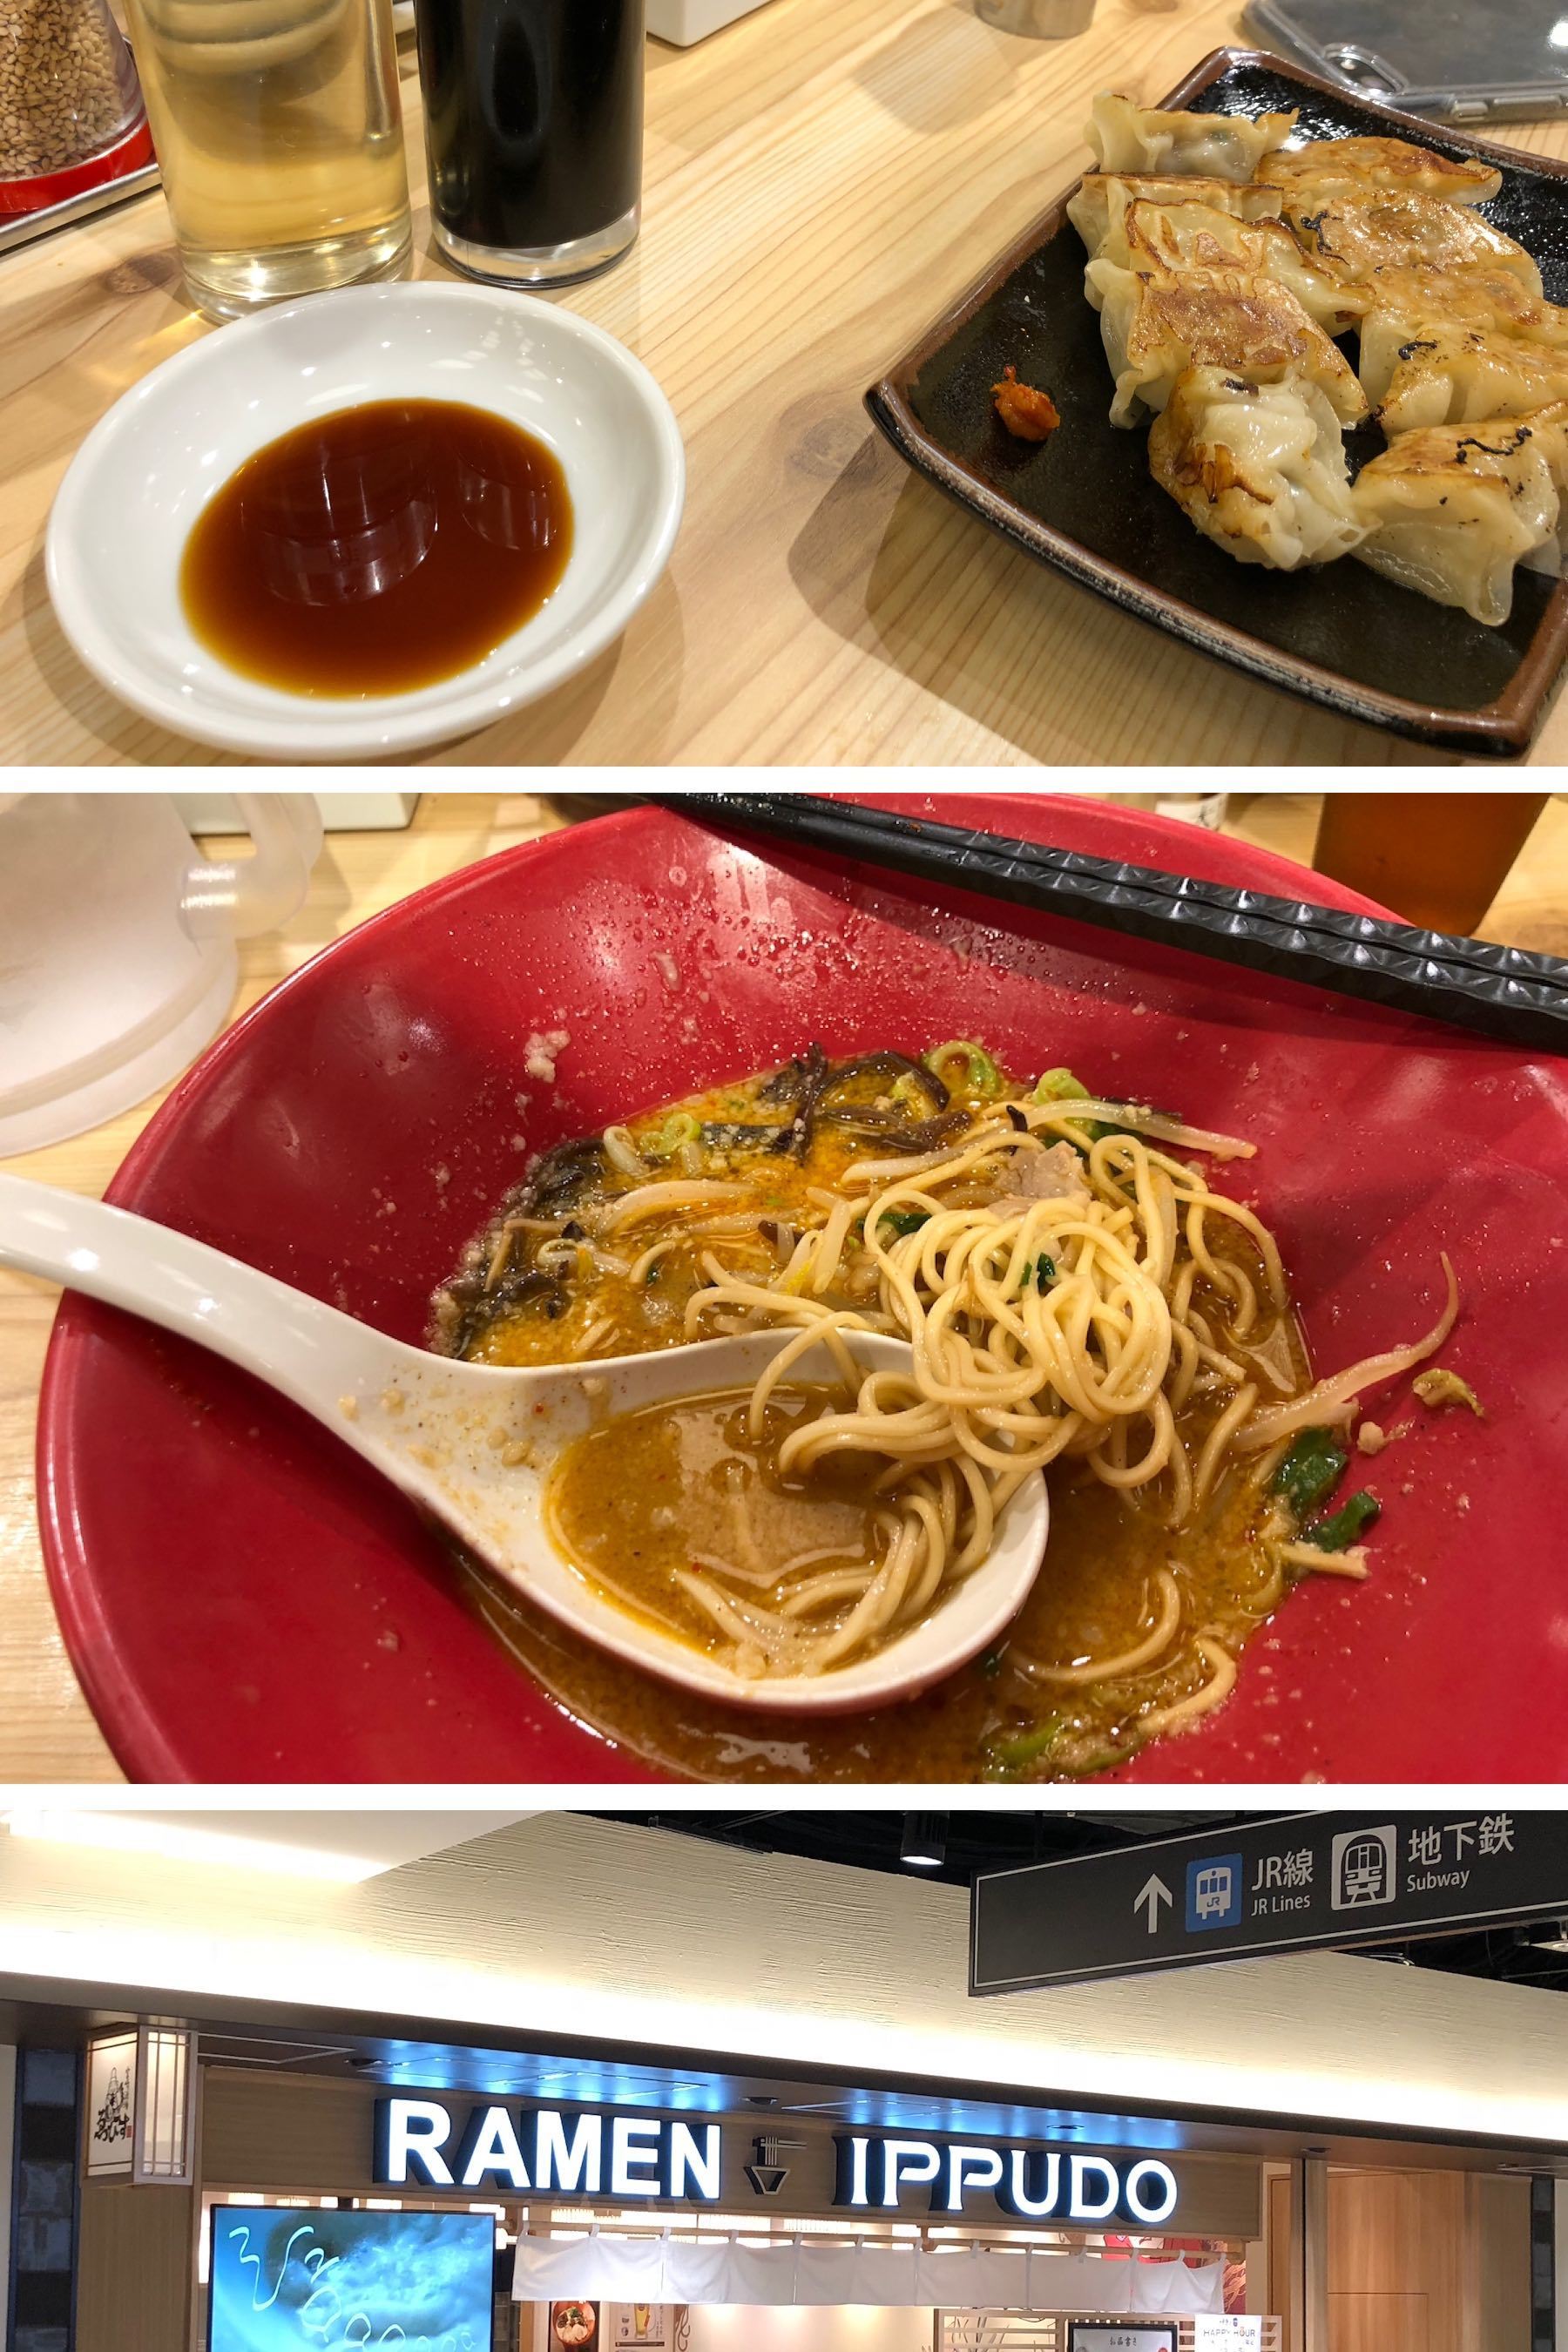
Ippudo
Ippudo has both the Hakata Classic tonkotsu ramen and Akamaru Modern miso ramen. Both are good; you should try both to decide which you prefer.
Frankly, if I want classic tonkotsu ramen, I just go to Ichiran. However, Ippudo has one thing that Ichiran does not have–gyoza. If you’ve never had gyoza, they’re the Japanese version of Chinese potsticker pork dumplings.
Ippudo doesn’t just have gyoza, they’re some of the best gyoza I’ve ever had. They’re mini gyoza–about half the size of the gyoza you’re used to, and 10 of them on a plate, instead of the normal 5. They are perfectly cooked–not underdone like some gyoza can be.
The Kyoto location of Ippudo is very convenient–right in the central train station.
Tempura
Many of the foods which are popular throughout Japan are twists on food which originated elsewhere. Just as gyoza are the Japanese take on Chinese potsticker dumplings, tempura originated with a green bean dish imported by Portuguese sailors in the 1500s.
Now, tempura has come a long way since then. You can find it everywhere. It goes particularly well with udon or soba noodle soup, which you can get either hot or cold. I like my udon hot, but cold soba noodles can be delicious on a hot day!
Curry Rice
Another import food which has a unique version in Japan is curry. Curry rice is one of the great fast foods, and you will find Japanese curry places serving cheap pork or beef curry throughout Japan. This is a great alternative to western fast-food chains, and if you are travelling with kids, chances are they will love it.
CoCo Curry
There is a great chain in Japan called CURRY HOUSE CoCo ICHIBANYA. It’s sometimes shortened on signs to CoCoICHI.
What it’s informally called is CoCo Curry. CoCo Curry is actually a really good chain which your kids will probably love. (Frankly, for a quick meal, I love it too: it’s tasty, consistent, basically everywhere, English-friendly and reasonably-priced.)
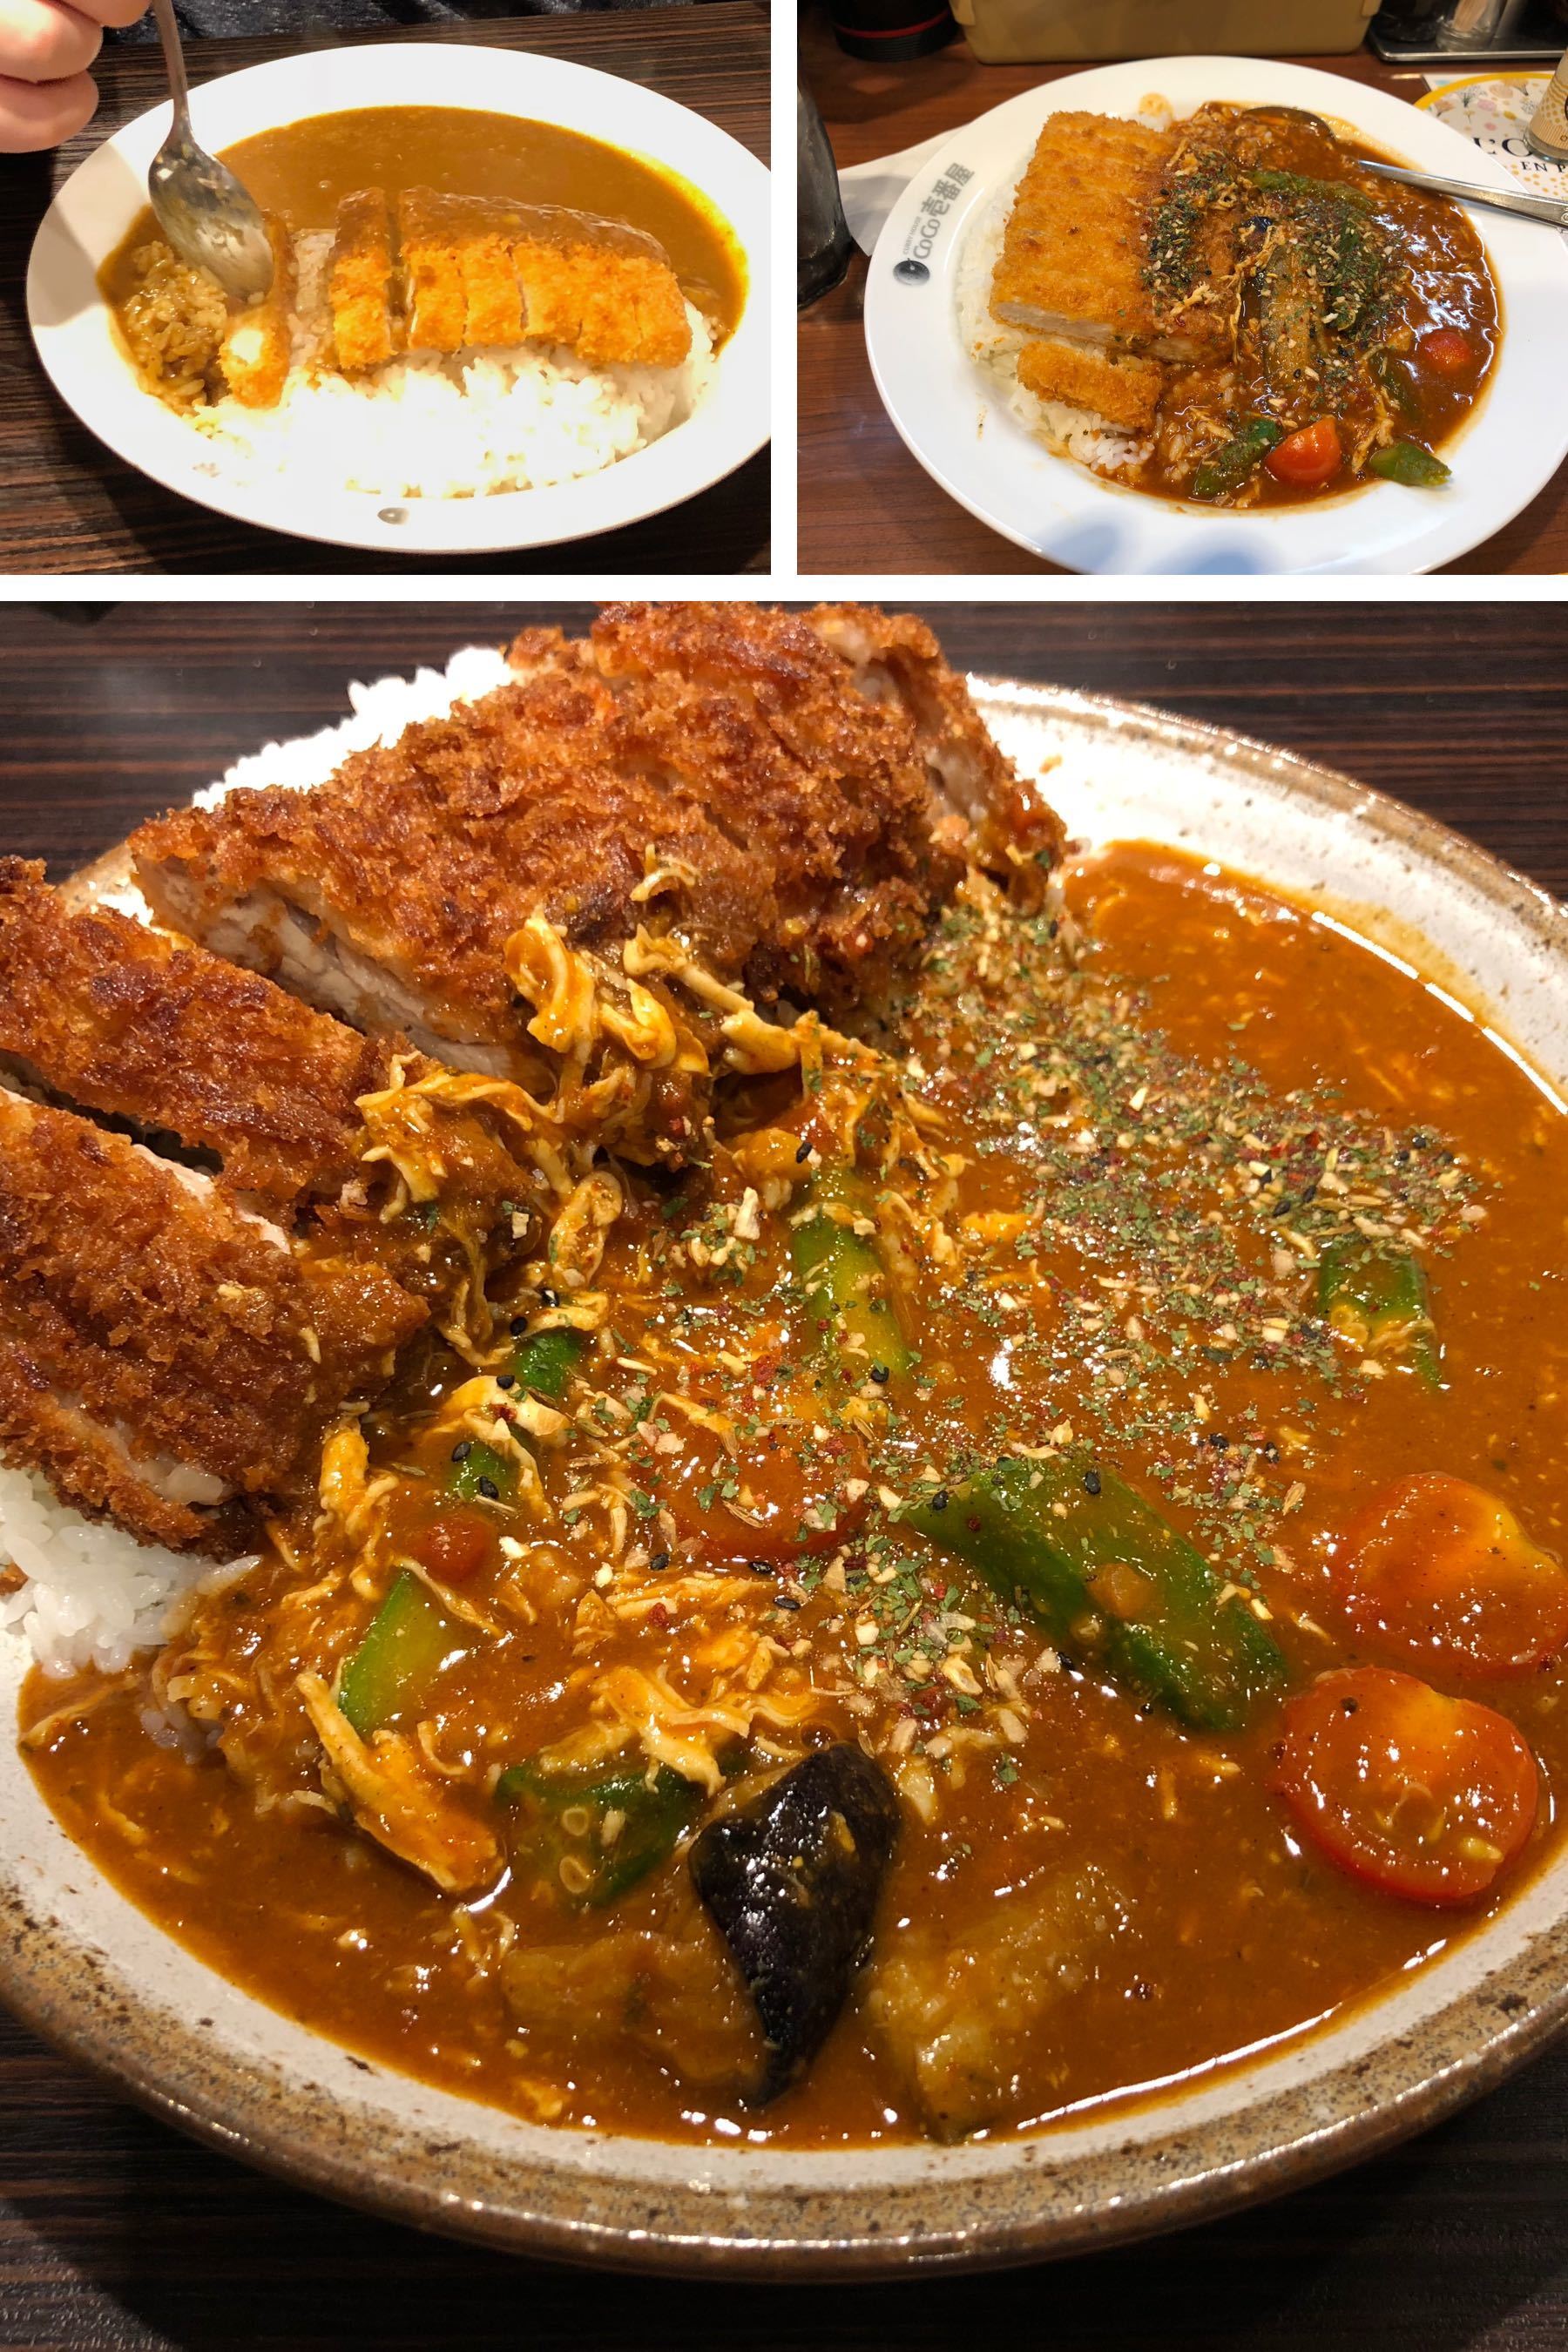
CoCo Curry has a variety of curries, including their standard pork curry with a chicken cutlet.
All of the curries can have their spice level modified, from three levels of mild all the way up to spice level 10. (However, they won’t let you order above spice level 5 unless you can prove you’ve eaten spice level 5 first.) Now, I have no idea what spice level 5 tastes like–I love spicy food, but even spice level 4 is too spicy for me. I typically eat spice level 2, and sometimes spice level 1 and spice level 3.
You can also get beef curry and other types of curry. And besides a chicken cutlet, you can get calamari, a shrimp cutlet, etc. They also have special curries occasionally. During the summer of 2018 they were celebrating their 40th anniversary with a special curry containing stewed chicken, which was actually pretty good. Here’s a picture of it, with a chicken cutlet added as well:
Now, a pro-tip about CoCo Curry is that you can make it taste even better with a hand-breaded chicken cutlet. This brings CoCo Curry up a quality level, for not that much more money. Just ask for a hand-breaded cutlet instead of a normal one when ordering.
The photo on the next page shows the standard pork curry with a chicken cutlet, the special curry with a chicken cutlet, and the same special curry with a hand-breaded chicken cutlet. I strongly recommend the hand-breaded chicken cutlet, with the special curry if it’s available.
Cheese Tarts
One common sight in train stations in Japan is stores selling cheese tarts. I’m not going to write much about common cheese tarts, however–I’m going to write about the BAKE cheese tart.
BAKE cheese tart
This is by far the best cheese tart I have ever eaten in Japan.
Technically, there are other cheese tart shops in Japan (there are a lot of Pablo locations in Osaka, for example), but in my opinion, you should just go to BAKE. I highly recommend that you do not have a cheese tart anywhere else but BAKE until you have tried theirs. If you do have a cheese tart somewhere else, you may decide that you don’t understand the hype, and you may not try BAKE.
Note that if you go to the BAKE Cheese Tart location in Lumine EST (right by JR Shinjuku station) in Tokyo, here’s a pro-tip: there is a Starbucks nearby, on the second floor of the Lumine EST. From BAKE, turn toward the station entrance, go through a glass door and up a flight of stairs. As a bonus, there is a reasonably large (for Tokyo) seating area near the Starbucks with a great view. (In Tokyo, seating and garbage cans are both at a premium!)
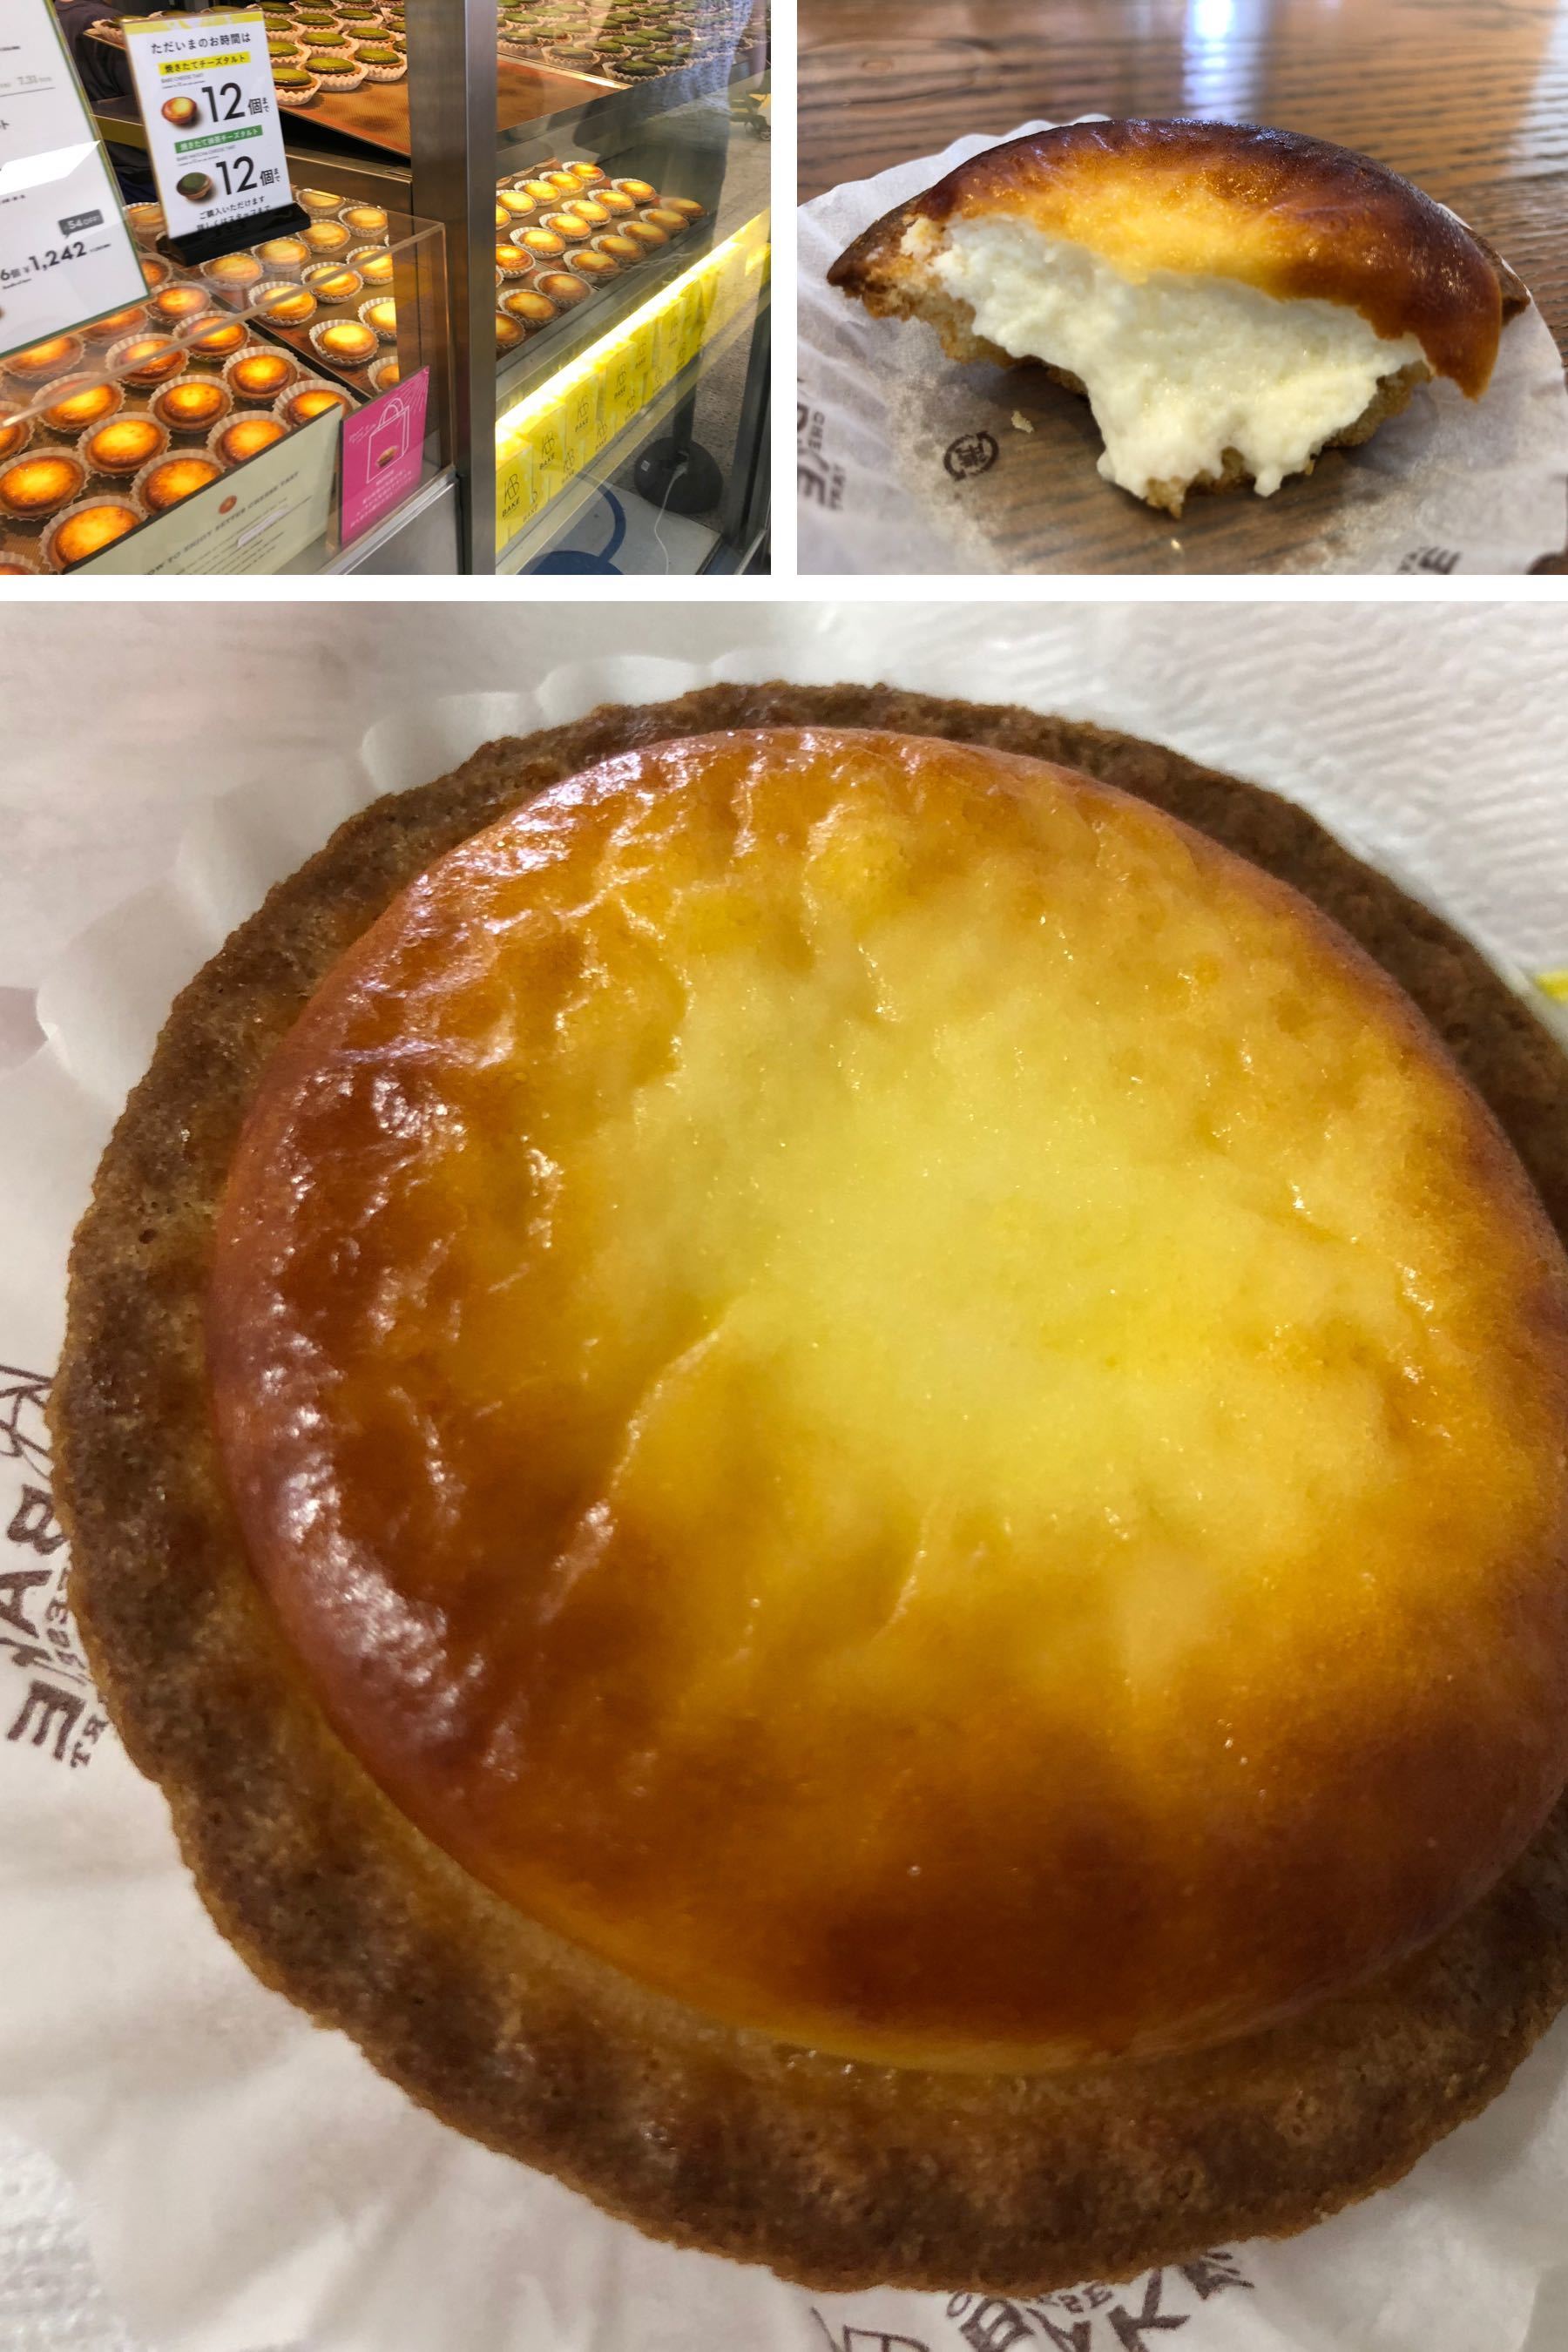
Ice Cream
Milk
There’s a very popular and delicious ice cream place called Milk, which emphasizes their Hokkaido milk. (BAKE also gets cheese made from Hokkaido milk; I guess the cows up there make good milk.)
If you’re in JR Shinjuku station and you haven’t stuffed yourself on BAKE, there’s a Milk ice cream location right next to it.
Coffeehouses
There are lots of Starbucks locations in Japan. This is usually the best choice, as far as hot coffee is concerned.
One coffee shop you’ll see all over is Doutor. Frankly, their small sandwiches are pleasant enough, but you’re usually better off at a patisserie (see next section). The coffee is fine, but it is expensive given what you get. You typically pay around 300 yen for a very small, average coffee.
Frankly, you’re better off with vending machine iced coffee. Or, you can go to Starbucks, and pay a similar amount for about triple the coffee, and better coffee. If you like your Third Wave coffee, it can get expensive in Japan, just like anywhere else. A good choice for this is Sarutahiko coffee, or you can use the maps and search at Good Coffee to find the nearest fancy coffee. There’s also Blue Bottle coffee in Tokyo.
French-style Patisseries
There are lots of French style patisseries throughout Japan, especially near subway stations. When you go into one of these, you take a tray and some tongs, and then just put all the baked goods you want on the tray, and take them to the cashier. There’s a particularly good one in Kyoto station, with a sign “Boulangerie Patisserie”. Here you will find croissants, curry buns, and a number of delicious things.
In terms of international chains, there are a couple PAUL locations in Tokyo. If you happen on one of them, the baked goods are delicious, and the coffee is much better than average.
One note: there is a menu for eating inside, and a separate (cheaper) counter food for take-away, along with coffee.
The staff are really helpful. I was sitting outside in their seating area, eating my sandwich and drinking my coffee, when someone appeared (unasked) with a pitcher of ice water and a glass.
Vie de France
One popular chain of the Japanese French-style Patisseries which I frequented quite a bit is Vie de France, since there are so many convenient locations near subway stations in Tokyo, Kyoto and Osaka.
The baked goods are quite tasty and reasonably priced. The coffee, however, is similar to Doutor. You’re better off just eating the delicious baked goods and then grabbing an iced coffee from a vending machine or a proper coffee from Starbucks after you leave.
Shopping
Japan has great shopping, and a tax rebate for foreign guests, which you see promoted everywhere as “Tax-Free Shop”.
“Tax-Free Shop”
With this program, the idea is for stores to refund you the 8% Japanese sales tax on goods which you are taxing out of Japan. The idea is that by doing this, you’ll spend more in Japan.
This is a good idea, but it’s a bit of a hassle. Here’s how it works…
First, when you buy something at a store, this is done in one of two ways:
- You can either go to a special Tax-Free Shop counter where they do the tax refund right away. This is how it typically works at Uniqlo.
- You can make all your purchases, and then go to a separate Tax-Free Shop refund counter where they do a refund, minus a small administration fee commission. This is how it works at many other stores, including LoFT.
Either at the Tax-Free Shop counter or at the refund counter, what they then do is tape (or occasionally staple) the receipt onto one of the pages of your passport, and they stamp the edge of the receipt and the passport page. Now, since you may be doing a lot of tax-free shopping, what happens is that they staple or tape the receipt to one of the other receipts already in your passport. So, by the end of your trip, your passport can have a lot of receipts in it!
Now, the restrictions of the Tax-Free Shop program are not only that the goods should be leaving Japan–you’re also not supposed to use the goods in Japan itself. This is ironic when you see places advertising Tax-Free Shop for things like trekking poles that are “great for climbing Mount Fuji”. Some stores take this restriction more seriously than others, putting the goods you have purchased in special plastic bags, and sealing the bags with red tape or some special method. However, since this bagging process includes the goods in their packaging, what I always do is just take them all out of the special bags (and throw out the special bags), so that I can take the goods out of their packaging. I always take my Tax-Free Shop goods out of Japan, but I also like to travel light!
If you come from a country like Canada which is reasonably strict about how much stuff you are bringing back into the country, you will want to write on the receipt where it was from, and what was purchased, so that you can keep track. However, there’s one more wrinkle with the Tax-Free Shop receipts: these aren’t just being taped to your passport, they also get taken away by Japanese Customs when you leave Japan. So, again, if you come from a country like Canada, this might be a problem for you. So, in this case, take pictures of your Tax-Free Shop receipts before you go to the airport. Once you actually go to the airport, the whole customs and immigration process happens so fast you’ll just realize at the last second that you’re losing all your receipts!
If you’re concerned about what happens if you’ve taken the Tax-Free Shop stuff out of their bags and packaging, in my limited experience of leaving Japan twice, both times with a bunch of Tax-Free Shop receipts, the answer is: Nothing at all. (That said, to be on the safe side, I try to take all my Tax-Free Shop purchases in carry-on luggage, not checked luggage, so that if there are questions I can show them that I am, in fact, taking the goods out of the country. (You check any bags before you go through customs and immigration, so any purchases in checked luggage can’t be verified.)
LoFT
LoFT is a great Japanese variety store, which sells everything from stationary, wallets and bags, souvenirs and gift goods, beauty products, etc. It has a number of locations throughout Japan; one of the largest is in Shibuya. Chances are you’ll be in Shibuya at least one day, so you should pay it a visit. You may find yourself returning near the end of your trip if you need to buy presents for people. Personally, I have bought a Bellroy passport wallet, a North Face laptop bag and a bunch of small gifts at LoFT in my trips there, and wished I could buy hundreds of things in the store!
One hilarious thing about shopping at LoFT in Shibuya is that you need to pay for your items on every floor, even if you are taking an escalator within the store to other floors. Since the Shibuya LoFT has 6 floors, and since the tax refund counter is on the sixth floor, this means that in theory you could stand in 7 checkout lines at one store. I hate lines. However, the lines in LoFT are smooth and efficient, so it’s actually not so bad. (Also, it’s a good excuse to just not buy anything on certain floors!)
Tokyu Hands
Tokyu Hands is a variety store which is similar to LoFT. I prefer LoFT, but both are worth a visit. They have large stores in Shibuya and Shinjuku.
Uniqlo
As discussed earlier, Uniqlo sells clothing which is purpose-built for the hot, sticky Japanese summer. Also, Uniqlo has the best Tax-Free Shop counters. You’ll find tons of Uniqlo locations in Tokyo, Kyoto, Osaka and other major cities.
MUJI
MUJI is kind of Japanese Gap crossed with Japanese IKEA, with some variety store stuff thrown in. Their focus is on simple, natural products. Many things you would want to buy at MUJI, such as plates, cups and ultrasonic aroma diffusers are a bit impractical to bring home with you. However, they do have nice clothes, and it’s an enjoyable place to shop.
Laundry
I do the laundry when we travel, and the laundromats in Japan are great. Here are some tips:
- Just use Google Maps to search for laundromat. There are usually enough reviews that you can get a sense of the place.
- Bring lots of 100 yen coins. 500 yen coins also work in larger and better machines. Smaller machines take 100 yen coins only.
- The price of washing a load of laundry is between 200 and 400 yen for a small machine, and 500 to 600 yen for a larger one. Some laundromats also have really fancy washer + dryer combo machines which actually do a wash and dry cycle. However, these are about 1000 yen.
- The price of drying a load of laundry is 100 yen for about 10 minutes. The dryers are huge, however, so if you have mostly synthetic clothes, your clothes will all be dry in 10 minutes. If you have heavier cotton clothes, those may will take 20 minutes to dry. However, just try 10 minutes, and feel how dry your clothes are at the end–it could be that everything is dry, and you don’t want to over-dry your clothes. It depends on how much you fill the dryer. (You can sometimes combine two smaller wash loads into one dryer, but this may just result in double the time and the same cost.)
- There are often vending machines selling water and iced coffee near laundromats, so even if there is no change machine, you can get change by buying a water with a 1000 yen bill.
- Some of the machines automatically add detergent, others don’t. Again, the better the machine, the higher chance it automatically adds detergent. You can usually figure it out by the simple fact of whether there’s a pull-out drawer for detergent. Or, for fun, you can use the Google Translate app on your phone, and have it take a picture of the instructions and translate them. This is hit and miss, but it sometimes is a bit informative.
Now, I hardly use cash at home, and I never carry coins. So, one souvenir I have of Japan is a cute change purse–with all the laundry to do and water to buy, it’s nice to have a doge to help.
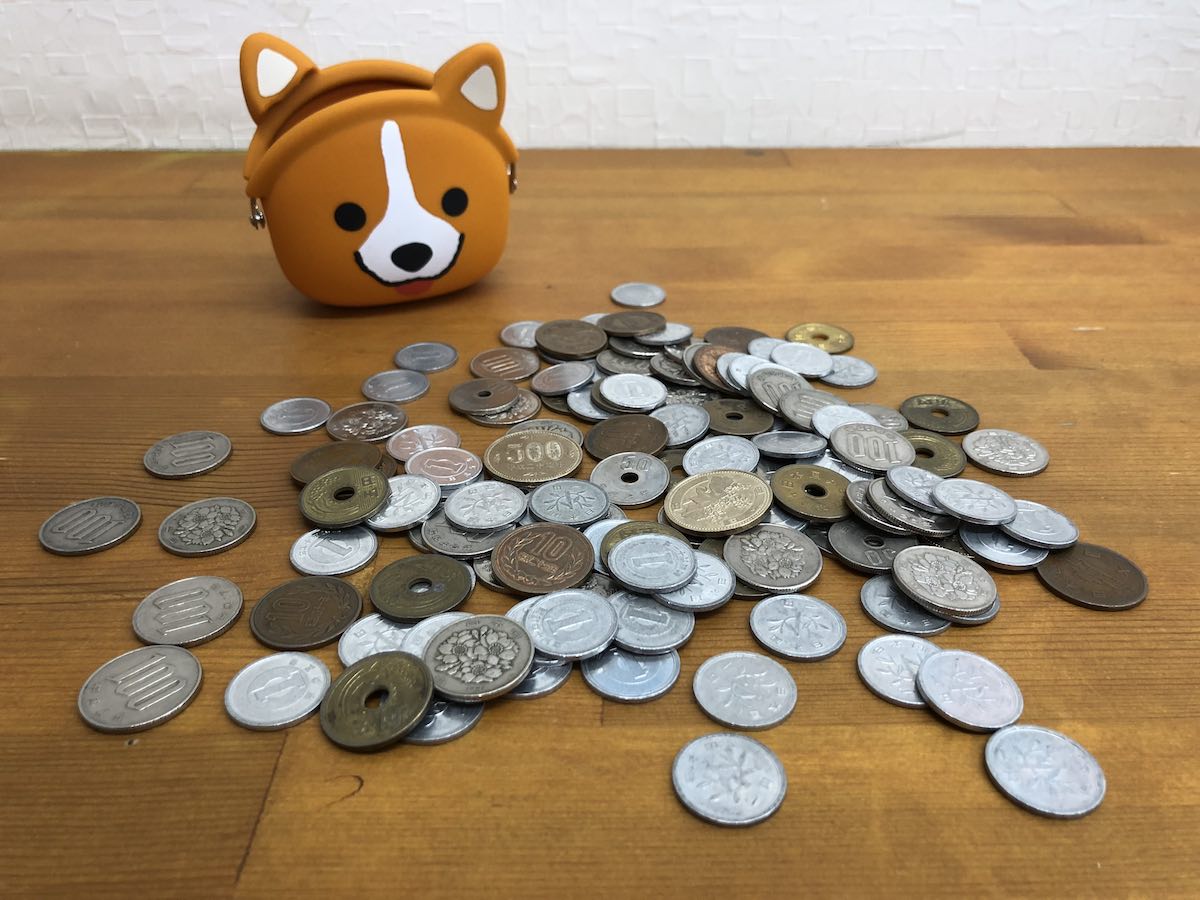
The nicest laundromat I used was Bennie Laundry in Osaka; the cheapest good one was Toranoko Coin Laundry in Tokyo.
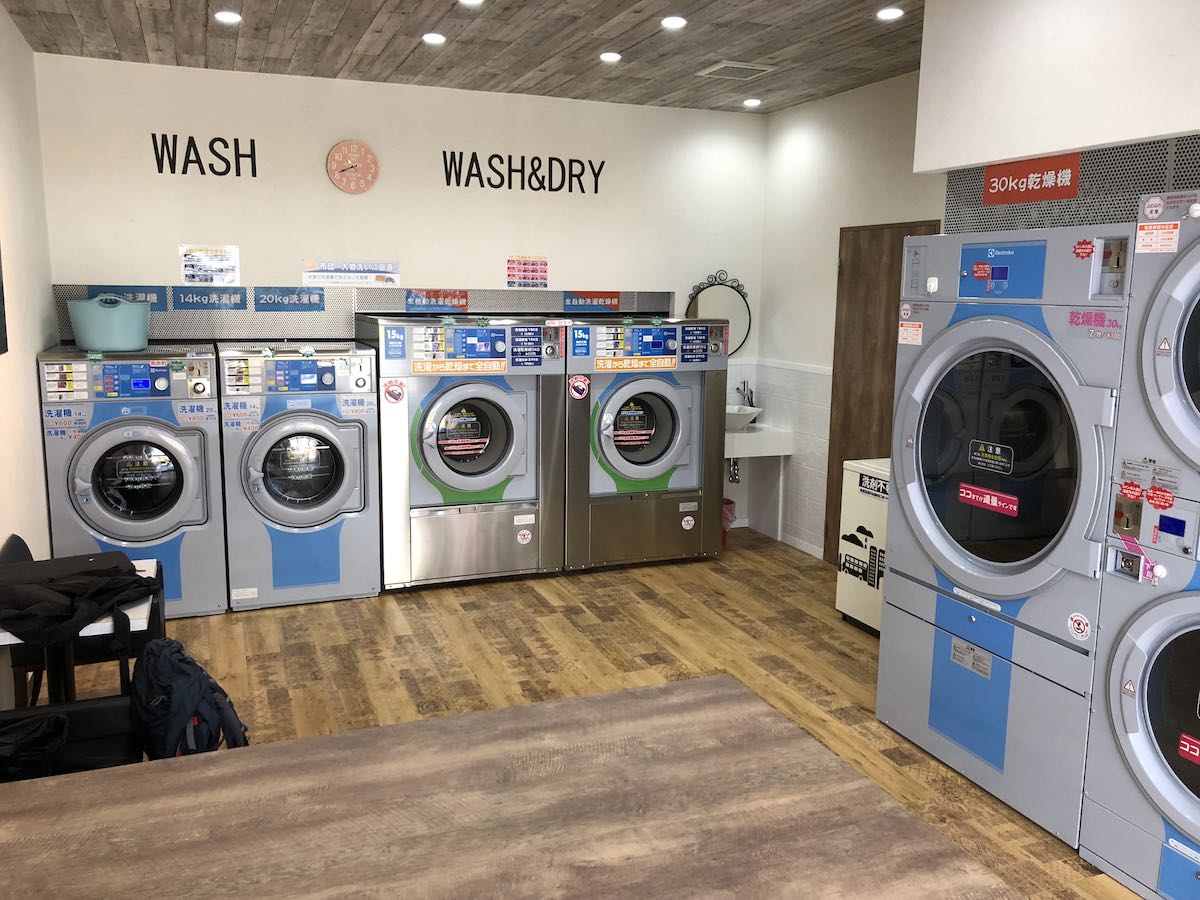
Goshuincho and Goshuin
The Goshuincho is a book for Goshuin. Goshuin feature beautiful calligraphy and are received at Buddhist temples and Shinto shrines. The Goshuincho is NOT for tourist stamps.

At the first major Shinto shrine or Buddhist temple you visit, you can buy a Goshuincho for about 1200 yen. You’ll want to make the decision about whether you are going to receive Goshuin throughout your trip at this point, since if you are going to do so, you might as well do so from the beginning. If you do purchase a Goshuincho, it costs about 300-500 yen to receive a Goshuin at most temples and shrines. Depending on the temple or shrine, you either drop it off at the beginning of your visit and pick it up at the end, or you just stand and wait.
Goshuincho are NOT Tourist Stamp Books
At some sights, you will find tourist stamps that you can stamp in a stamp book. However, NEVER stamp a tourist stamp in your Goshuincho. This is deeply disrespectful. If you do this, you have ruined your Goshuincho. If you then present your Goshuincho at a Buddhist temple or Shinto shrine, you will offend them. (Also, they may justly refuse to give you a Goshuin. There is literally a canned response about this at some temples, such as at Mount Koya.)
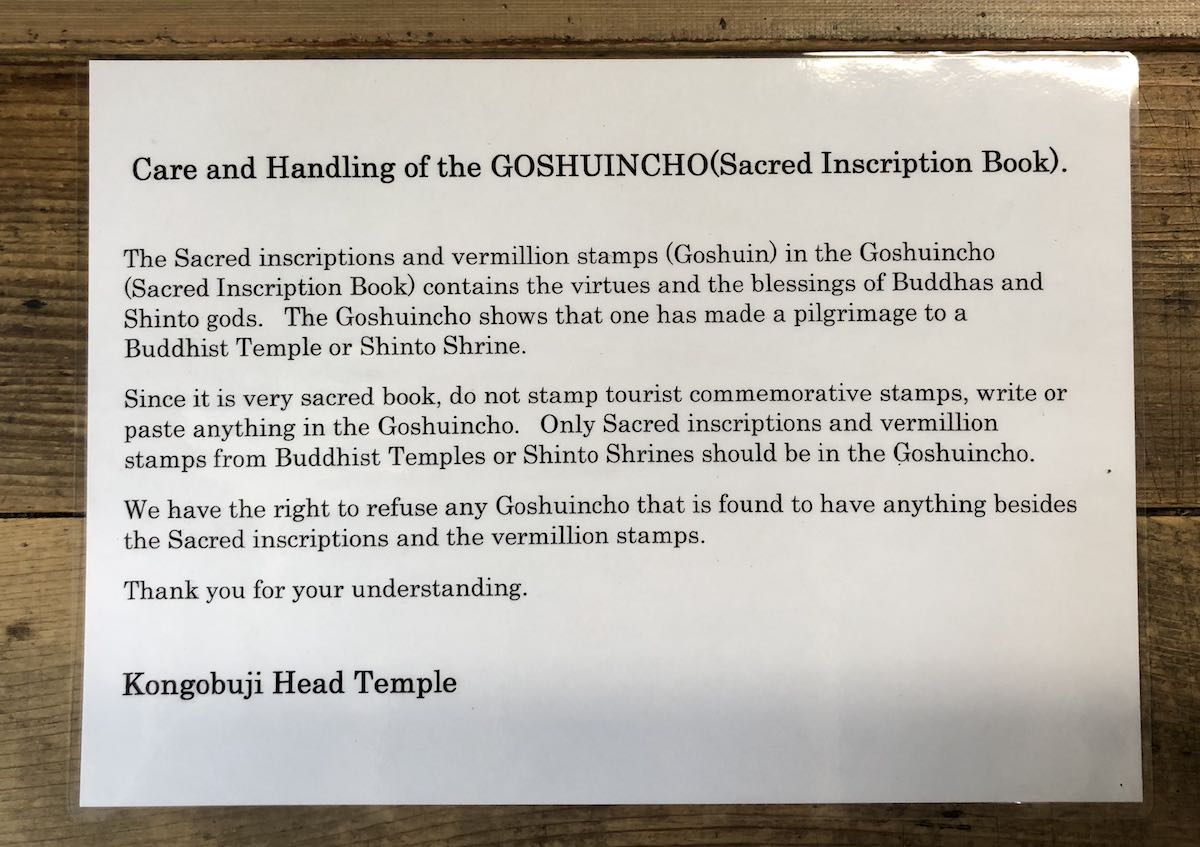
Frankly, the risk of inadvertently forgetting and stamping a tourist stamp in your Goshuincho is high enough that my recommendation is to just not bother with anything but Goshuin.
Etiquette
In BC, Canada, where I’m from, we have lots of ferries. On the ferries between Victoria and Vancouver, you can pay $12 to go to a place called the Seawest Lounge, where for 90 minutes you are surrounded by quiet people with good manners. Here, excessive noise is discouraged. You’re supposed to have your phone in silent mode, and if you want to have a phone conversation, you step outside. Here there are no screaming children, and if children do make noise, the parents actively try to quiet them.
In Japan, this is just expected behaviour, on every subway, train and bus. People just have better manners.
Kabuki and Other Performances
In BC, you can occasionally pay to temporarily be in a civilized place. However, not even our movie theaters or actual live performance venues are civilized. Literally, people noisily eat during musicals, munching and crunching their way through a heartfelt solo. We truly are barbarians.
In Japan, the rule for a performance is simple: don’t disturb other people. So, for Kabuki, this translates into the following specific rules during the performance: no eating, no drinking, no leaning forward (you’d obstruct the view of the person behind you), no plastic bag rustling and no usage of phones.
Can you see why I love Japan?
Shoes
Take off your shoes whenever you go into a temple, shrine or castle. You can’t really get this wrong, since there are attendants ensuring that you do this. Typically you either store your shoes in a shelf at the entrance, or you carry them around in a plastic bag.
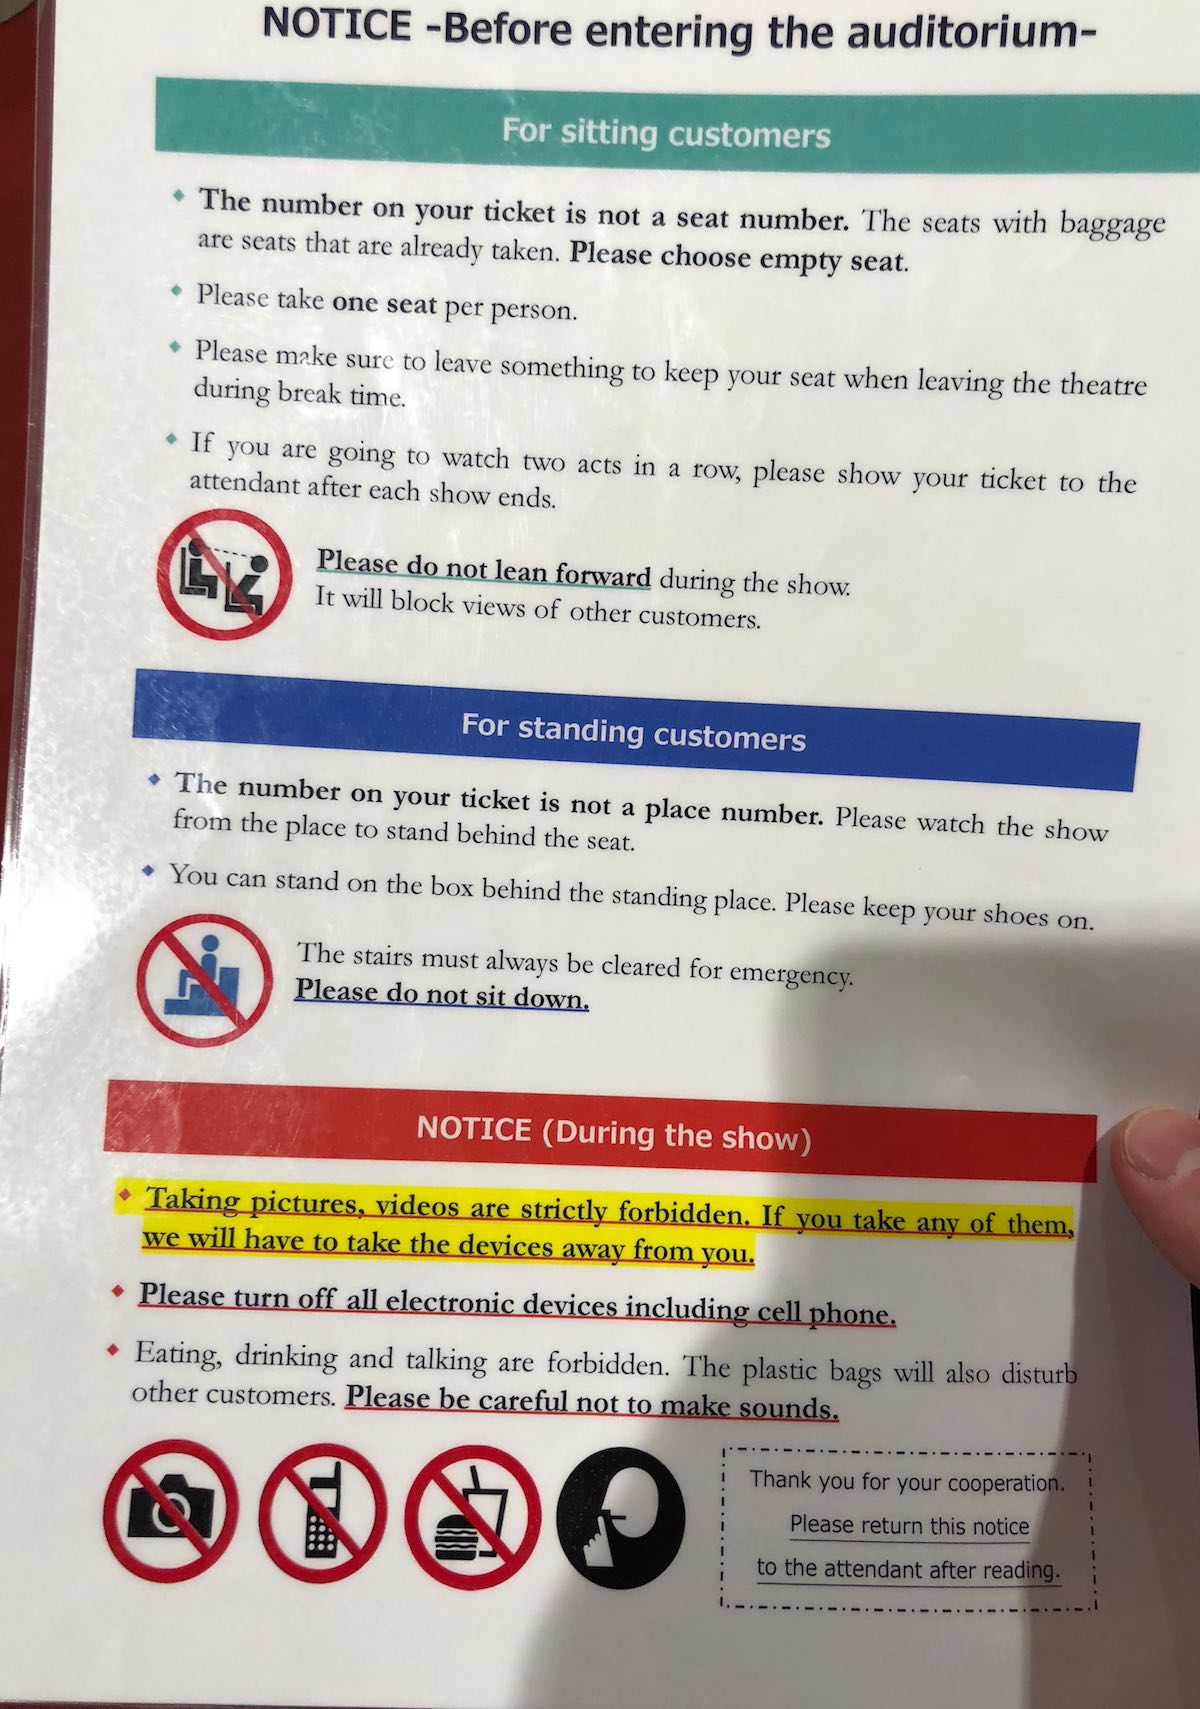
Eating and Drinking
Eating and drinking while walking or on subways is frowned upon. The Japanese don’t do it. As a foreigner, be aware that if you do, you are violating their rules. (That said, you can get away with the occasional sip of water or possibly iced coffee.) Eating and drinking on proper trains (e.g. Shinkansen) is fine, if you’re seated. There is a tray table, and even people selling food and drinks.
Talking Loudly
Don’t talk loudly on subways and trains. There are even posters asking you to not do this.
Talking on Mobile Phones
Don’t talk on your mobile phone on the subway or train. If you are called, get off the phone in a couple sentences.
Chopsticks
There are two key rules here:
- Don’t stand chopsticks up in your food.
- Don’t use chopsticks to hand food to other people
Both of these are reminiscent of funeral rituals, so they’re taboo.
Nose Blowing
Nose blowing in public is rude, and a handkerchief is considered disgusting. So, get tissues, and blow or dab your nose as privately and quietly as you can, if you must.
Communicating Without Speaking (Much) Japanese
This chapter is not a phrasebook. Instead, the goal of this chapter is to explain how to communicate with the Japanese people, while speaking virtually no Japanese.
So, it’s not a phrasebook, it’s a playbook.
That said, there are a handful of words or phrases you absolutely need. First, however, I’m going to teach you how to pronounce Japanese essentially correctly without understanding any Japanese. This way, when you read the phrases, you can pronounce them to yourself, and then see the pronunciation afterward.
Japanese is written with three types characters: Kanji (adopted Chinese characters with differences), Hiragana (the phonetic alphabet), Katakana (a pointier version of the phonetic alphabet, which is used for foreign words). As a tourist, you don’t really need to know any Kanji, Hiragana or Katakana. And even if you do know a handful, unless you know all the Hiragana and Katakana, chances are you’ll be functioning as though you know nothing.
You do, however, need to know how to read Japanese words which you see written using the western (Latin) alphabet. This way of writing Japanese is called Romaji, meaning “Roman letters”. There isn’t even one Romaji standard, however! There are more than 3 of them. However, as a tourist, it doesn’t really matter: all you need to learn is how to read the one which Google maps uses.
Pronouncing Japanese (Romaji)
So, even if you don’t understand any Japanese, you can still speak Romaji correctly enough, if you follow a few simple rules.
Pronounce the Vowels Correctly
First and foremost, pronounce the vowels correctly. This is so important. If you get this right, you will probably be understood; if you get it wrong, you won’t.
Here’s the short version of how to pronounce the vowels. Unlike English, the pronunciation of vowels does not change!
- a
- like the a in “ah”
- e
- like the e in “get” or “meh”
- i
- like the vowel sound in “meet”, but shorter.
- o
- like the letter o in “go”
- u
- like “ooh”, but shorter
(Yes, i sounds like e, and e doesn’t.)
If you pronounce the vowels this way you’ll basically be fine as a tourist, but since this is so important you should see this great four minute video for the proper way.
Other Stuff
- Most syllables are consonant + vowel pairs. So, Takeda is
tah-keh-dah. - Some syllables are two consonants + a vowel. So, ichi is
ee-chee. - Sometimes there’s an n by itself. If so, just stick in onto the previous sound, without modifying how the vowel sounds. So, gomen is
go-menand konnichi wa iscone-knee-chee-wah. - Sometimes there’s an i following an a at the end of a word. If so, just modify the a to sound like the letter i. So, hai is pronounced
hi(but with a breath) notha-eh. (It’s actually hard to write how to pronounce hai, as it takes a bit longer thanhi; see the example in this video for the correct way.) - Some words end in su. This almost always sounds like
ss. So, desu (meaning is) is pronounceddeh-ssnotdeh-sooh. - Sometimes there’s an i following a syllable in the middle of a word. If so, just pronounce it normally. So, gozaimasu is pronounced
go-zah-ee-ma-ss - Japanese has particles (things like ka, wa, ga, o) which serve grammatical functions in a sentence, but Japanese does not have stress. So don’t over-emphasize one syllable in a word like you would in, say, English.
If you are really motivated and want to do better than this, use Duolingo and start with learning Hiragana. Then when you read the Romaji on your phone, you’ll be thinking in the syllables.
Finally, for a fun video on how to pronounce Japanese car company names, see this.
The Absolute Minimum Set of Words or Phrases You Need
While you can visit Japan not knowing any Japanese, it really helps to know these eight words or phrases.
-
wakarimasen (
wah-kah-ree-mah-sen) - “I don’t understand.”
-
hai (
hi) - “Yes.”
-
iie (
ee-yeh) - “No.” Note that this is often too direct, but you’re a foreigner, so just use this.
-
arigato gozaimasu (
ah-ree-gah-toe-go-zah-ee-mass) - “Thank you.” This can be shortened to just arigato, just as thank you can be shortened to thanks.
-
sumimasen (
soo-mee-mah-sen) - “Excuse me.” Note that there are two types of “excuse me”. This type is the version you say when you want someone’s attention.
-
gomen nasai (
goh-men-nah-sai) - “Excuse me.” Note that there are two types of “excuse me”. This type is the version you say when you bump into someone on the train.
-
ohayoo gozaimasu (
o-hai-yoo-go-zah-ee-mass) - “Good morning.” This can be shortened to just ohayoo.
-
konnichi wa (
cone-knee-chee-wah) - “Good afternoon.”
-
konban wa (
cone-ban-wah) - “Good evening.”
For a much more advanced version, here’s a fun video of the top 25 must-know phrases.
What Are They Saying?
-
irasshaimase (
ee-rah-she-mah-say) - “Welcome to my shop!” (This is typically said or yelled by the staff when you go into certain types of restaurants and stores. You don’t say this–it’s not your shop, it’s theirs! Just smile and nod.)
- … ka?
- They are asking you a question. The “ka” by itself is a particle, and this one serves as a question mark. If you can reason about what they are saying, you may be able to answer somehow. If don’t have a clue, just say wakarimasen, and the person may try English.
Advanced Phrases
-
yoroshiku onegaishimasu (
yo-ro-she-koo-oh-neh-gai-she-mass) - Please treat me well. This can be shortened to yoroshiku. See this great article.
Google Maps and Google Translate
First of all: you absolutely need Google Maps. This means you should just get a data plan with your carrier which handles Japan travel, before you go. There may be ways to get local SIM cards and stuff, but I’ve never tried them. The point is: you need a data plan which can handle frequent use of Google Maps, and occasional use of Google Translate.
Assuming you have Google Maps and a data plan, you can get places.
How to Ask for Things Without Speaking Any Japanese
Telling Your Taxi Driver Where To Go
Japanese taxi drivers don’t speak English. However, this shouldn’t stop you from using taxis. (The main reason to not use taxis is money, not communication.)
First, if you are getting a cab from somewhere with a valet running a taxi stand (say from a nice hotel), then what you do is just tell the valet who is running the taxi stand where you are trying to go (in basic English), and give them your phone. They will talk to the driver for you, showing them where you are trying to go on your phone. They’ll then hand the phone to you or the driver, who will hand it to you. Then you’re set!
Now, assuming this is not the case, getting where you want to go is reasonably easy.
- Get into the taxi.
- Say your destination clearly, using the pronunciation rules you just learned.
- If the driver understands, you’re set. If not, just search for your destination in Google Maps with car directions selected, and hand the driver your phone with the route view visible. They will be able to pan, zoom, etc., and typically figure it out. If not, then just take your phone back and do a better job pronouncing the destination! Or, find some nearby landmark and pronounce that.
Asking Questions Just With Nouns
The reason that this is in the Communicating with the Japanese chapter is that lots of communicating can be reduced to saying a place name that you are trying to go to, in the form of an intoned question.
For example, you can say “sumimasen” to get someone’s attention, and then point at a train and say “Yamadera?”, and the intent of “Is this the train to Yamadera?” is clear. In fact, it will be more clear to the Japanese person than if you said “Is this the train to Yamadera?”, since there are no English words to listen to!
Itinerary Advice
The rest of this book contains very brief information on trip length, hiking, temples and shrines, castles and gardens, kabuki and bunraku, onsen, museums, and festivals. In a typical guidebook this type of information would be the bulk of the book–but this is not a typical guidebook. These sections are absolutely not trying to be comprehensive. Instead, they are focused on highlighting the subset of these which I have enjoyed the most, and pointing you at places to learn more.
I will also completely ignore those sights which may be less enjoyable or worthwhile than others. (This way, I don’t have to say anything negative about them.) I put a lot of work into planning my two Japan trips, but still, some things are more accessible to the foreign visitor than others. For example, if you go to a museum and 98% of everything is only written in Japanese, chances are you shouldn’t have gone to that museum.
Trip Length
You really should spend at least 2 weeks in Japan, even if you’re travelling with kids. Probably the best trip length for your first trip to Japan is 3 weeks, plus or minus a few days. Once you’ve done all your research and built an itinerary, chances are it will fall in that range.
1 Week Version: Pick Either Tokyo or Osaka as a Base
For a one week trip to Japan, the best thing to do is to base yourself in either Tokyo or Osaka. If you go to both, you won’t have enough time in either, and probably just wish you had just picked one.
Tokyo Version
If you’re based in Tokyo, you don’t need a JR pass. Chances are you’ll spend the entire time in Tokyo, with a day trip to Nikko. Or you may include Mount Fuji, if you have two days for it.
Osaka Version
If you’re in Osaka, you want a JR pass–regardless of whether you are flying in to Tokyo (either to Haneda or Narita) or are flying directly into Osaka to Kansai International Airport. This is because Osaka is a great base for day trips. If you’re doing this, get a hotel room as close as possible to Shin-Osaka station, since that way you’ll minimize travel time to and from the station. I’ve stayed at the Courtyard Shin-Osaka Station for 5 nights in 2018: the staff are friendly, the breakfast buffet is good and you are literally attached to the train station via an walkway (right by the McDonalds and a French-style patisserie).
Here are approximate times from Shin-Osaka station to various places that you can do as a day trip. You can search on Google Maps (easiest), or you can search on HyperDia to exclude Nozomi and Mizuho Shinkansen (since those aren’t included in the JR pass):
- Kyoto: 12 minutes (Shinkansen)
- Himeji: 29 minutes (Shinkansen)
- Nara: ~1 hour (Osaka Metro Midosuji line to Tennoji [15 minutes], JR Yamatoji line to Nara [34 minutes])
- Miyajima: ~3 hours (90 minutes to Hiroshima via Shinkansen, then 28 minutes to Miyajimaguchi, then a JR ferry which takes about half an hour)
- Ise: ~2.5 hours (Osaka Metro Midosuji line to Namba Station [14 min], JR to Iseshi Station [2 hours])
Note that anything involving transfers can have variable times when making those transfers, so going to Nara can take 90 minutes, and going to Ise can take 3 hours. When I went to Ise, I was staying in Nagoya, not Osaka. Ise is just under 2 hours from Nagoya.
2-3 Week Versions
Probably the best thing to do is to spend 5-7 days in Tokyo, then travel to your other destinations, before arriving back in Tokyo and flying home.
I think the one true itinerary for your first trip to Japan, as long as it is at least two weeks, is the following:
Tokyo ⇒ … ⇒ Kyoto ⇒ Osaka ⇒ … ⇒ Tokyo
It’s most convenient to fly in and out of Tokyo, and you will want to visit Tokyo. If there are no specific events which add constraints to your schedule, you should front-load Tokyo at the beginning of the itinerary, instead of the end.
These other destinations should definitely include Kyoto and Osaka. If I had a week inside a 3 week itinerary for Kyoto and Osaka, chances are I’d spend 3 nights in Kyoto and 4 nights in Osaka. This way, I’d do my Kyoto sights while based in Kyoto (makes sense!), and I’d use Osaka as the base for day trips. Also, Osaka is really fun, especially after a few days of temples and shrines in Kyoto.
What you put in the … part is, of course, up to you! Hopefully the next pages give you some ideas. Also, if you’ve read this far, you’ll probably also want to read Lonely Planet’s Japan for more ideas…
Hiking
Some of my best experiences in Japan have been hiking. Obviously, there are many great places to hike in Japan. Since this book is Your First Trip to Japan, however, I’m going to just pick four hikes:
- Kurama to/from Kibune via Kurama-dera (a hike to a mountain temple, a half day trip from Kyoto)
- Magome to Tsumago (part of the old Nakasendo route, a day trip from Nagoya)
- Mount Misen, from the base, on Miyajima (the site of the “floating Torii gate”, a day trip from Osaka)
- Mount Fuji, from the base, via the Yoshidaguchi trail (an overnight trip from Tokyo)
On my first trip to Japan, two of the things I discovered were actually about myself: I was really out of shape, and I loved to hike.
By my second trip to Japan I was in much better shape! So, the Kurama to Kibune and Magome to Tsumago hikes are much easier than the Mount Misen or the Mount Fuji hikes! I couldn’t have done either of those on my first trip to Japan, since I wasn’t fit enough.
Depending on your level of fitness, I strongly recommend doing some or all of these four hikes…
Kurama to/from Kibune via Kurama-dera (a hike to a mountain temple near Kyoto)
This is a 4 km hike in the mountains near Kyoto, from Kurama to/from Kibune, via the Kurama-dera temple. For history buffs, Yoshitsune Minamoto spent ten years of his childhood training here. There’s a stone memorial to him along the path.
It’s a great (half-)day trip from Kyoto. You take the Eizan railway from Demachiyanagi station, and get off either at Kurama (last stop) if you’re starting there, or at Kibuneguchi (second last stop) if you’re starting there. The train is not a JR train, so bring your Suica card.
I’ve done this hike in 2016 and 2018, both times as Kurama ⇒ Kurama-dera ⇒ Kibune. If you’re out of shape (as I was in 2016) it’s a fairly difficult hike; if you’re reasonably in shape (as I was in 2018) it’s really pretty easy, more of a walk than a hike.
In 2016, after Kibune I walked down the road toward train station, stopping at a lovely onsen called Kibune Onsen Tenzan no Yu. However, it closed in 2017. In 2018 I just got a bus back from Kibune to the train. There is also an onsen in Kurama, which the Trip Advisor reviews say is very nice. (I haven’t been there, however, so I don’t know.) If you’re going to it, then you want to start at Kibune, hike to the temple, and then end up in Kurama. This would actually be an easier hike, with less uphill climbing. Depending on how in shape you are, that’s either a blessing or a curse. I actually prefer hiking uphill–it’s a better workout, and I find it easier on the knees. (If you have trekking poles, bring them, but they’re not needed.)
One great thing about this hike is that the Eizan railway train runs late, and there’s a stop right at the Kurama end and near enough to the Kibune trail, so you won’t get stranded if you start late or take your time at the temple and onsen. So, you can leave Kyoto in the afternoon to do this hike, this is not a full day event. There are lots of restaurants in Kurama where you can eat right over the river. Bring lots of yen with you, however – in 2016 I wanted to, but I didn’t have enough cash with me.
There’s also a picturesque Shinto shrine in Kibune called Kifune shrine, which is worth a visit either at the start or end of your hike, depending on its direction.
Finally, if you’re scared of critters, there’s a catch-all warning sign for deer, hornets, bears and what look to be two types of snakes.
The following pictures are from my 2016 and 2018 hikes…
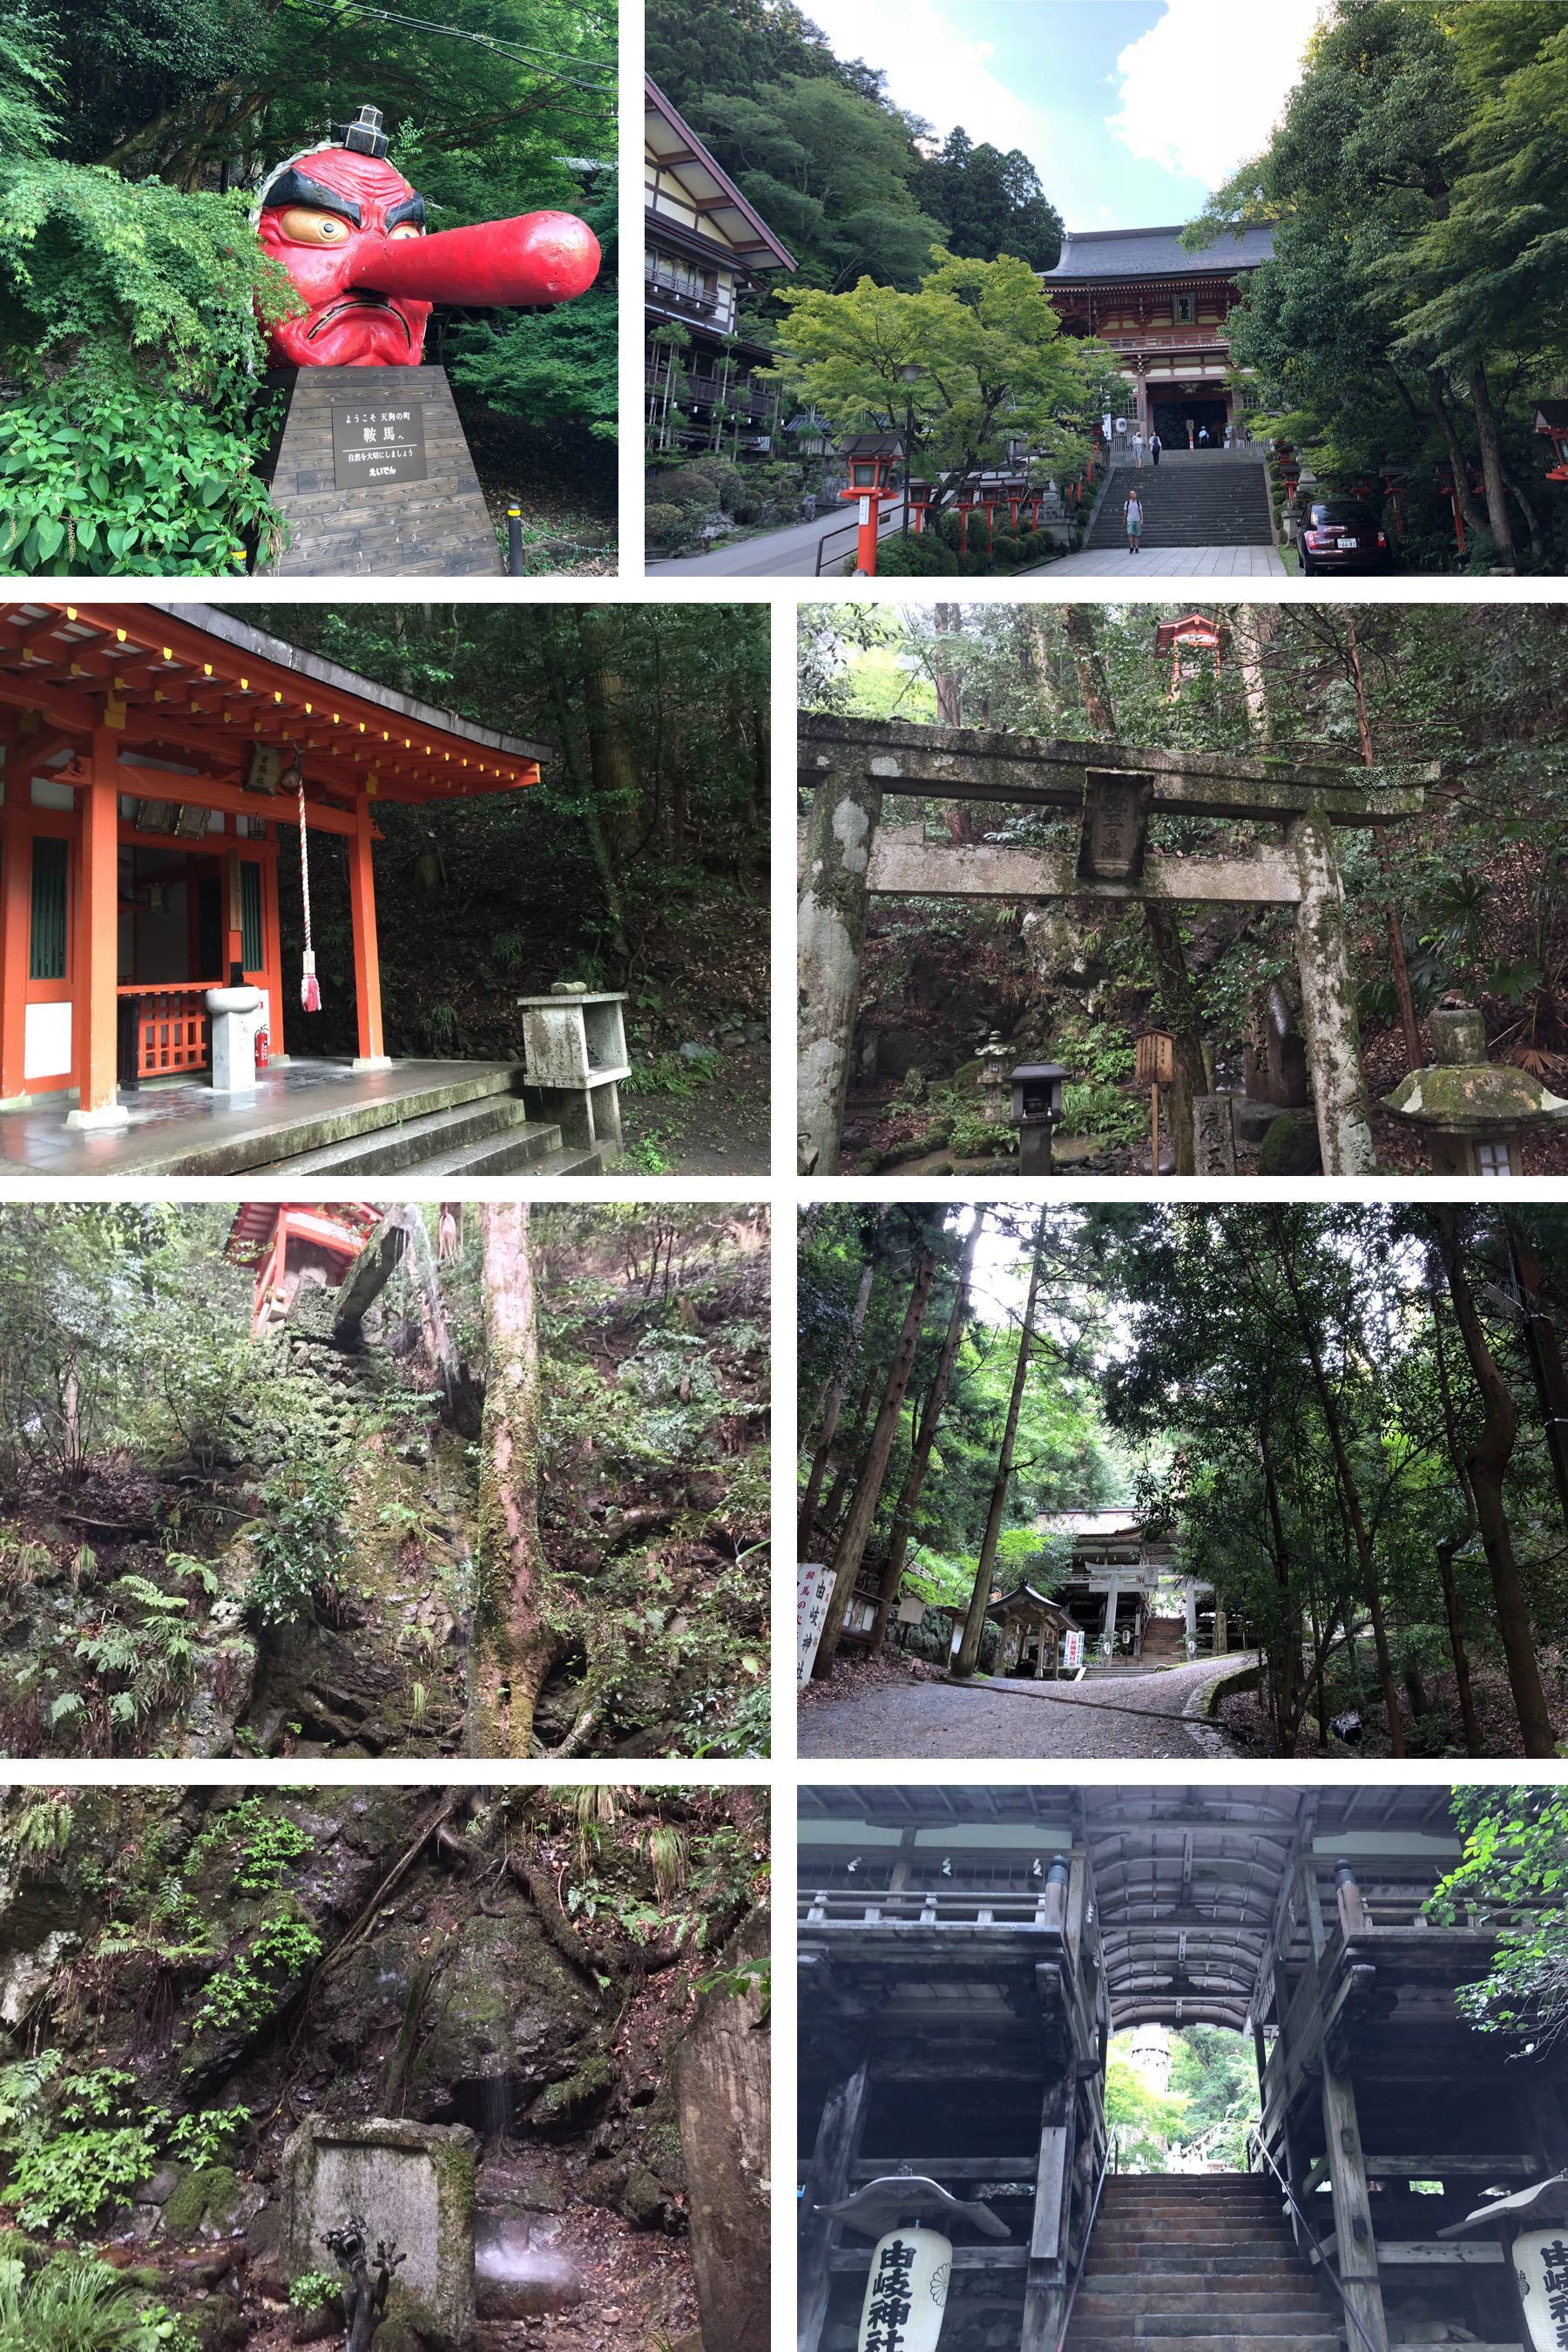
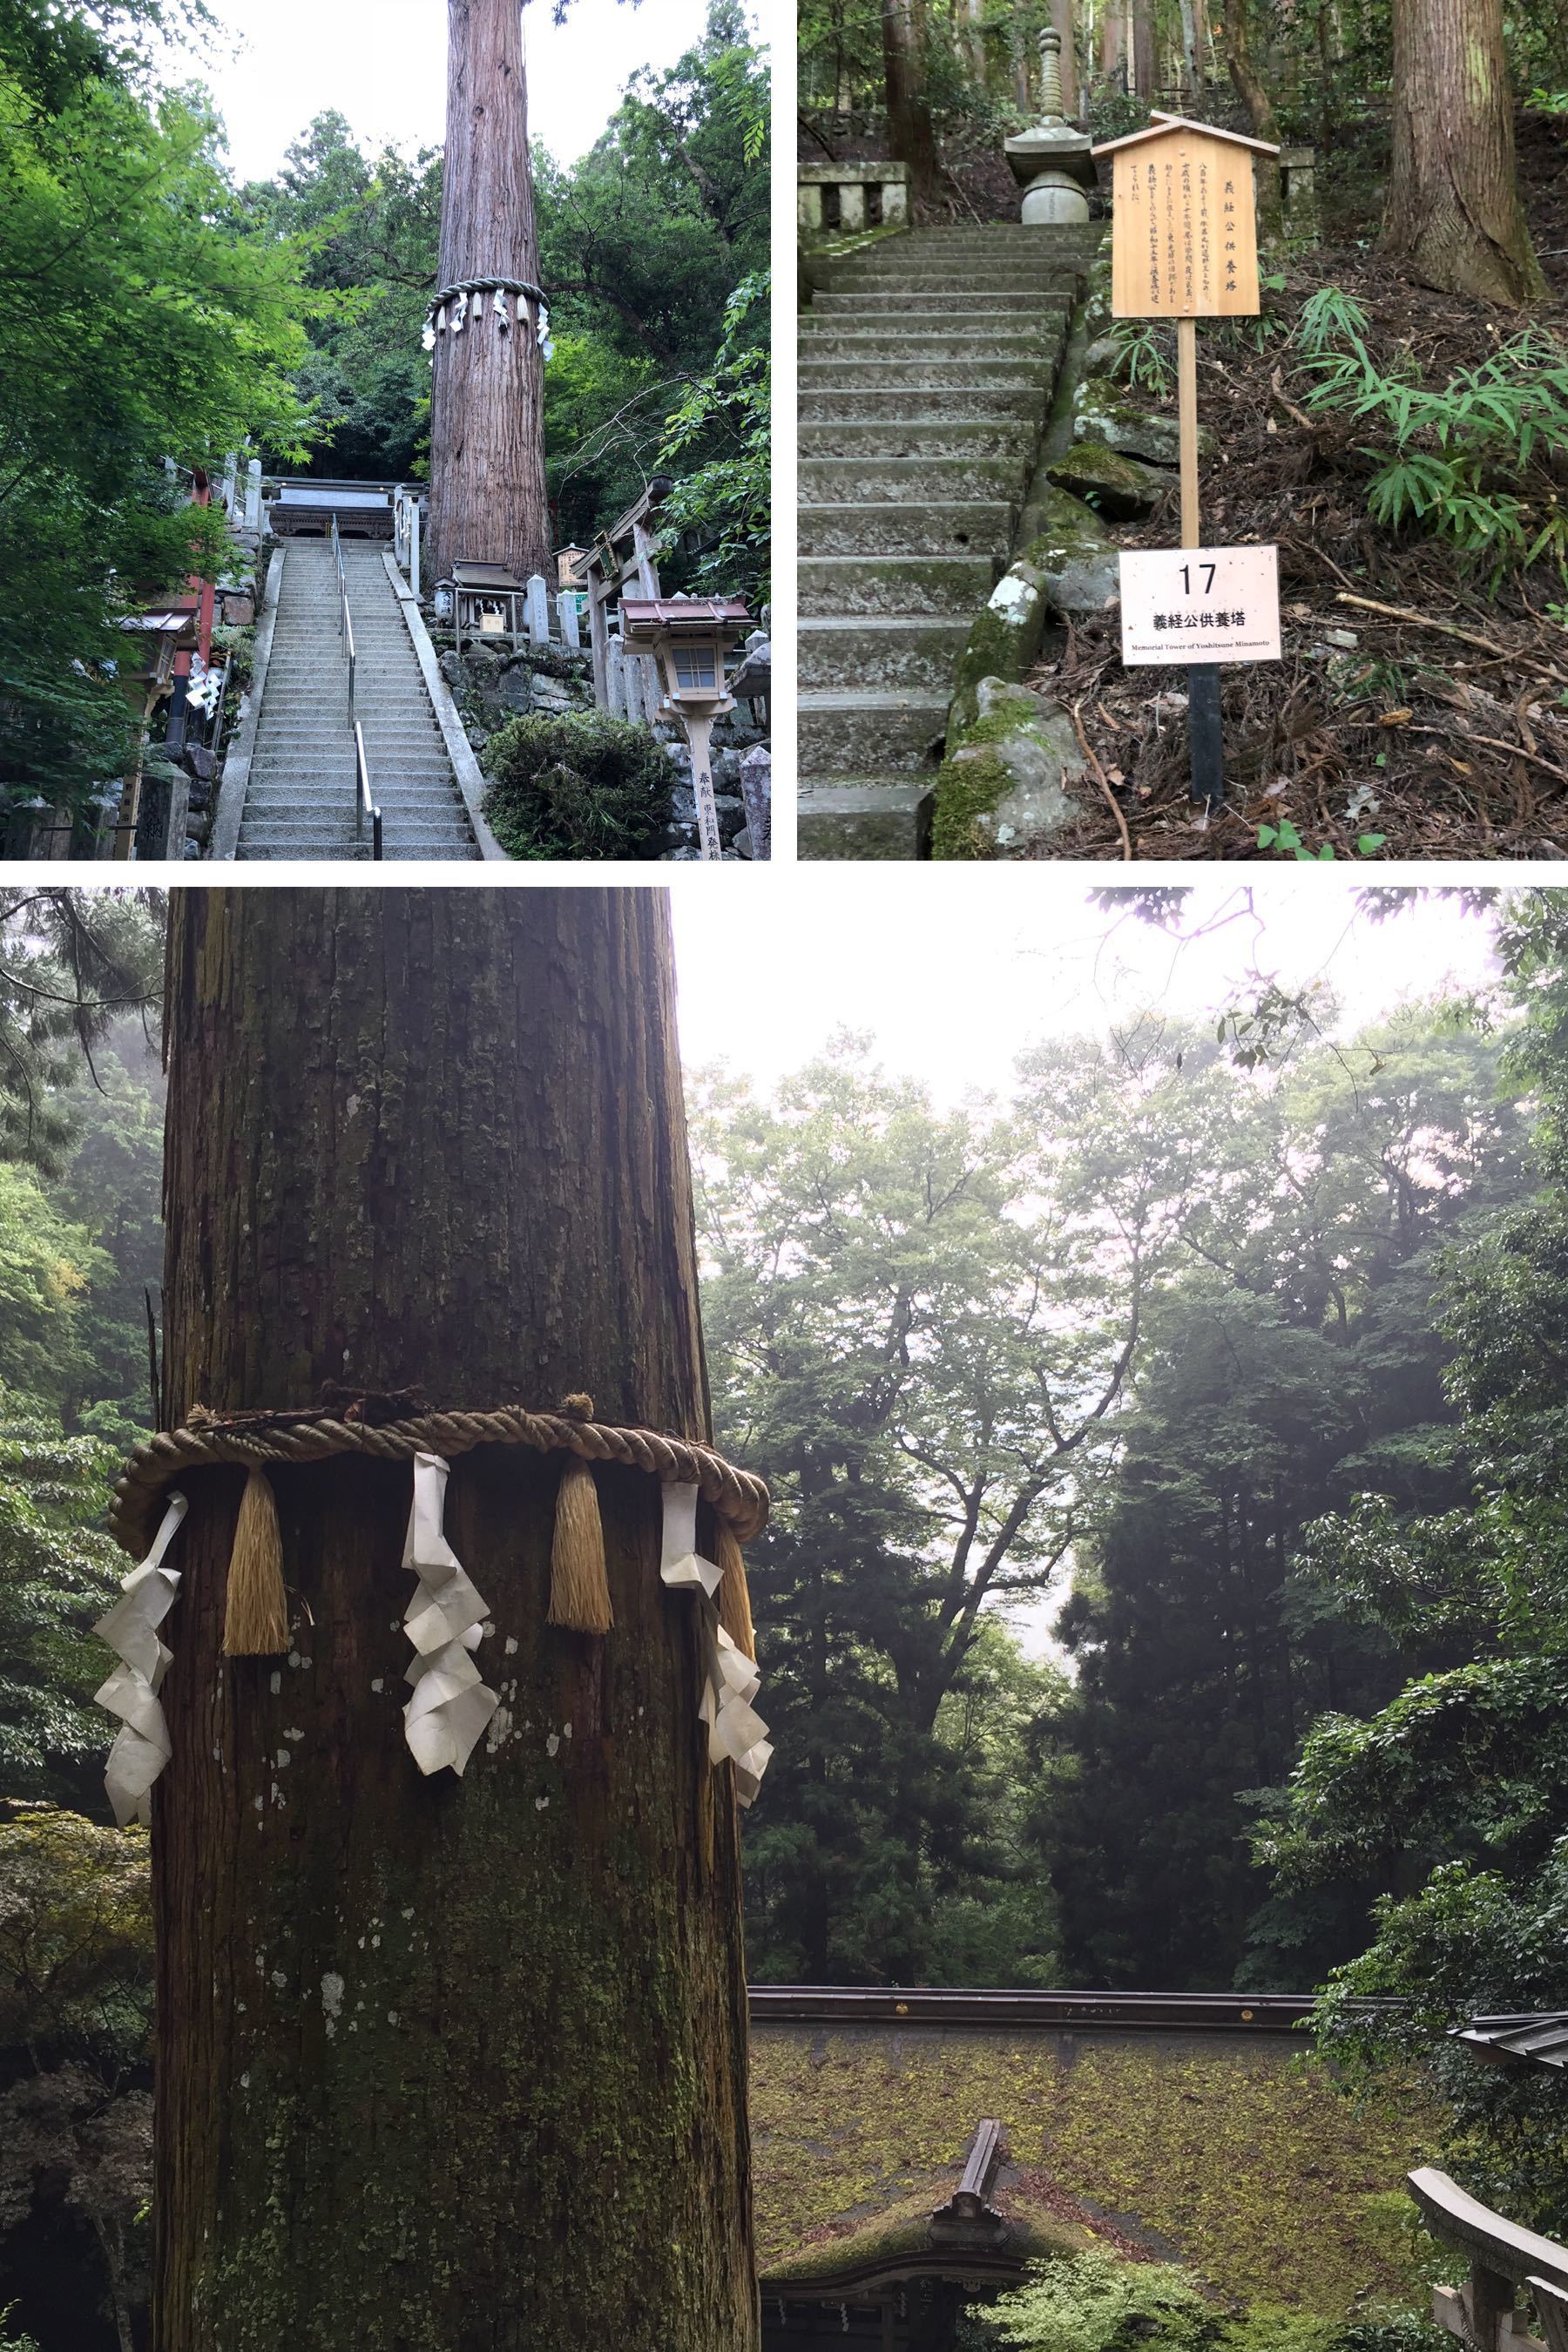
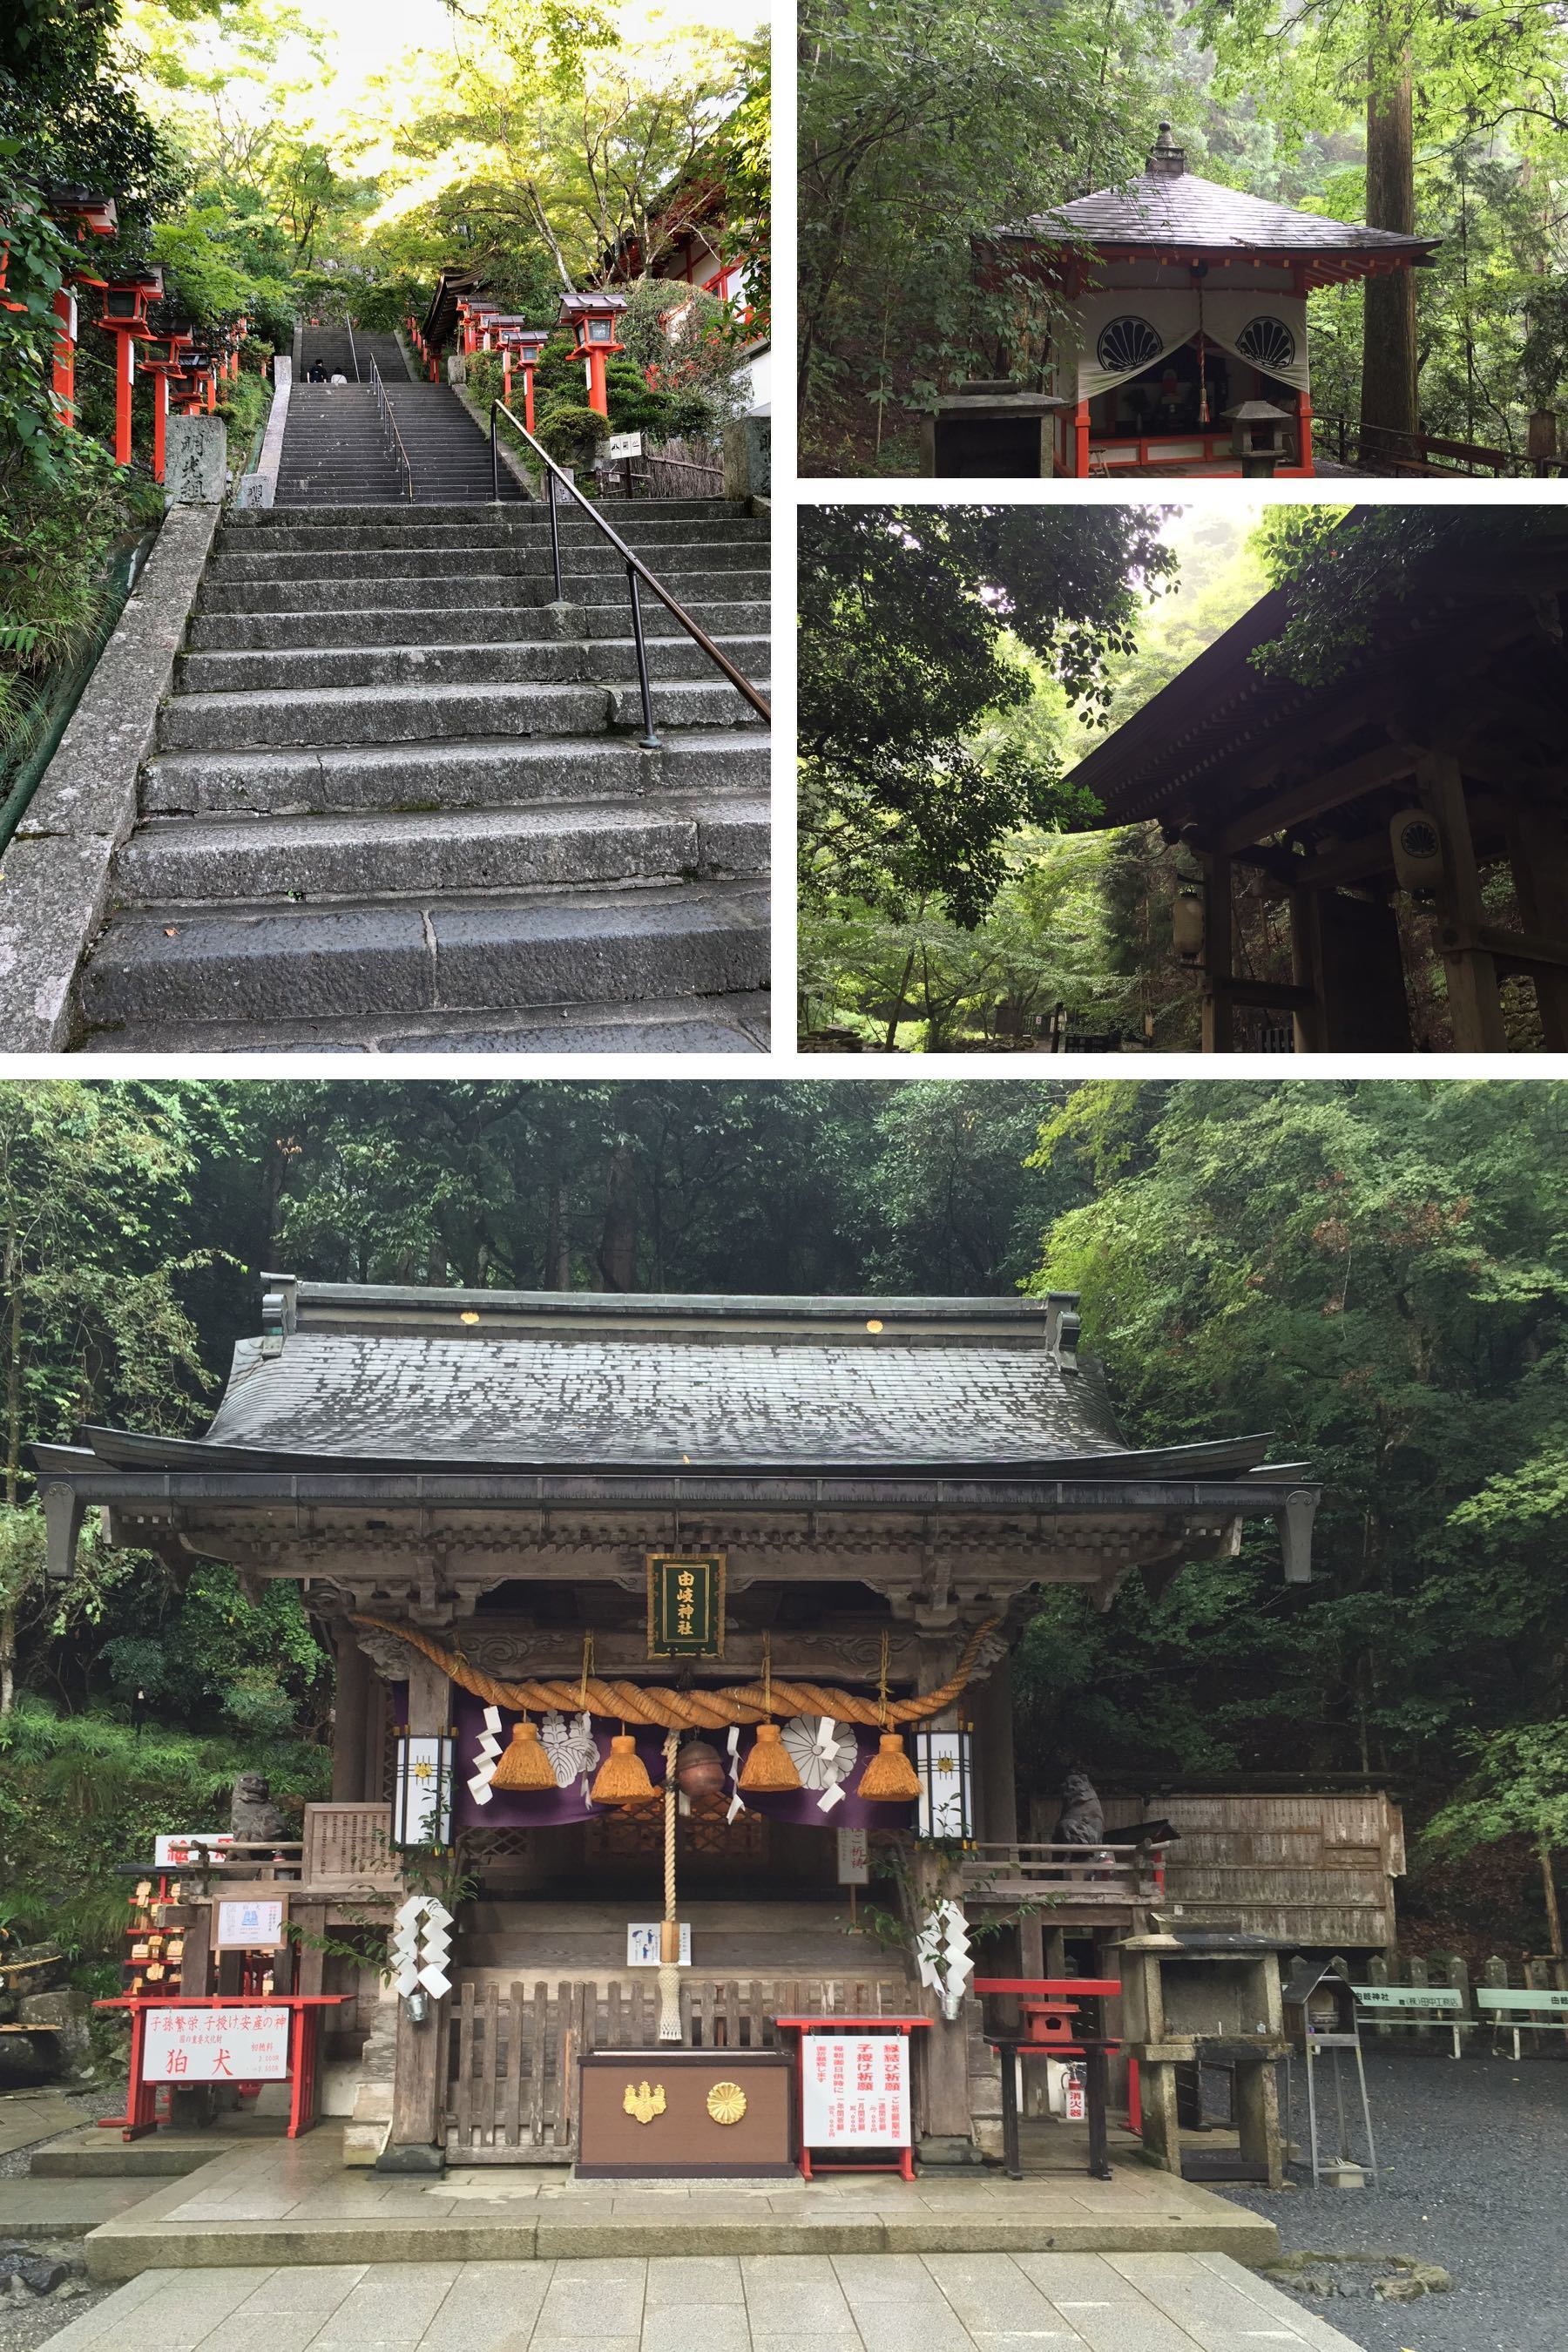
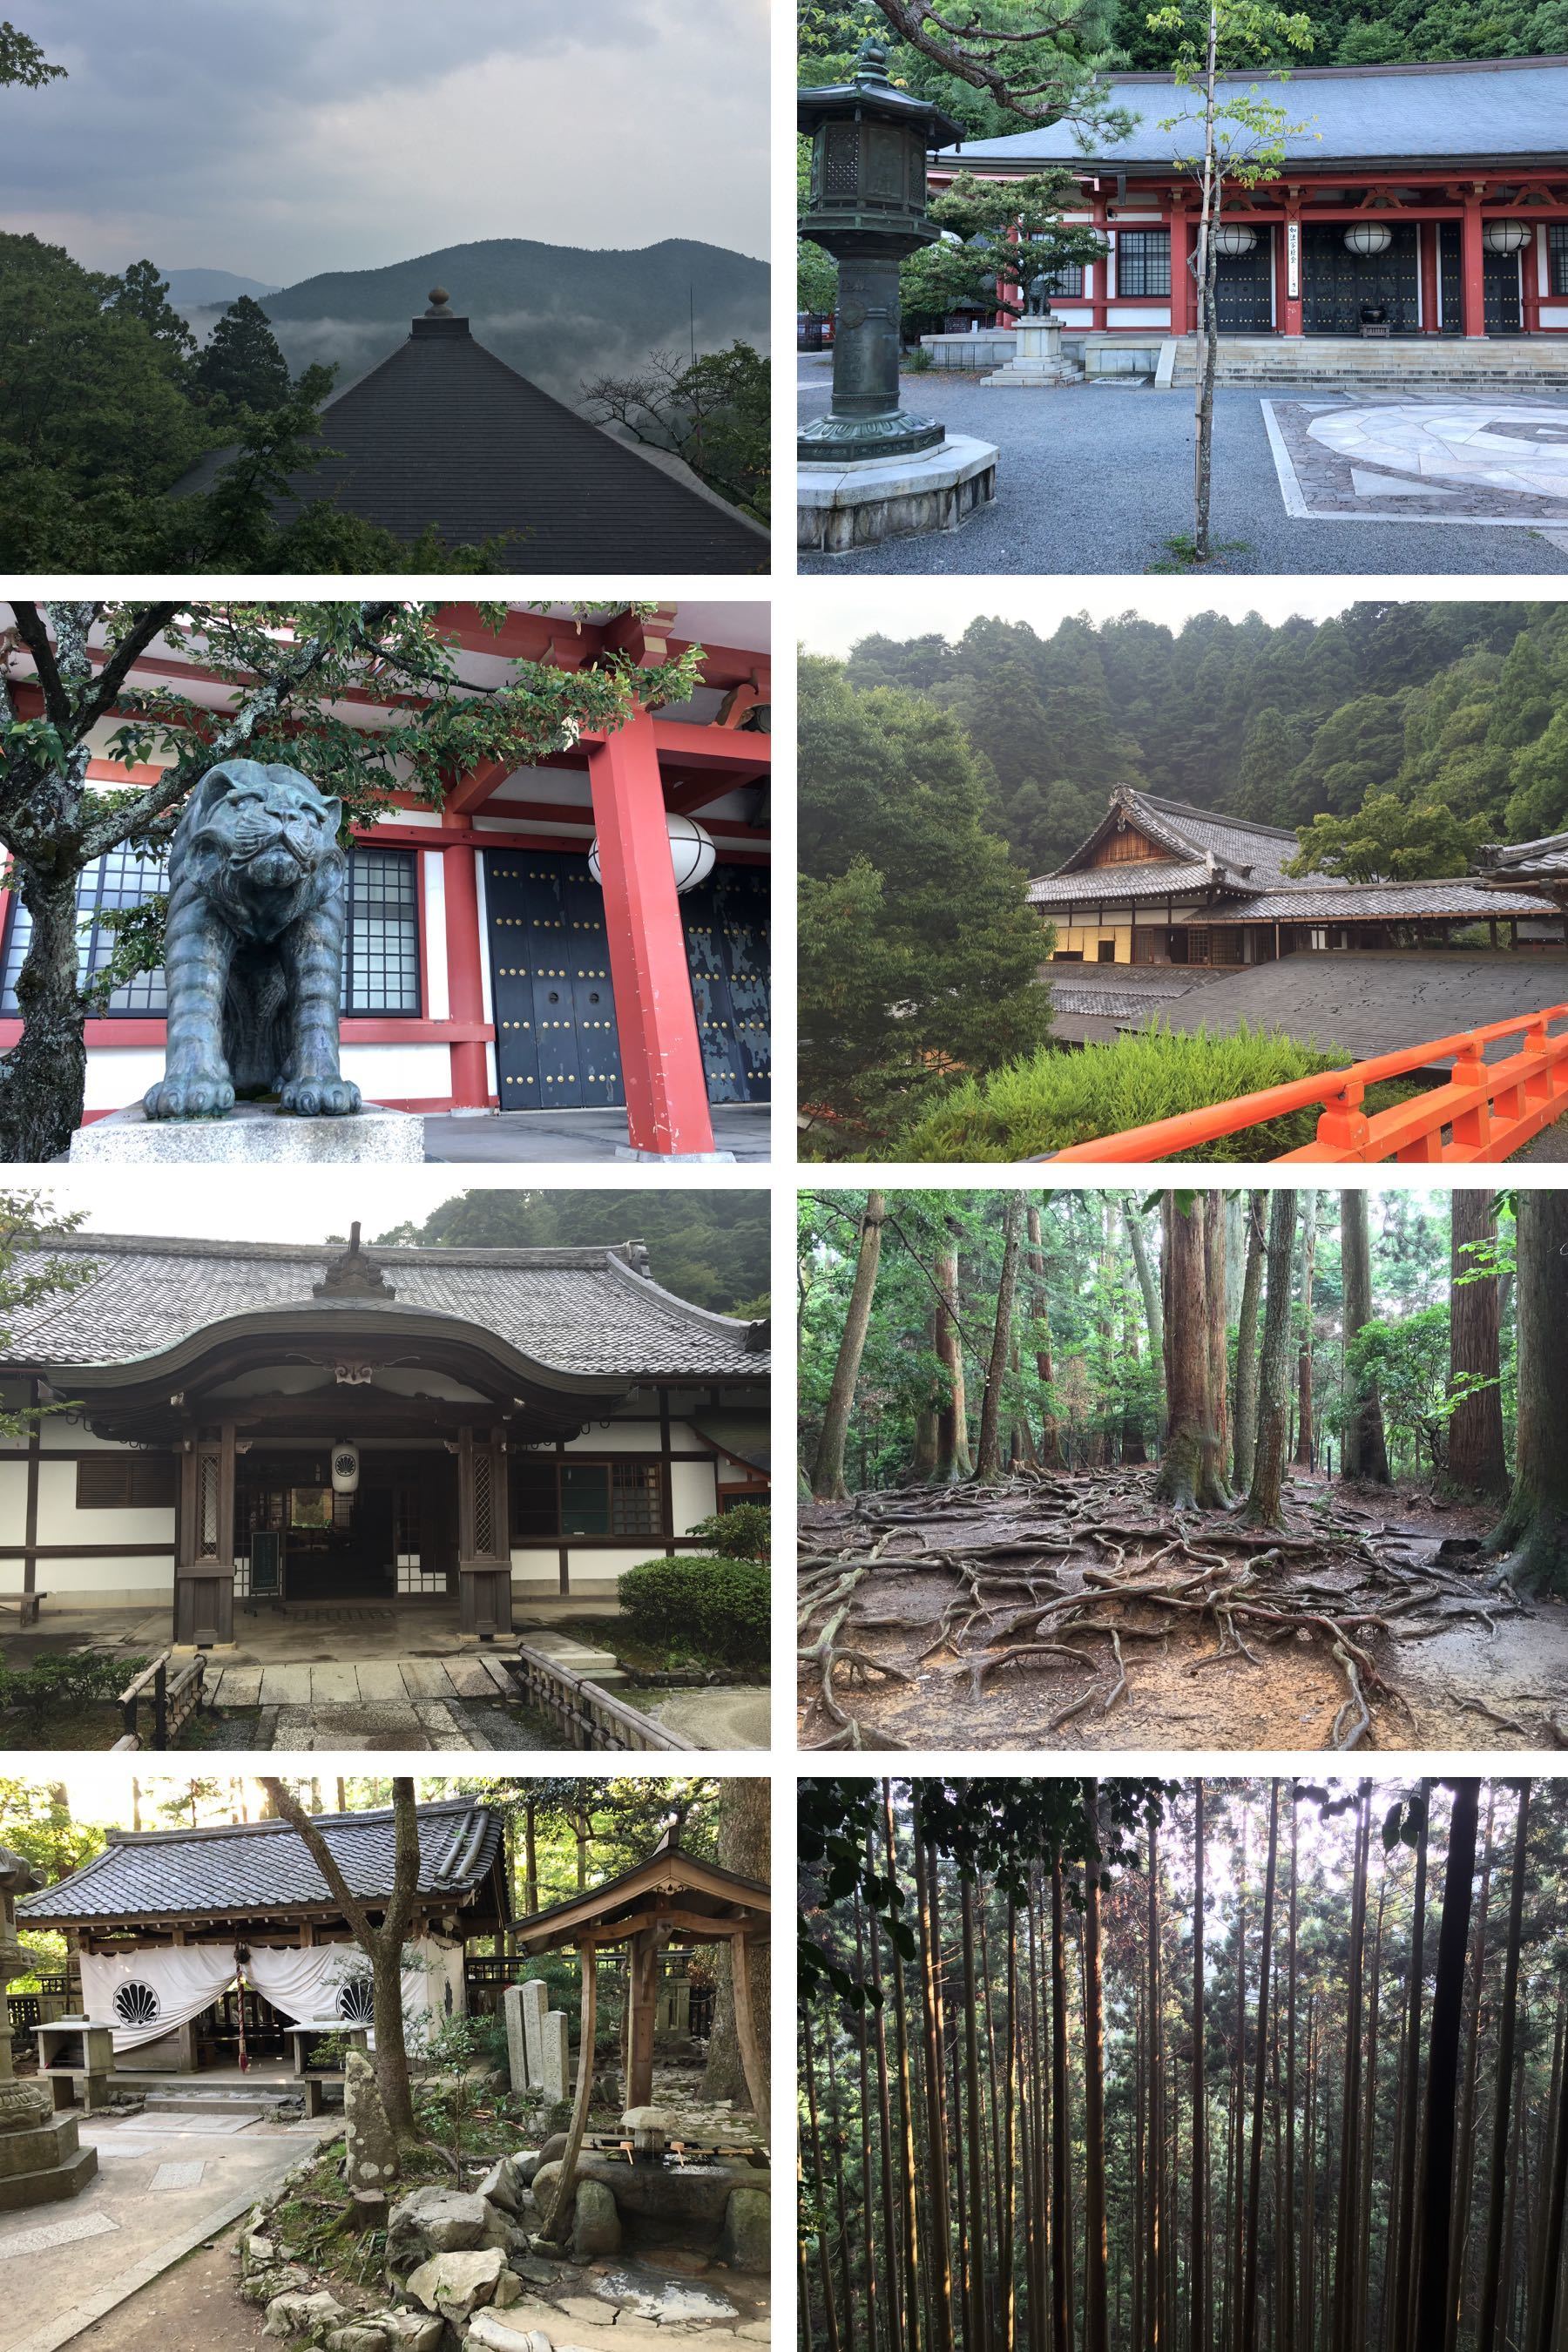
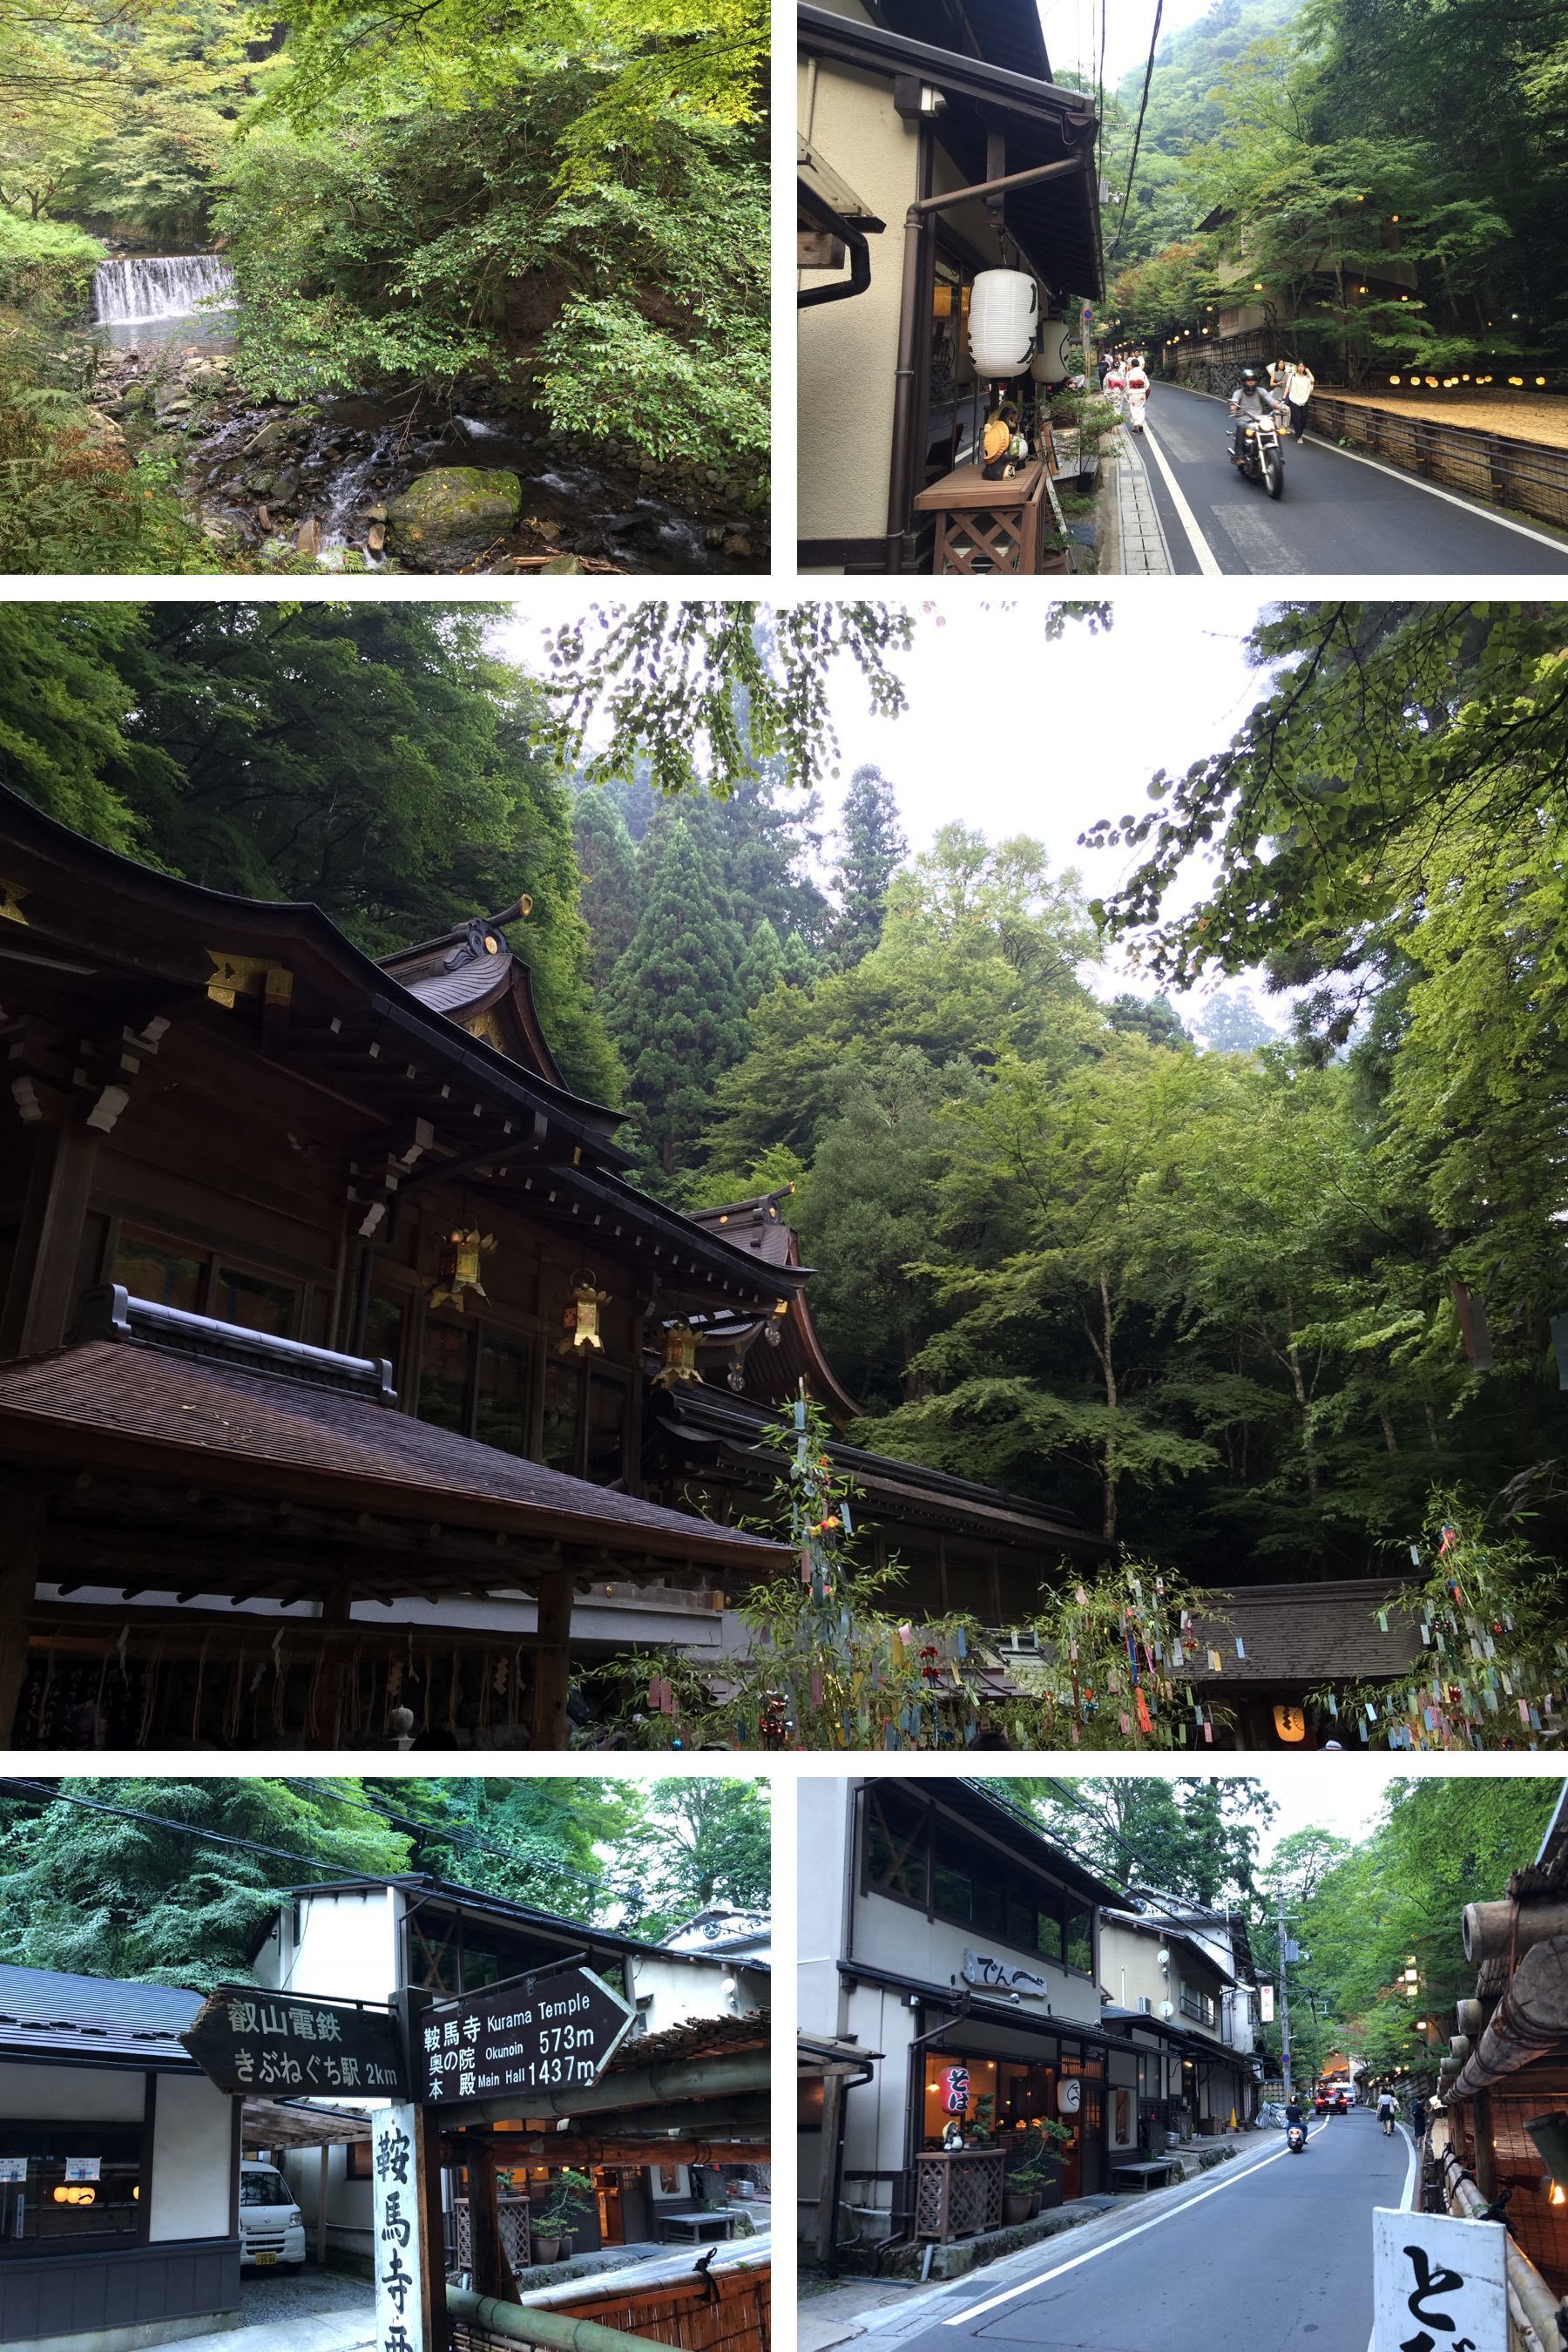
Magome to Tsumago (part of the old Nakasendo route)
This is a relatively easy 8 km hike in Gifu, which is a few hours by train from Nagoya. The reason you’re doing this hike is for the scenery. It was one of the highlights of my first trip to Japan.
It is doable as a day trip from Nagoya, or as a long one from Osaka or Kyoto. I did it as a day trip from Nagoya. From Nagoya, you take the train to Nakatsugawa station, and from there to get to Magome you either take a bus, train or taxi depending on how much time and money you have. You then hike to Tsumago, and catch a bus back. Make sure you check the timetable for Nagiso Station to Tsumago and Magome, since the last bus leaves before 6 PM. If you miss it, you’ll be in a tricky situation!
This hike is part of the old Nakasendo route, which was part of one of the five routes connecting Edo (now Tokyo) and Kyoto during the Tokugawa shogunate. Basically, the Tokugawa shoguns made all the daimyo (regional samurai feudal lords) travel to Edo every other year, to keep tabs on them. (In Europe it’s said that all roads lead to Rome; in Tokugawa Japan, they all led to Nihonbashi in Edo. Of the five routes, the other, more important one was the Tokaido route–the name now used for the Shinkansen which run between Tokyo and Kyoto.)
There are at least a couple of tour companies, Oku Japan and Walk Japan which do 5-12 day self-guided or group walking tours along this route. (I haven’t used either company’s services, but their websites are good!)
Note that this is a hike in a wooded area, and there are warning signs about bears–and you can even ring a dinner bell for the bears to alert them to your presence! (Yes, I know it’s to reduce the risk of startling them.) Finally, the hike is extremely well-signposted, but bring an iPhone or Android phone so that you have Google Maps to get to the start…
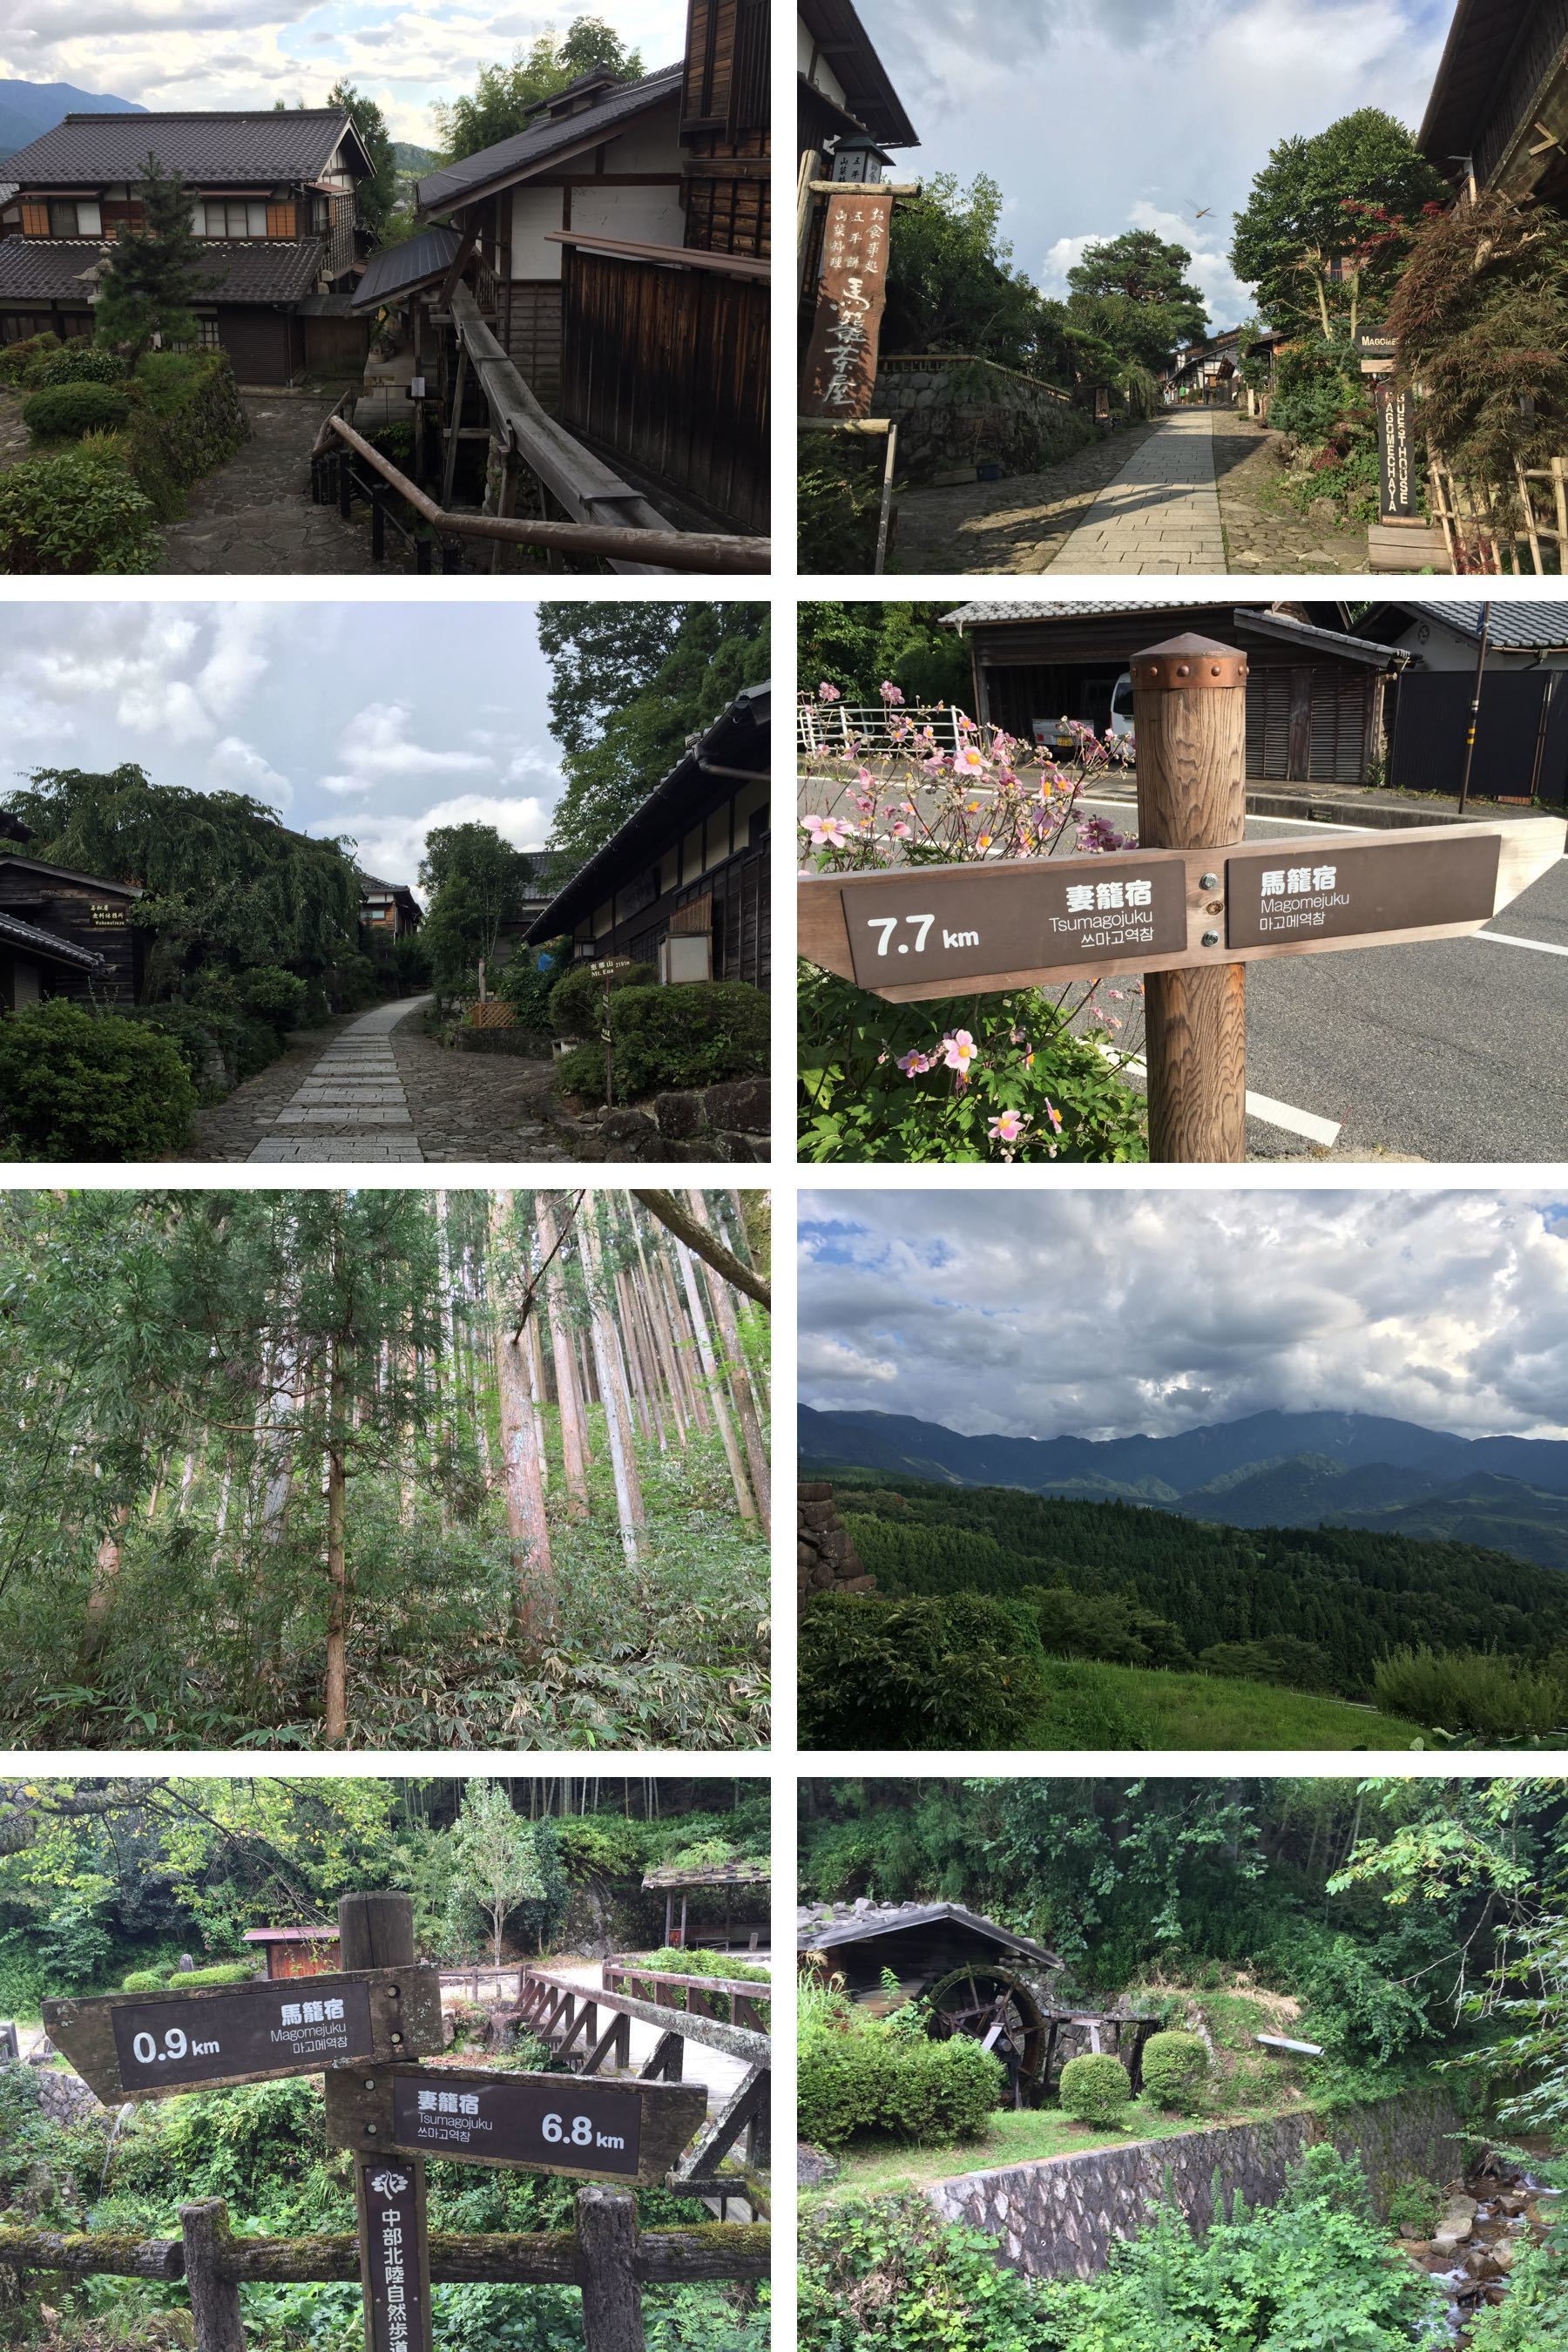
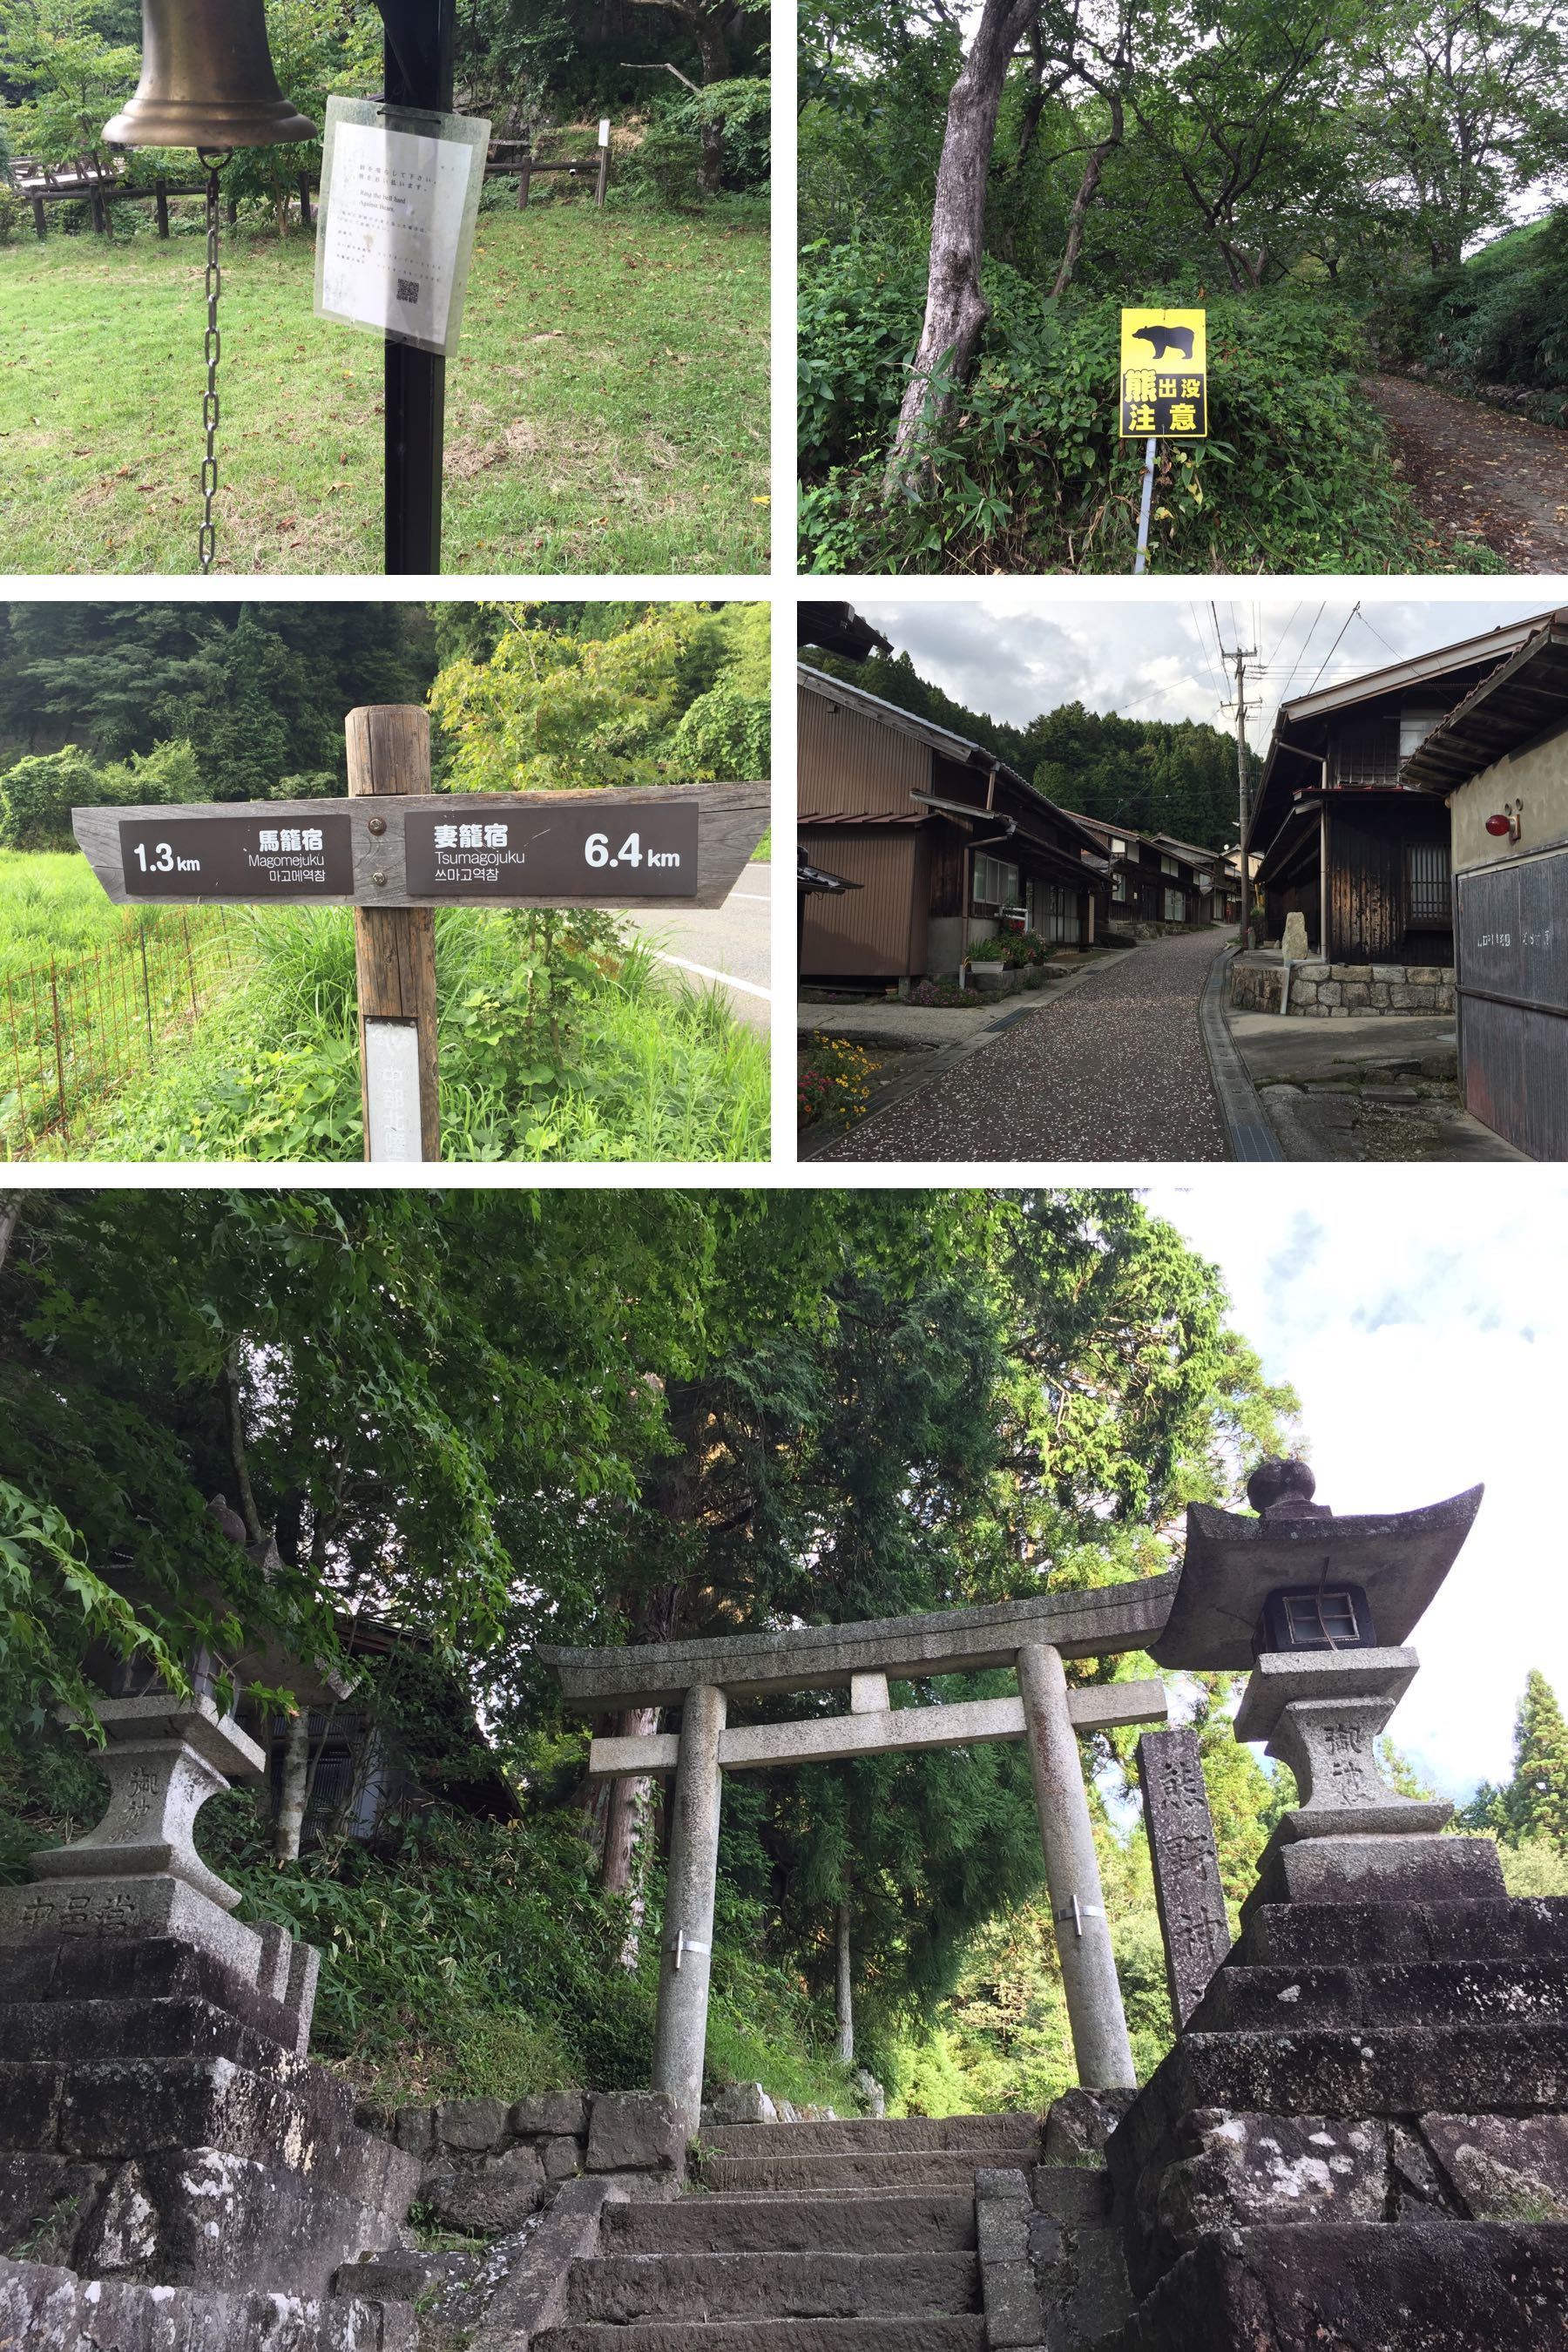
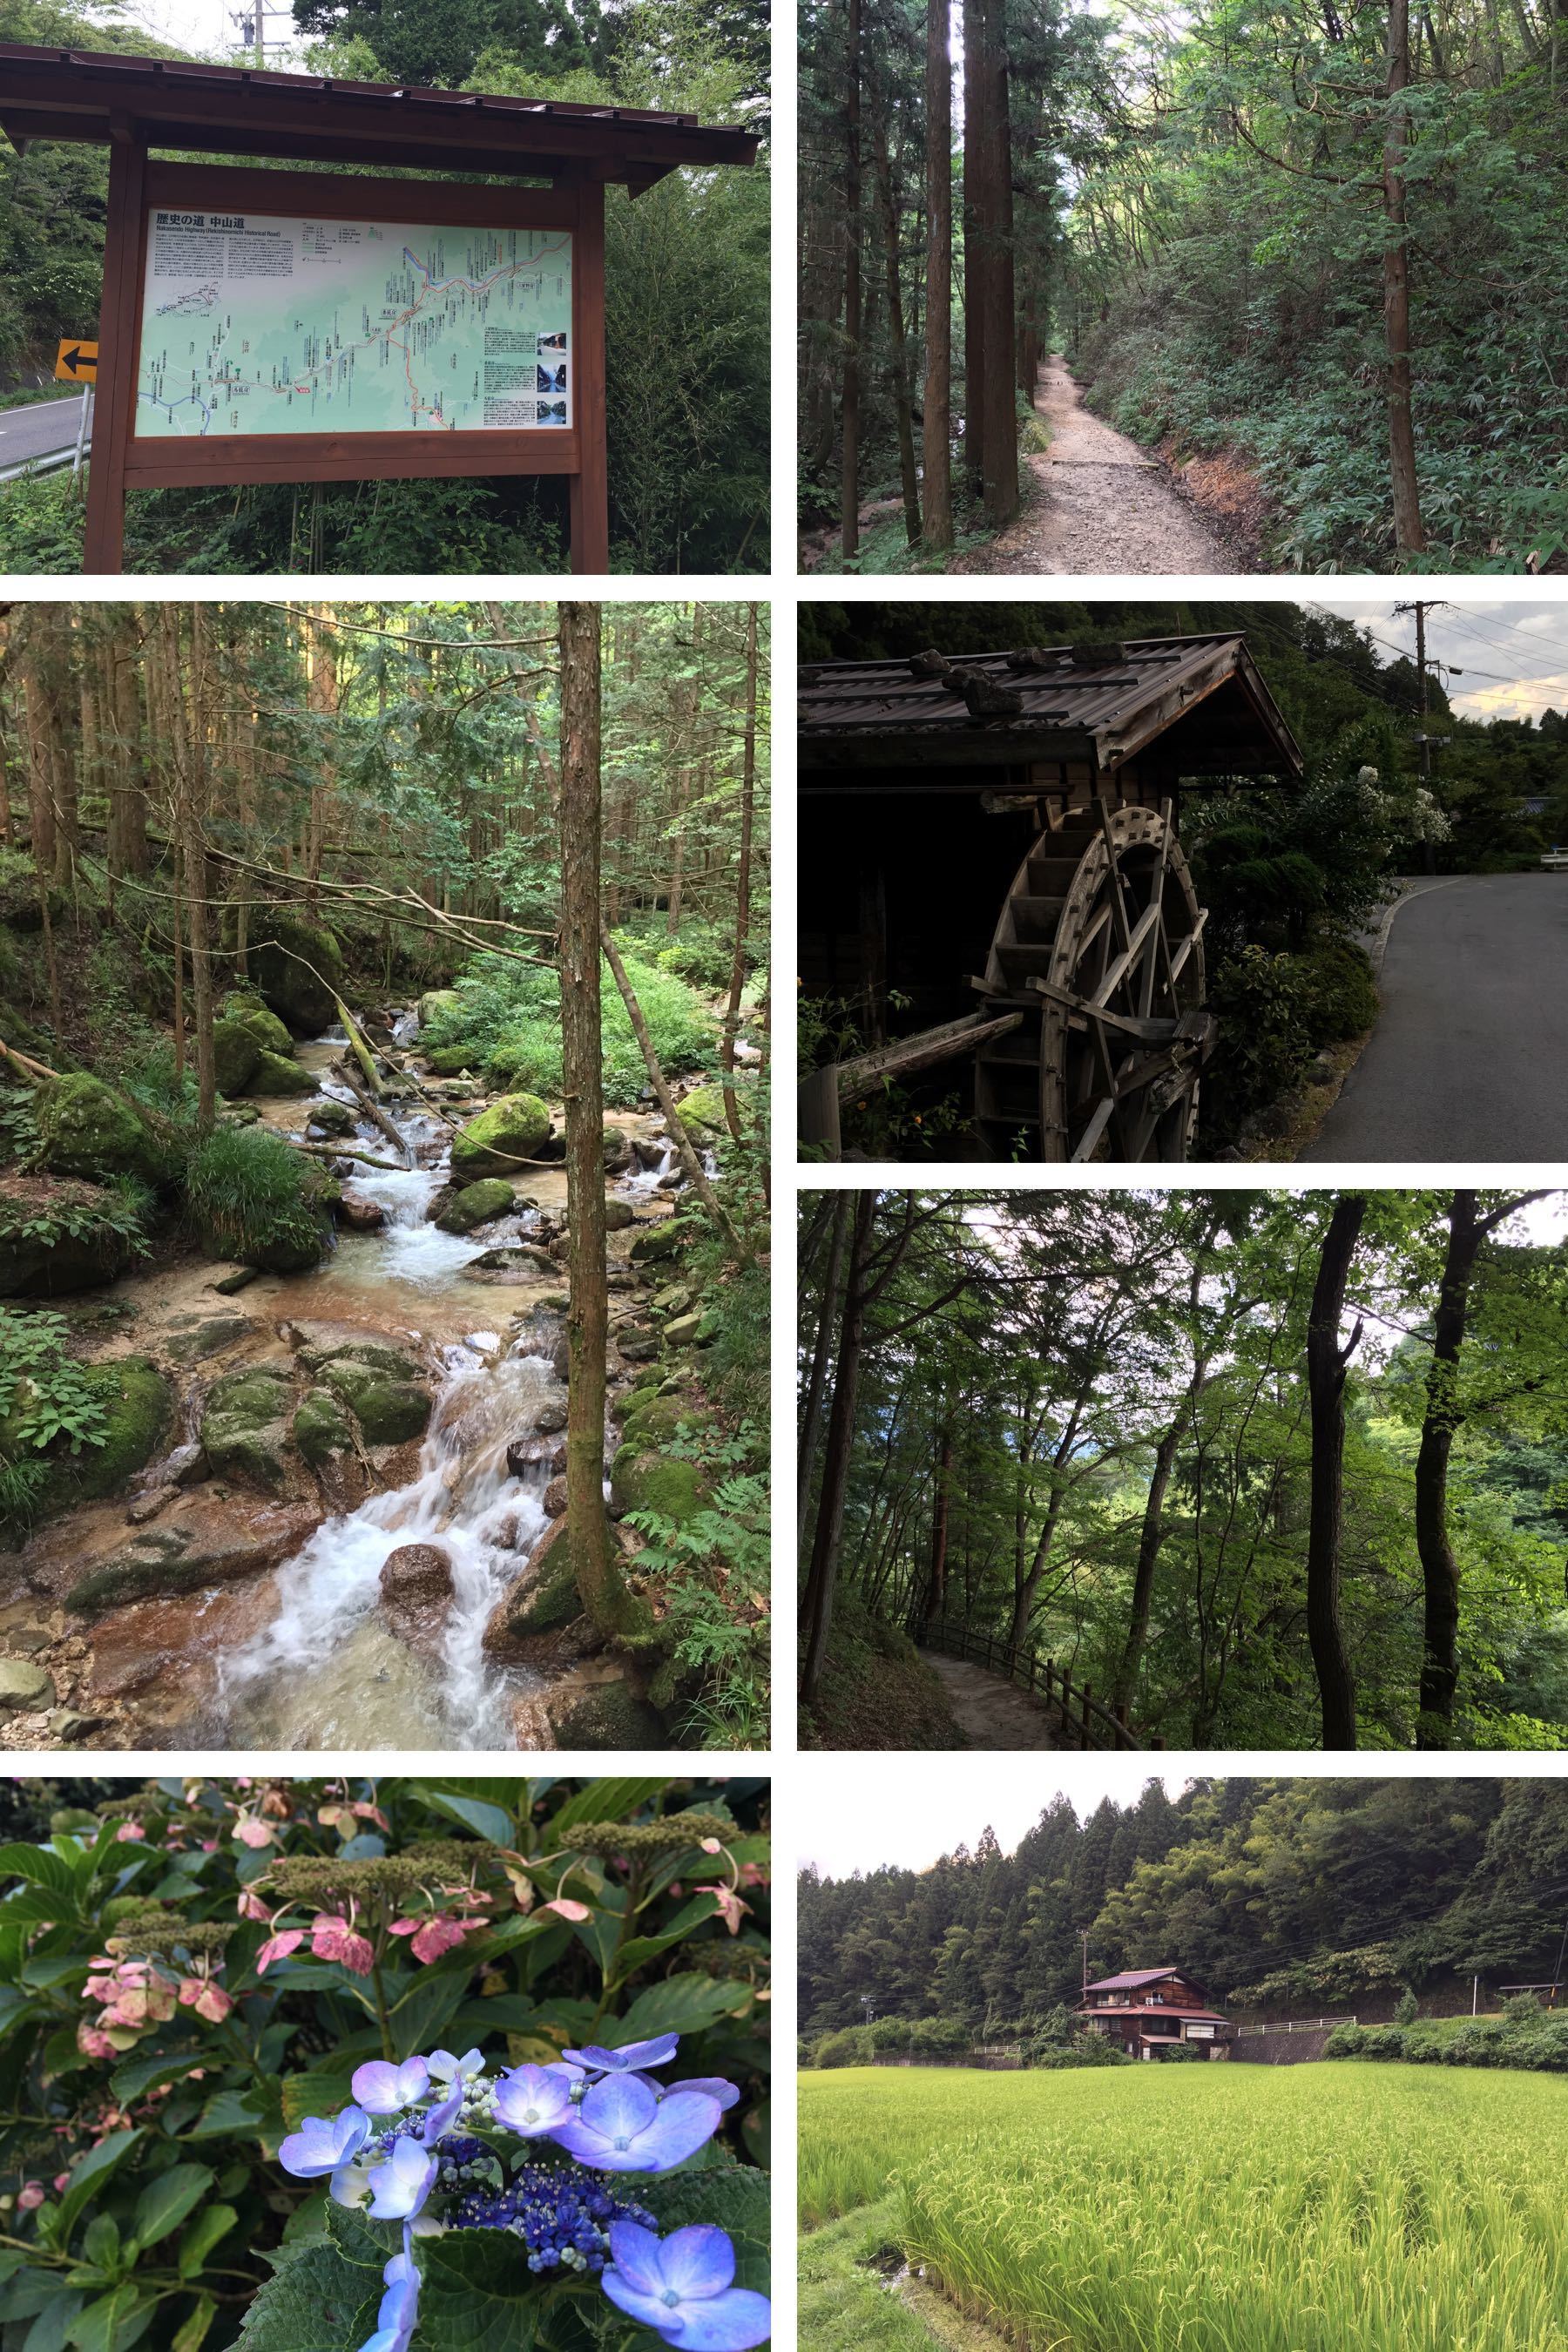
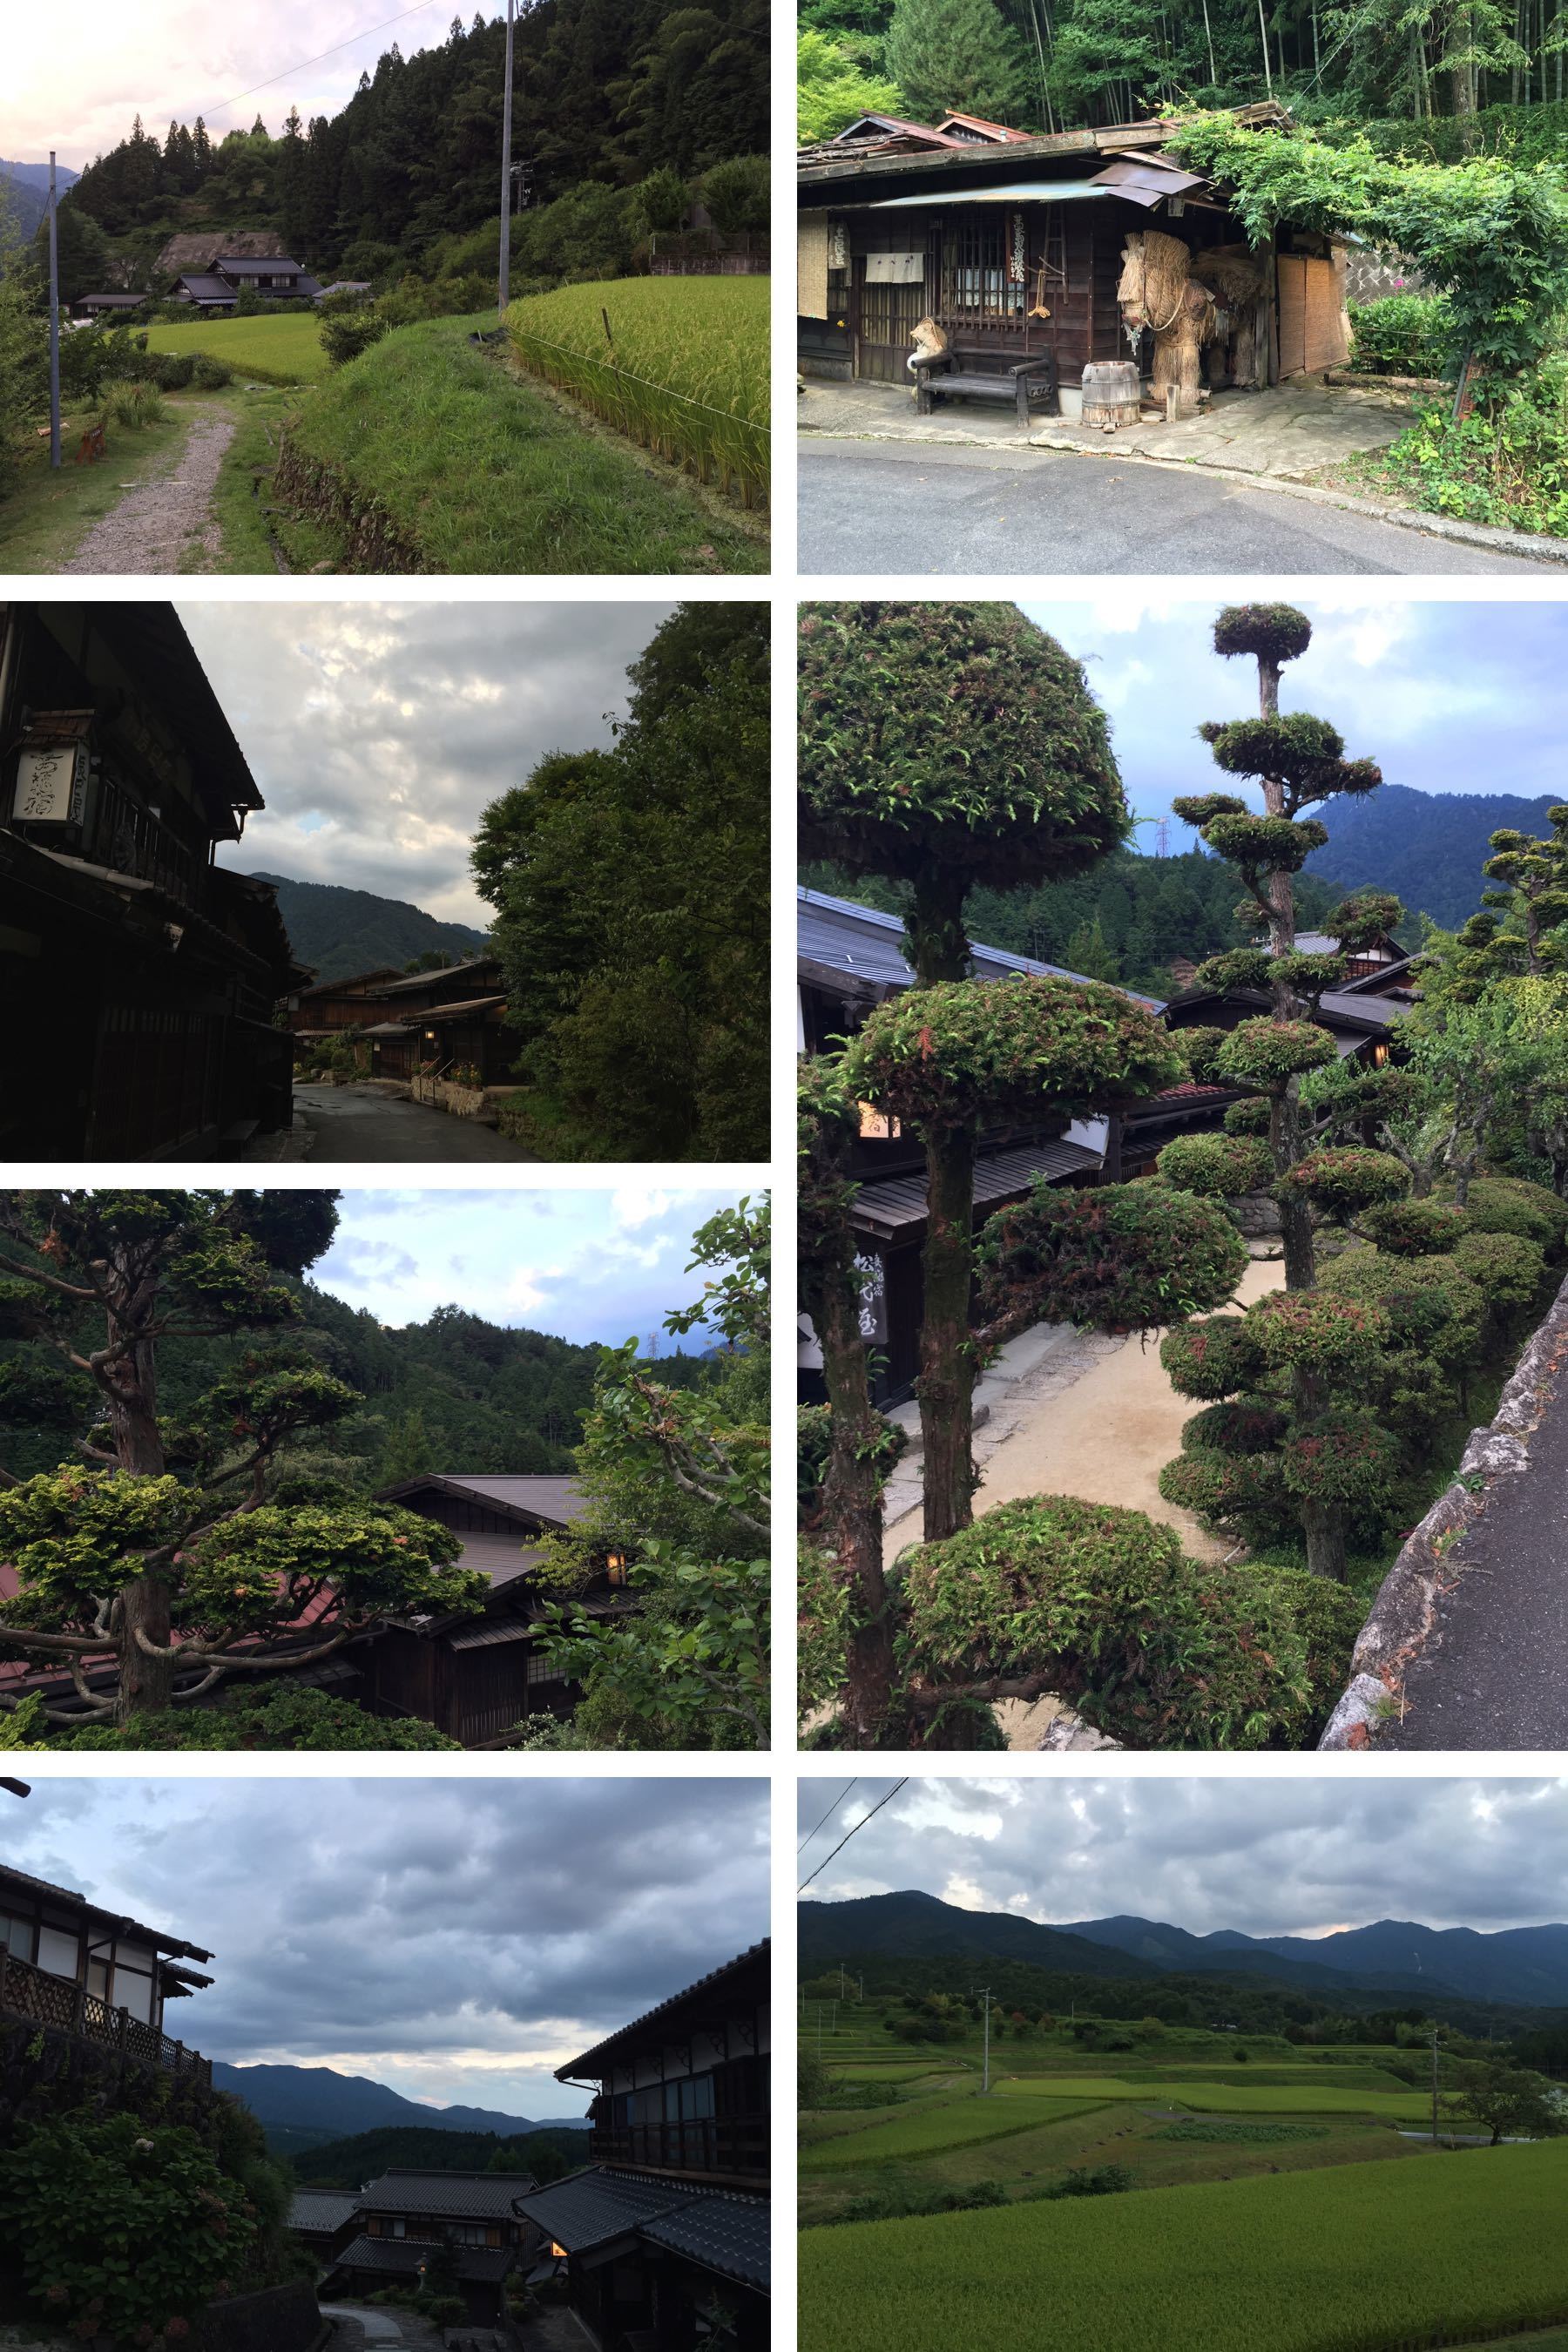
Mount Misen, from the base, on Miyajima (the site of the famous “floating Torii gate”)
Climbing Mount Misen from the base is an excellent day trip. This is a somewhat steep hike on Miyajima (an island near Hiroshima) that ends with a beautiful view of the famous “floating Torii gate”, shown on the cover of this book.
The view of the Torii gate at Itsukushima Shrine is one of the “Three Views of Japan”, the other two being the islands of Matsushima and the sandbar of Amanohashidate. For the Torii gate to “float”, the tide needs to be in. When I arrived at Miyajima, the tide was still out, so people were just walking under it on the beach. But at sunset, at the end of the hike, the tide had come in and the view was beautiful.
Thanks to the Shinkansen, you can do this hike as a day trip from Osaka–this is what I did, and that included doing all the laundry in the morning first. However, sunset is at about 7 PM, so you want to start descending by 5 PM. Of course, if you are watching the sunset on Miyajima, you will get back to Osaka at about 11 PM. (This type of day trip is why I advocate staying in a hotel near Shin-Osaka station when you’re in Osaka!)
One thing to note about Miyajima is all the relatively tame deer. Unlike in Nara where there are special “deer crackers” which are sold to tourists to feed the deer (and are safe for the deer to eat), on Miyajima the deer are not supposed to be fed. So, don’t feed them, and leave them alone. The deer have no fear of humans–you’ll see them wandering the streets, and even checking out the gift shops!
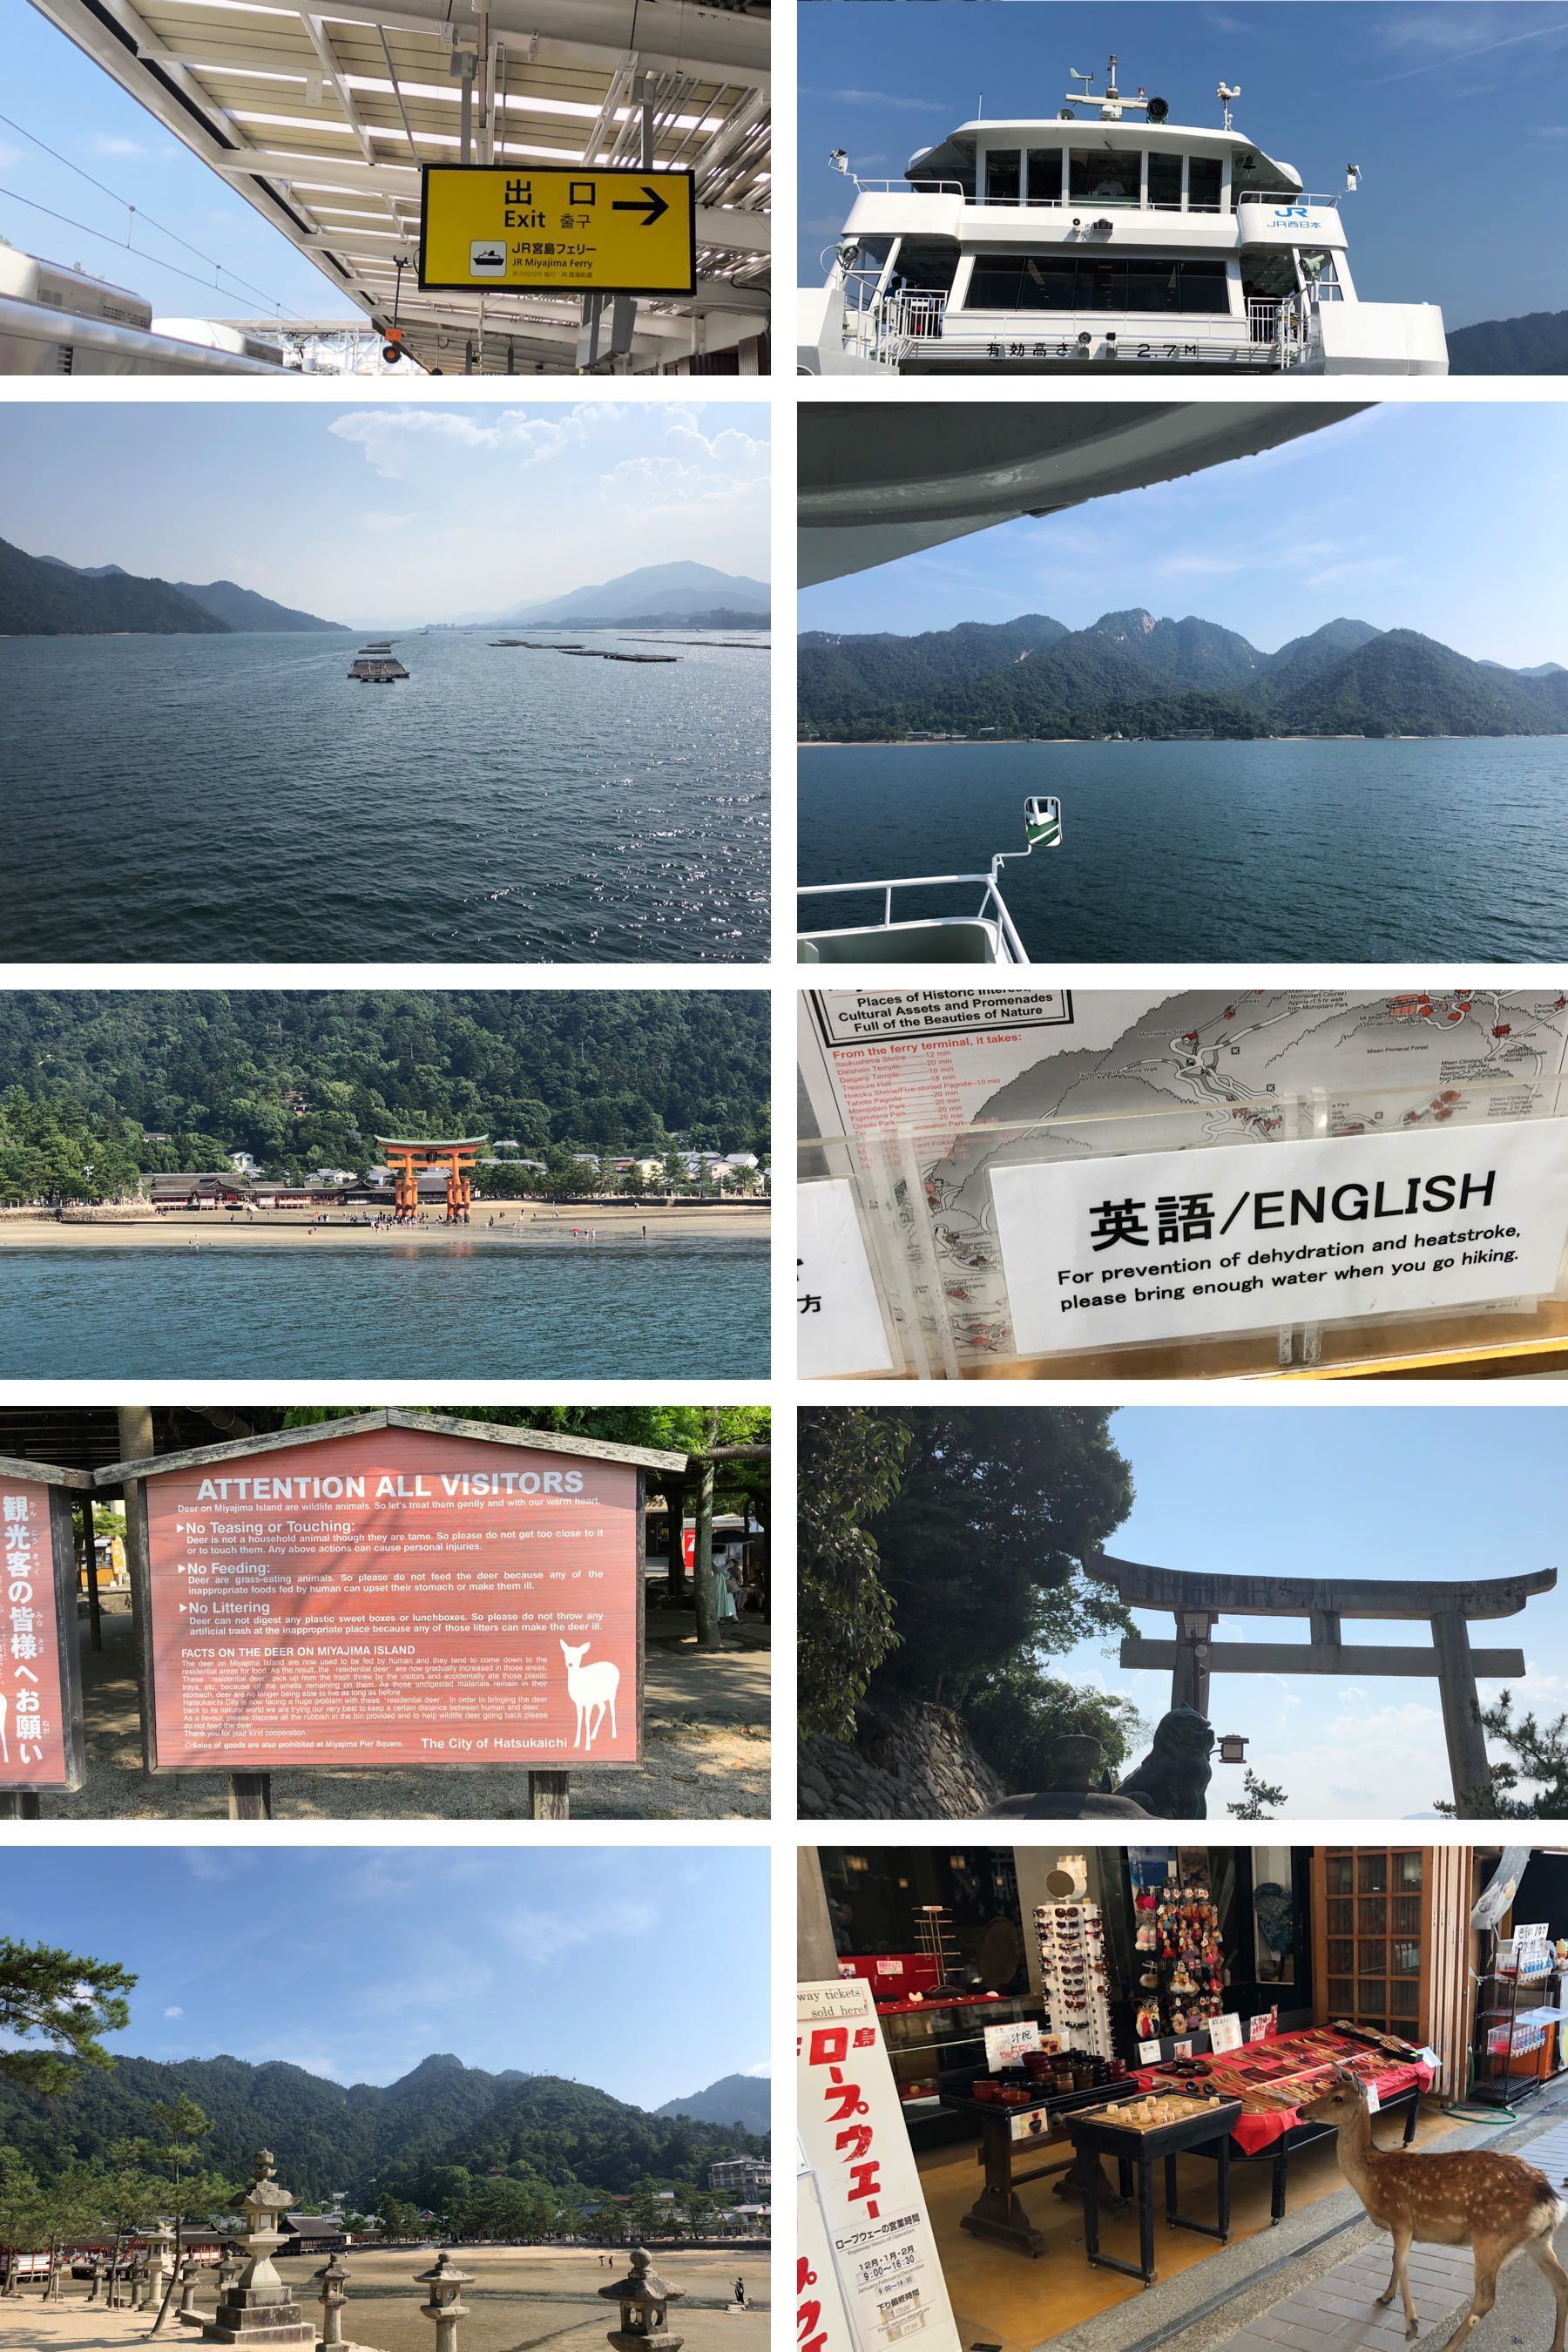
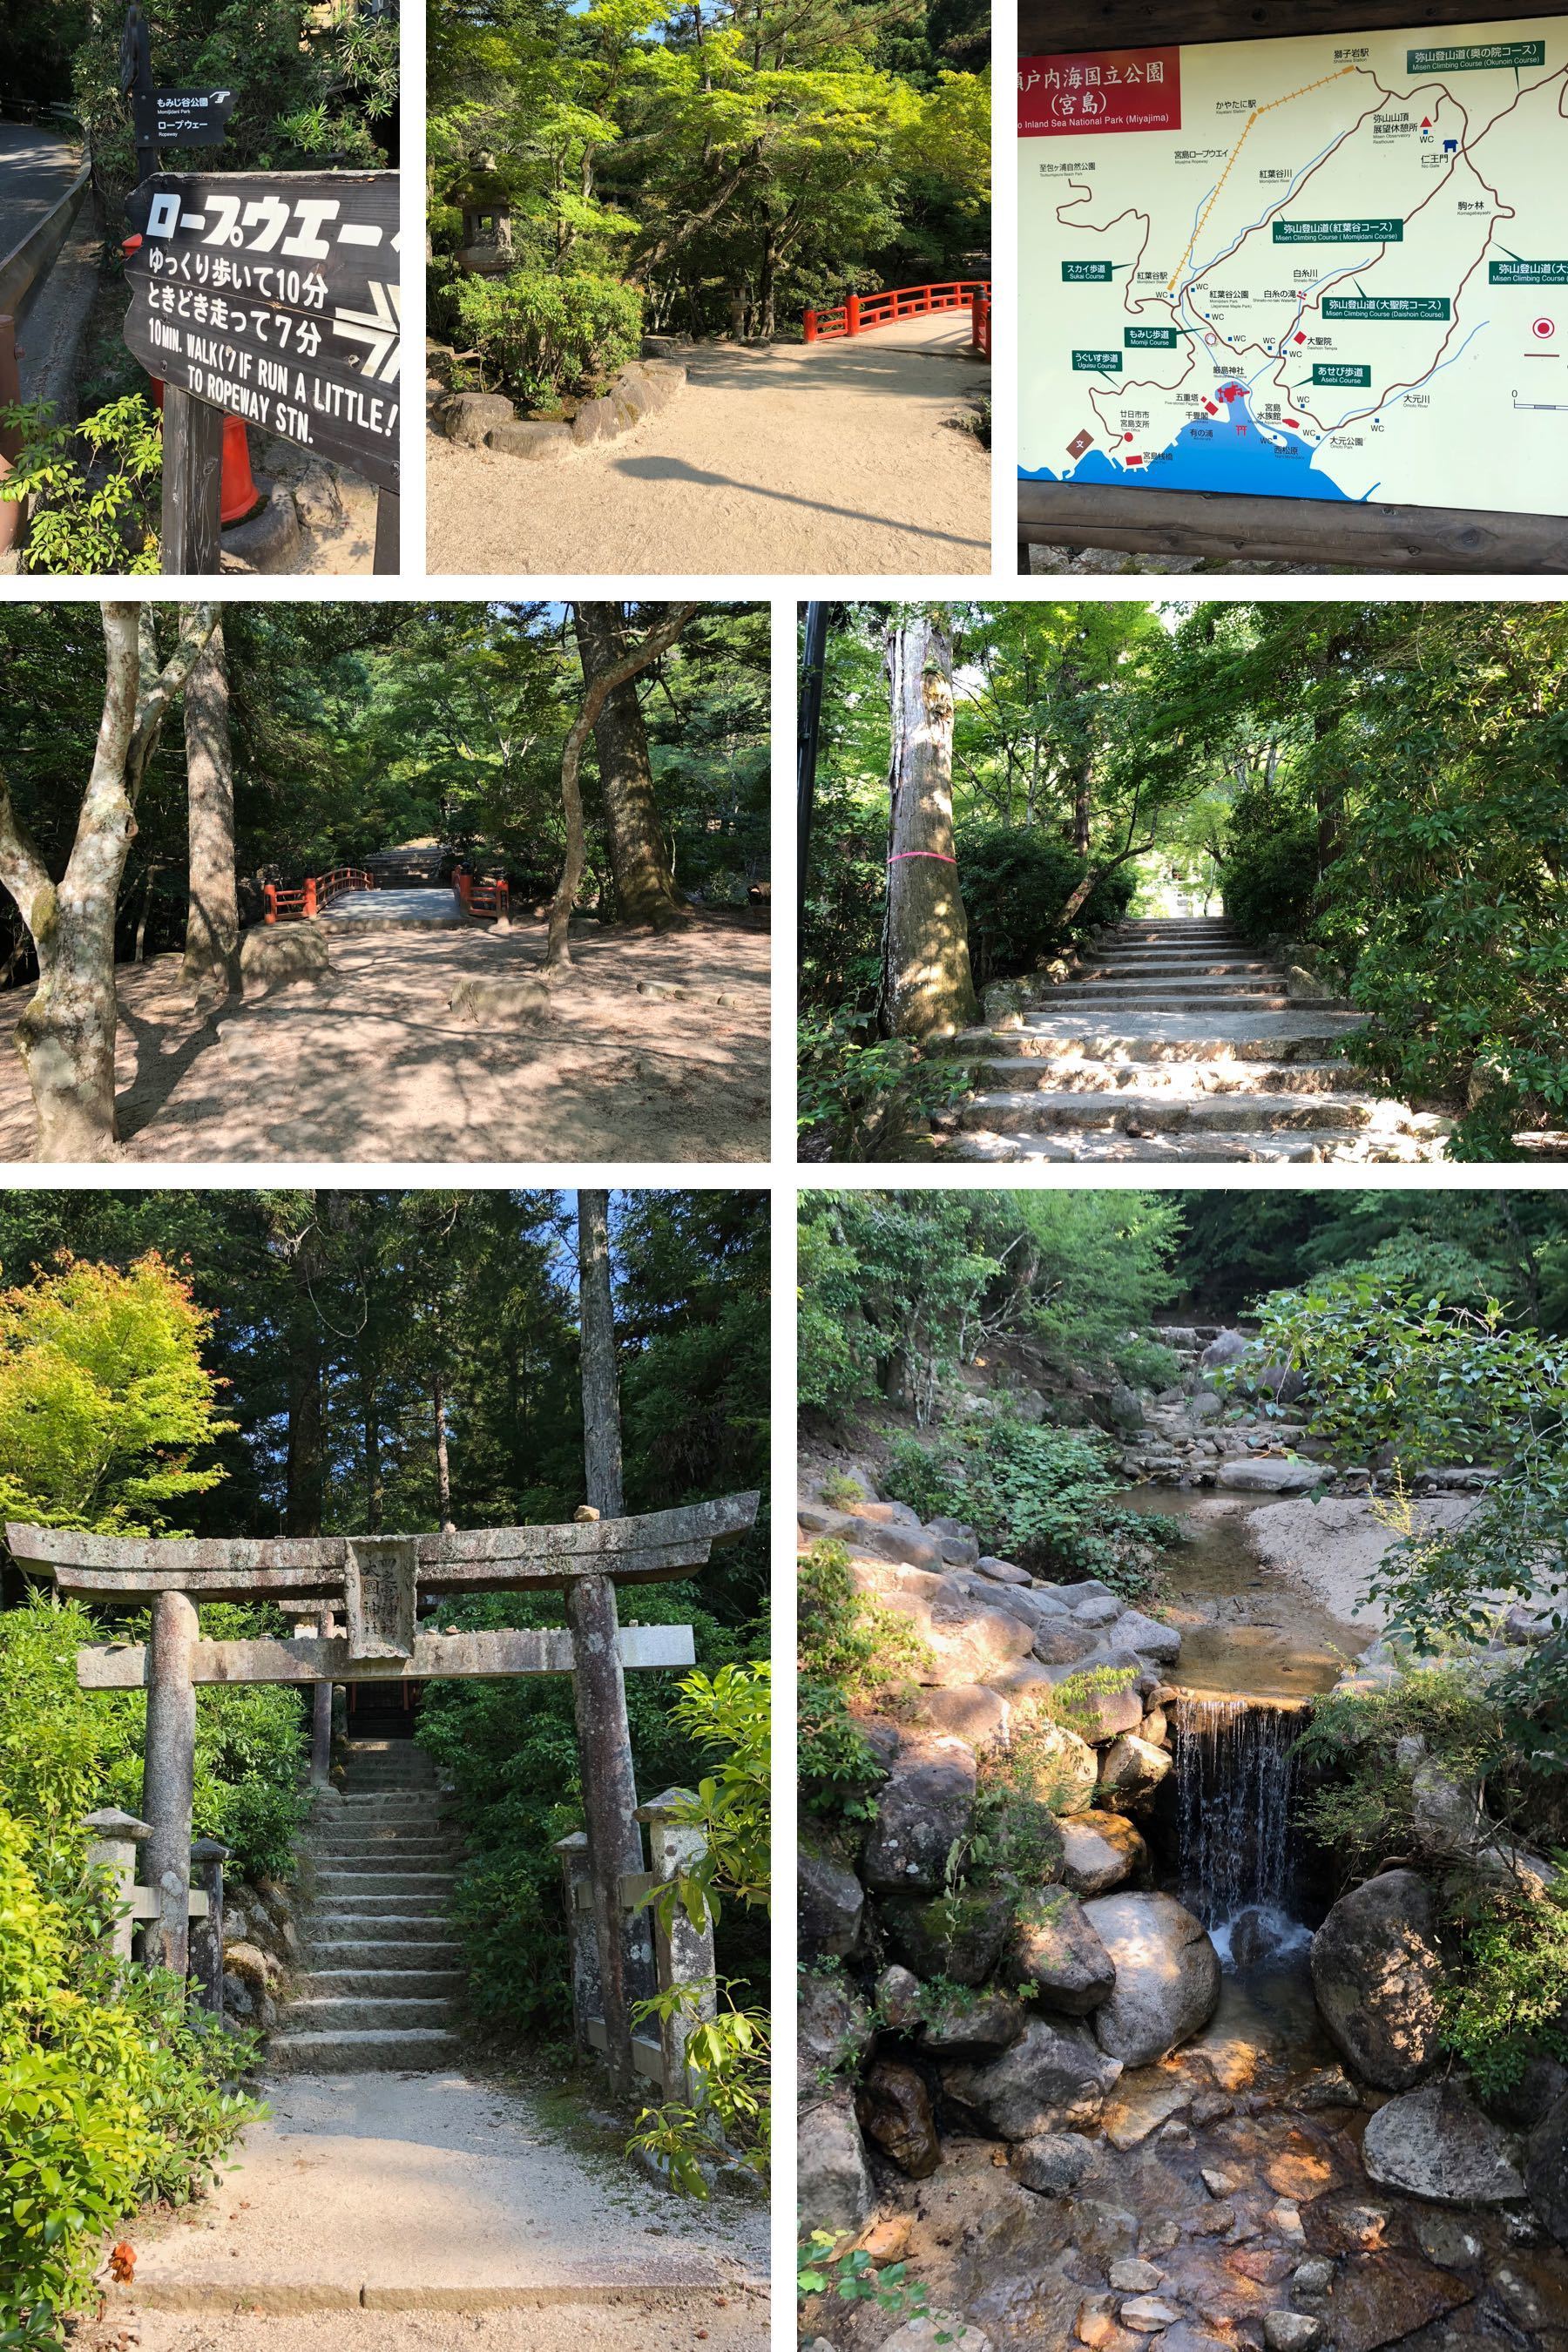
There is 550 meters of elevation gain from the sea level to the summit, if you do the full hike. It’s really easy to get a sense of the effort level involved: when you are on the ferry, approaching the island, just look at the top of the highest thing on the island. That’s where you’re hiking to. The full hike is 5 km total and is fairly steep, so make sure you bring trekking poles! It takes about 5 hours to do the full hike.
If you are doing this hike, bring plenty of water and sports drinks to prevent dehydration! I did the hike in a 38 degree Celsius heat wave, and I drank about 2 liters of Aquarius and 2 liters of water. There is a convenience store (I think it was a 7-11) near the JR station. There is no water for sale at the top of Mount Misen, so bring enough for the entire hike!
There is a visitor center in the JR ferry terminal on Miyajima where you can get a paper map. When I got mine, I asked the woman for advice about which way to go. She recommended the Momijidani Course on the way up and the Daisho-in course on the way down, so that’s what I did. (Her reasoning was that when I started my hike it was shortly after 2 PM, and if I wanted to do a loop, the light would be better on the Daisho-in Course than the Momijidani Course when making the descent. I made it just before sunset, but it was good advice regardless, and a beautiful hike.
One thing to note is that there are numerous signs warning about poisonous snakes called Mamushi (pit viper). It seems that all hiking areas in Japan have a warning sign about something, but this had more than the usual number of warning signs, and they were all about Mamushi, so it was a bit concerning. Thankfully I didn’t see any Mamushi on Miyajima.
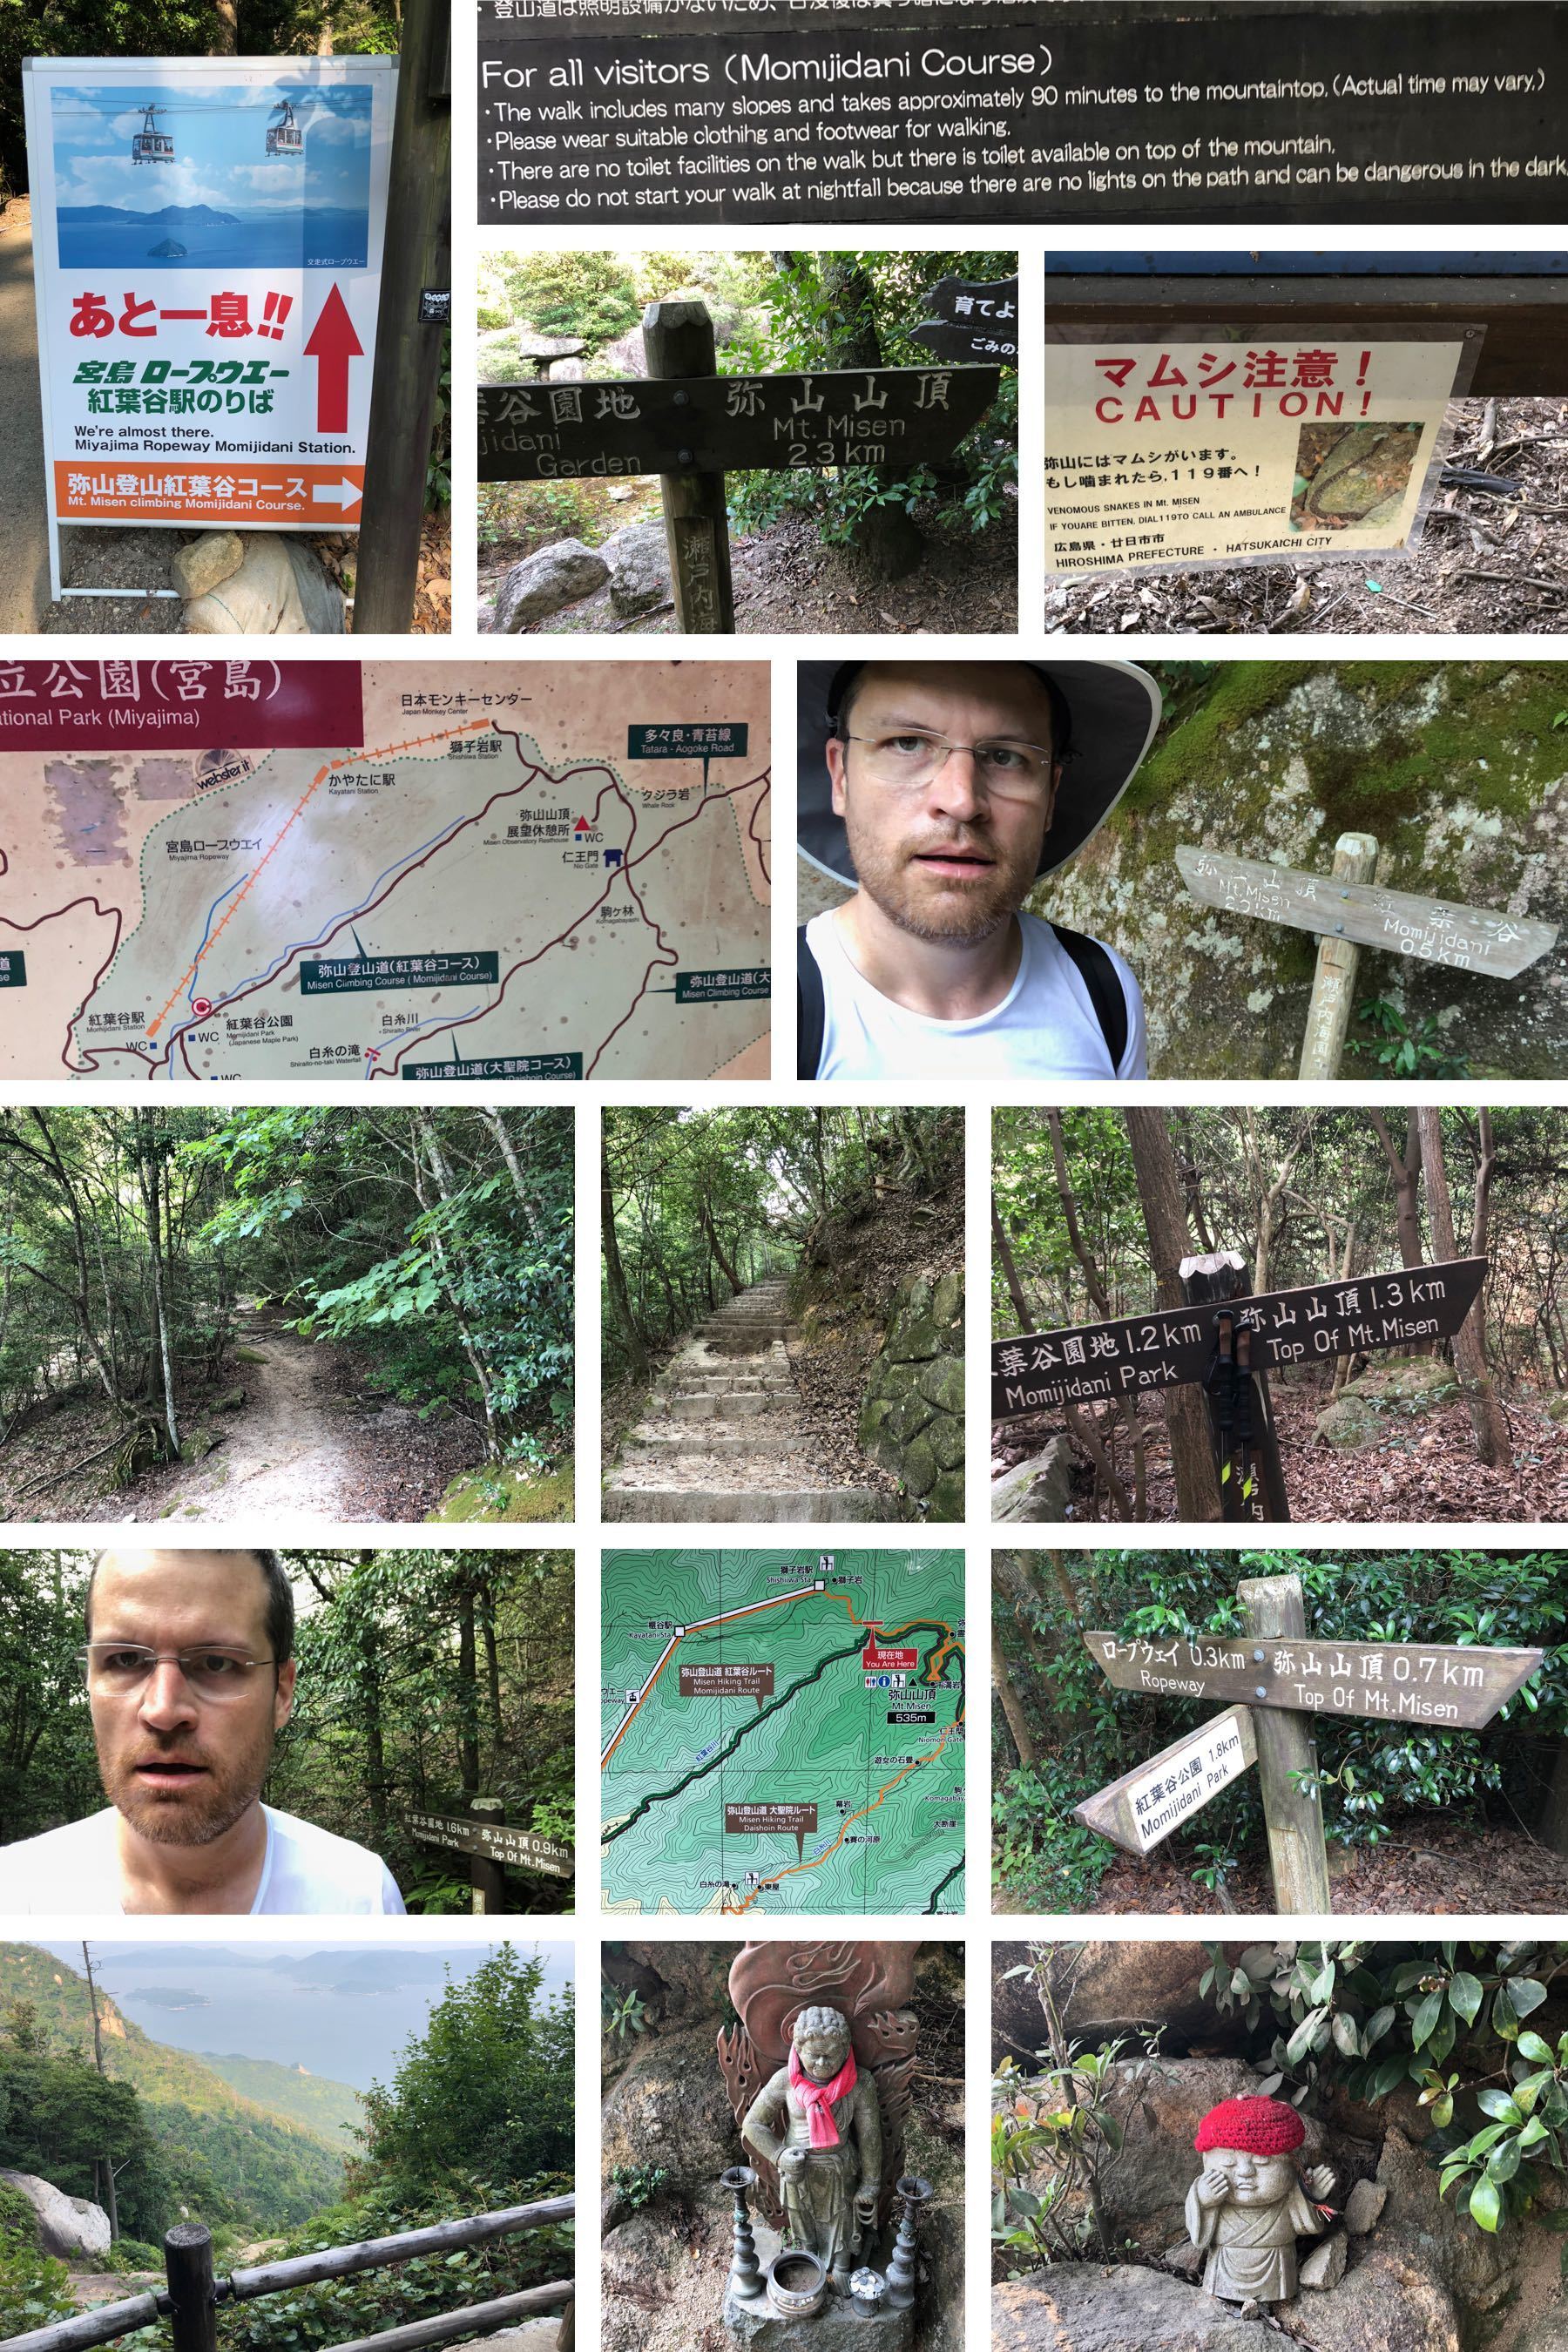
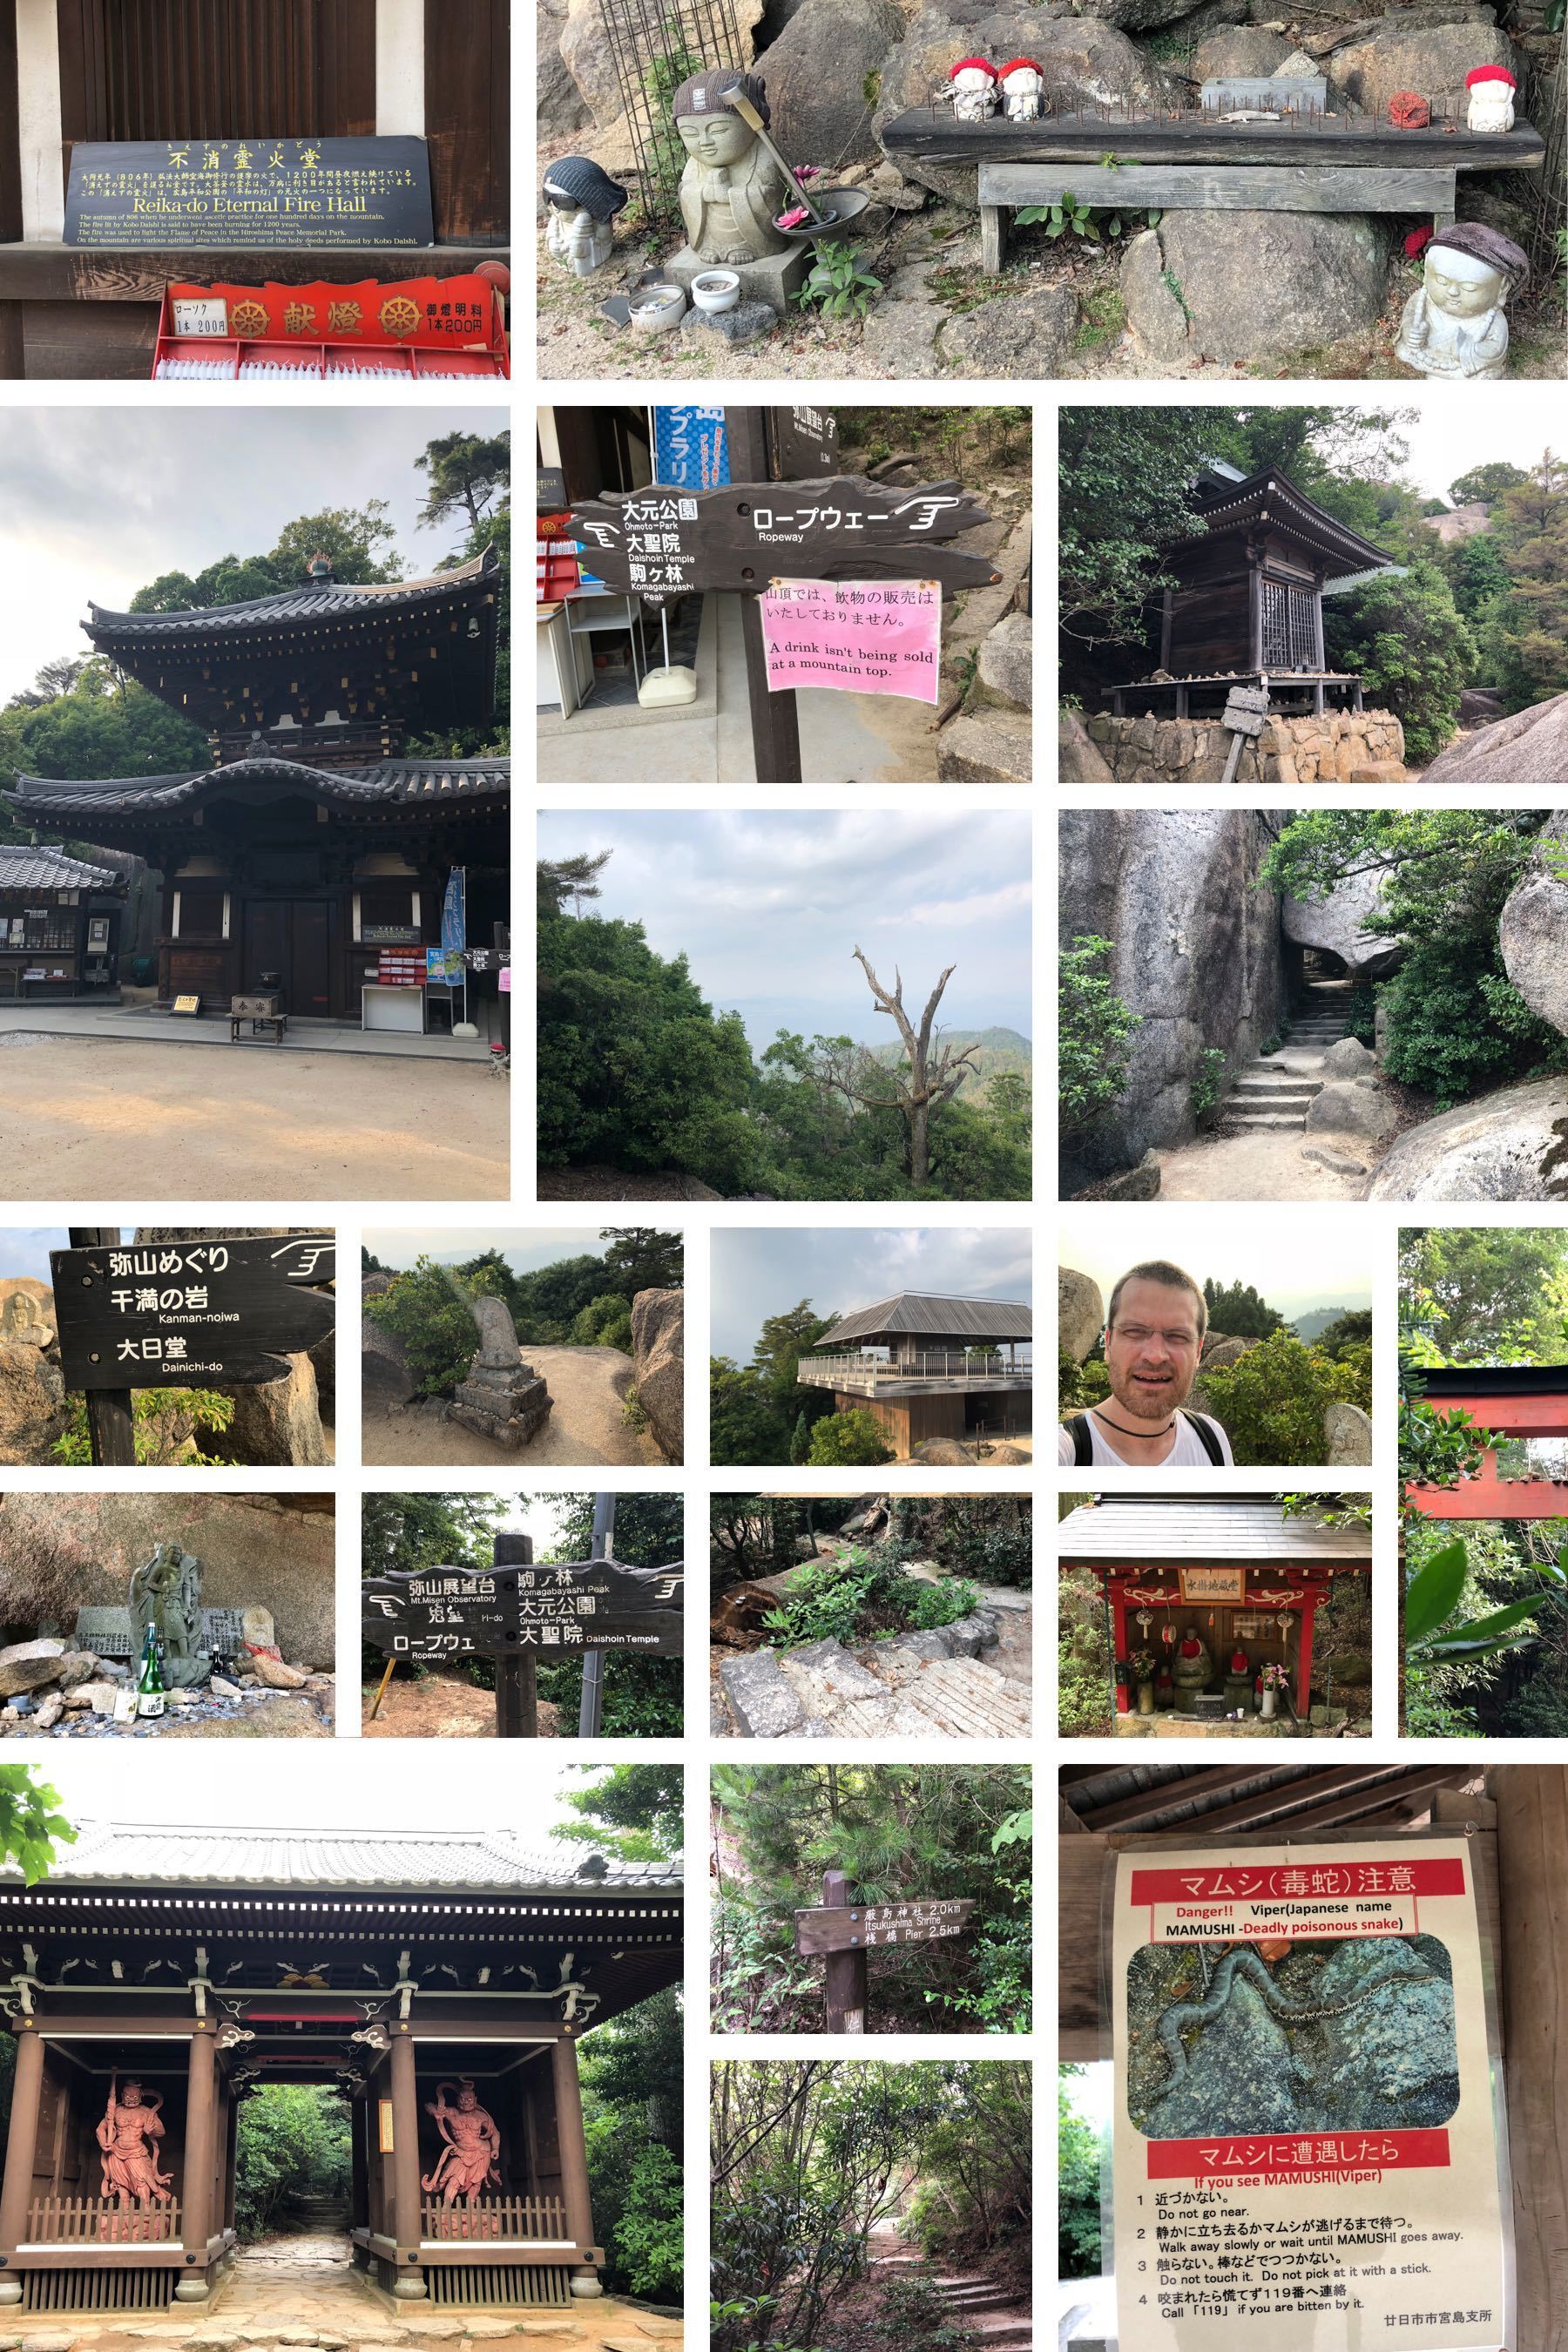
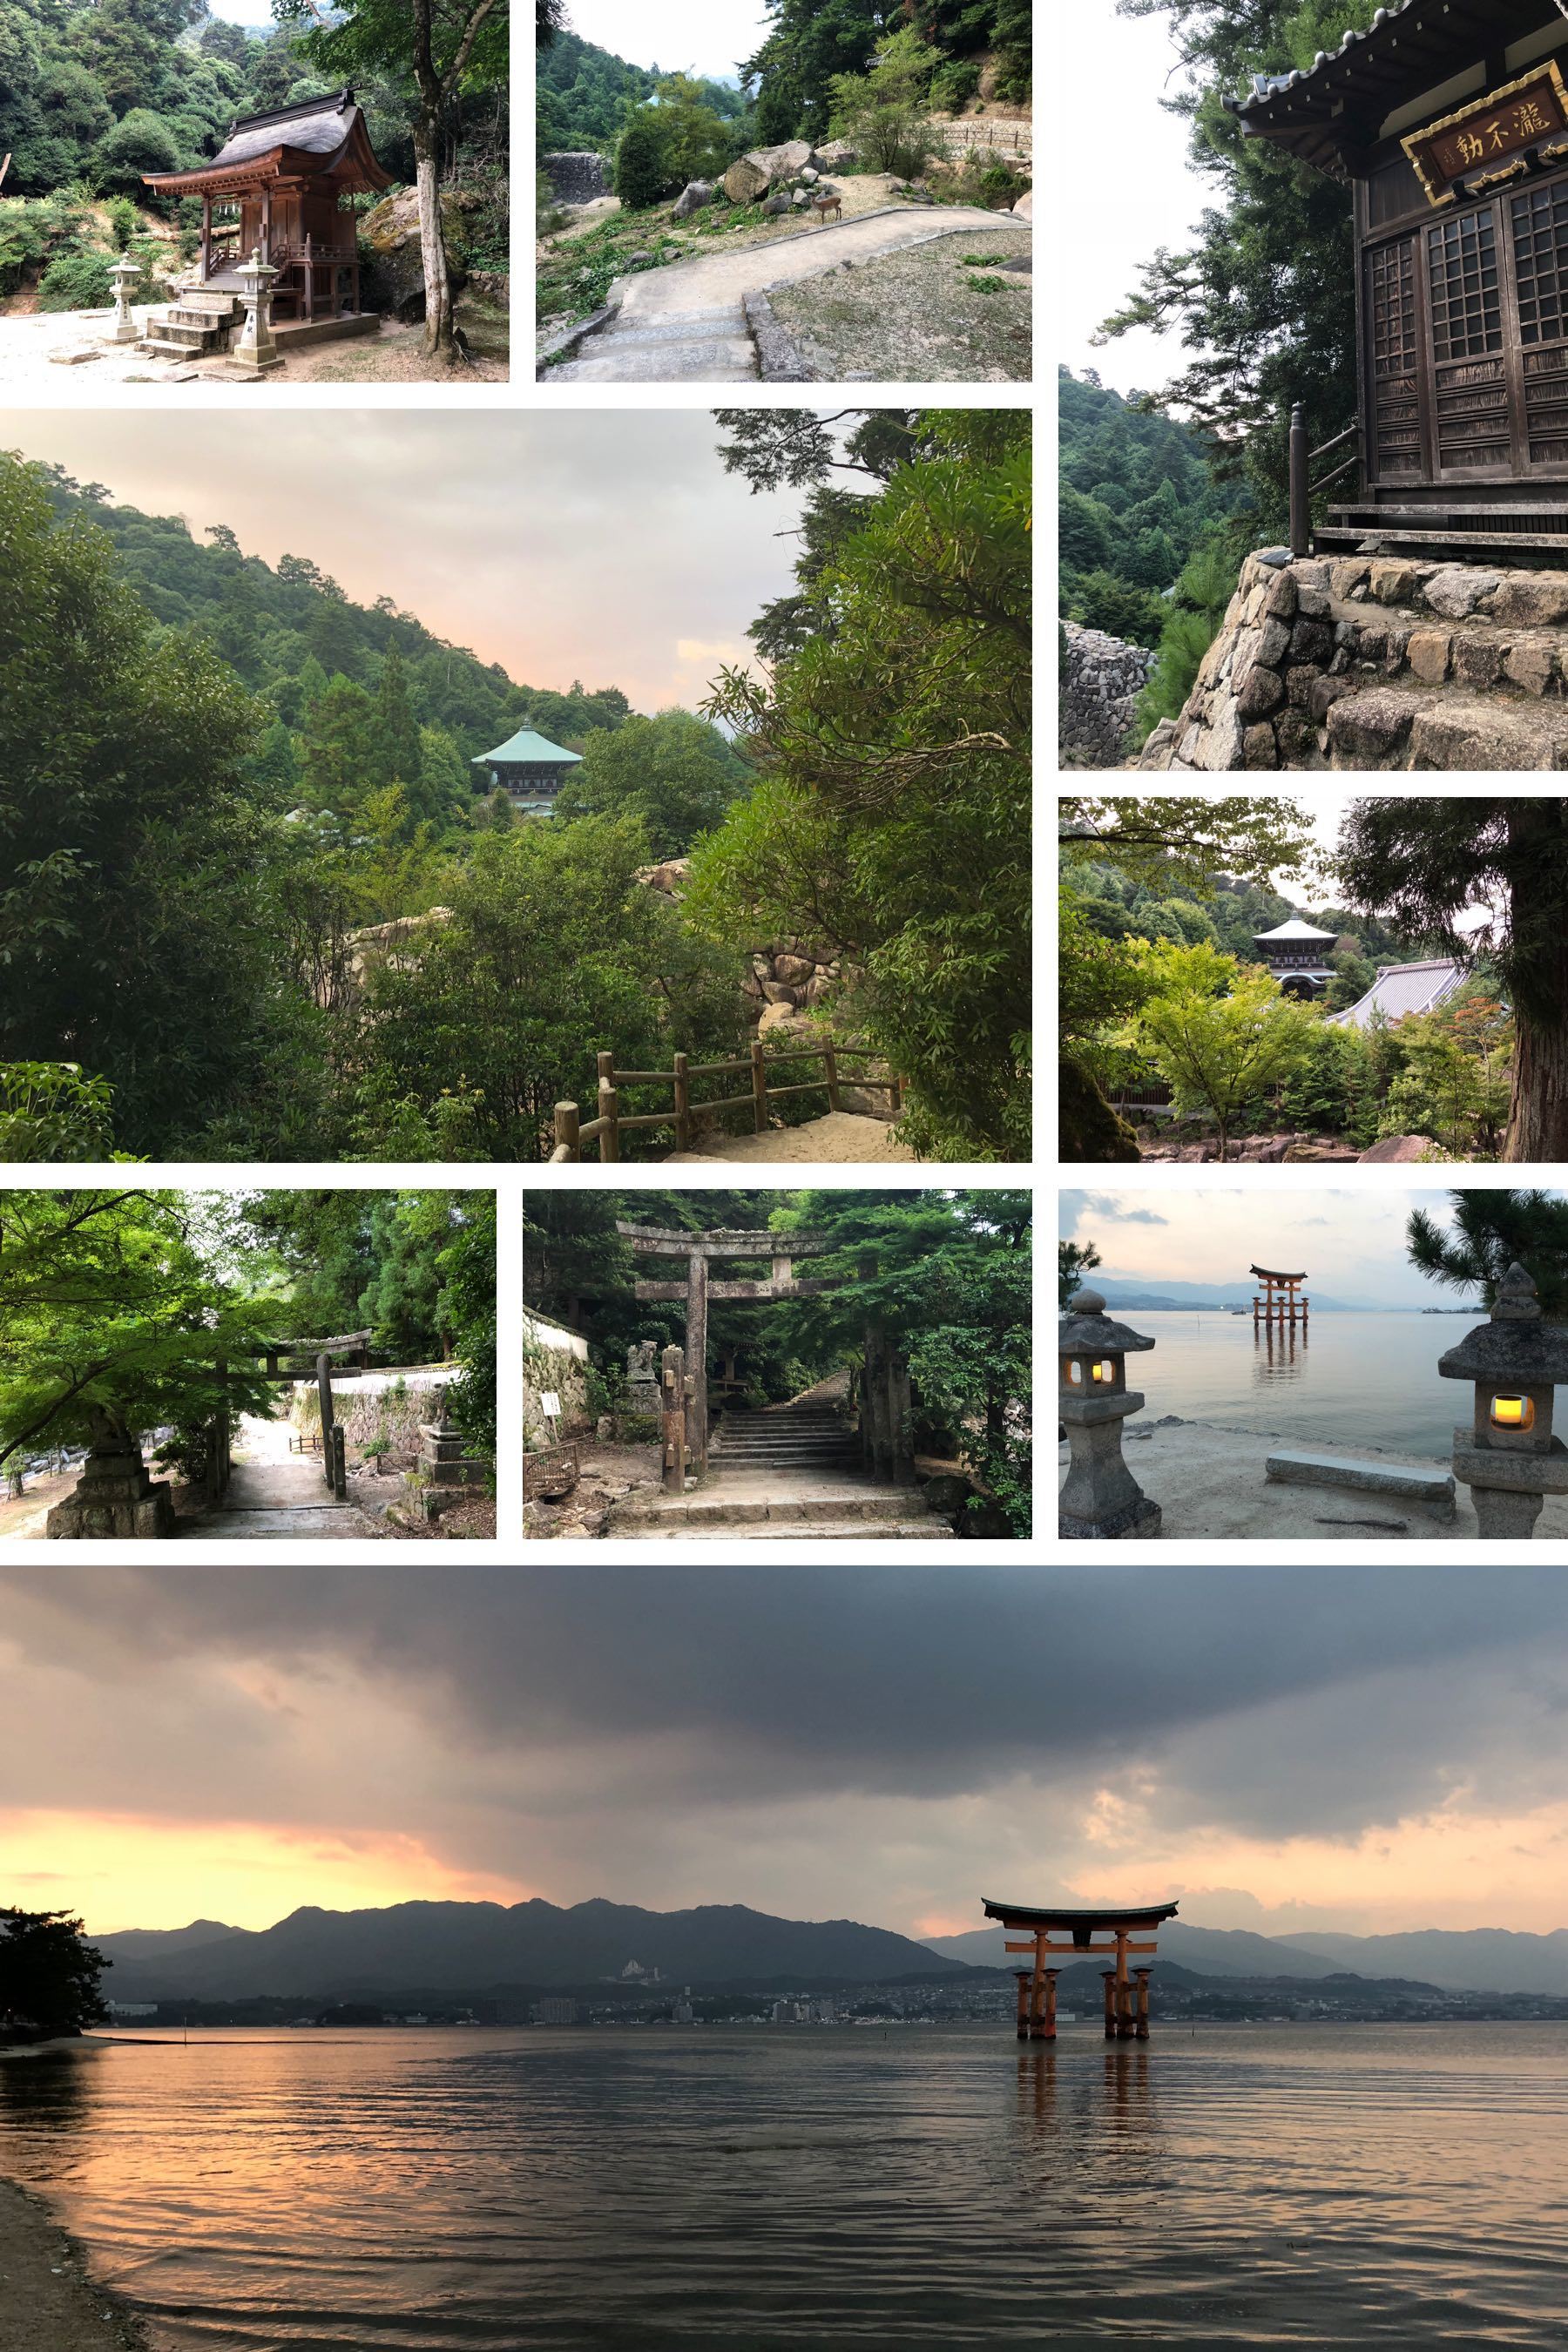
Mount Fuji, from the base, via the Yoshidaguchi trail
I enjoyed this hike so much that I wrote a short book entirely book about it! Titled Yoshidaguchi: A Climb of Mount Fuji From The Base, it focuses on what you should bring, and what I did.
On August 15-16, 2018, I hiked the Yoshidaguchi trail of Mount Fuji.
I woke up in Tokyo just after 5 AM on the Wednesday, took trains to Mount Fuji station, got there at about 9 AM, went to the visitor center, got a map, took a cab a couple kilometers to 7-11, bought supplies, walked to a shrine, did the hike, took a bus and then trains back, and got back to Tokyo at 11 PM on the Thursday, and had delicious udon noodles and the best hot shower of my life.
I hiked the full Yoshidaguchi trail on the ascent. While I did reach the 3706 meter peak of the Yoshidaguchi trail, I did not reach the 3776 meter summit of Mount Fuji–I was short on daylight and on time, so I didn’t hike around the crater.
Due to the way that I timed my hike, I didn’t see the sunrise from the top of Mount Fuji. Heck, I haven’t seen anything from the top of Mount Fuji except the inside of a cloud! (The last good view I had from Mount Fuji was from 8th station, at 3020 meters.)
On the descent, I hiked down the descending Yoshida trail and then took the bus back from the Fuji Subaru Line 5th Station.
If you’re considering climbing Mount Fuji, I strongly encourage you to read that book first! Like this book, it has a free minimum price (and a $9 suggested price). So, since you can get that book for free, I don’t need to include any information from it here. I will, however, include some of the picture pages, in case they spark interest…
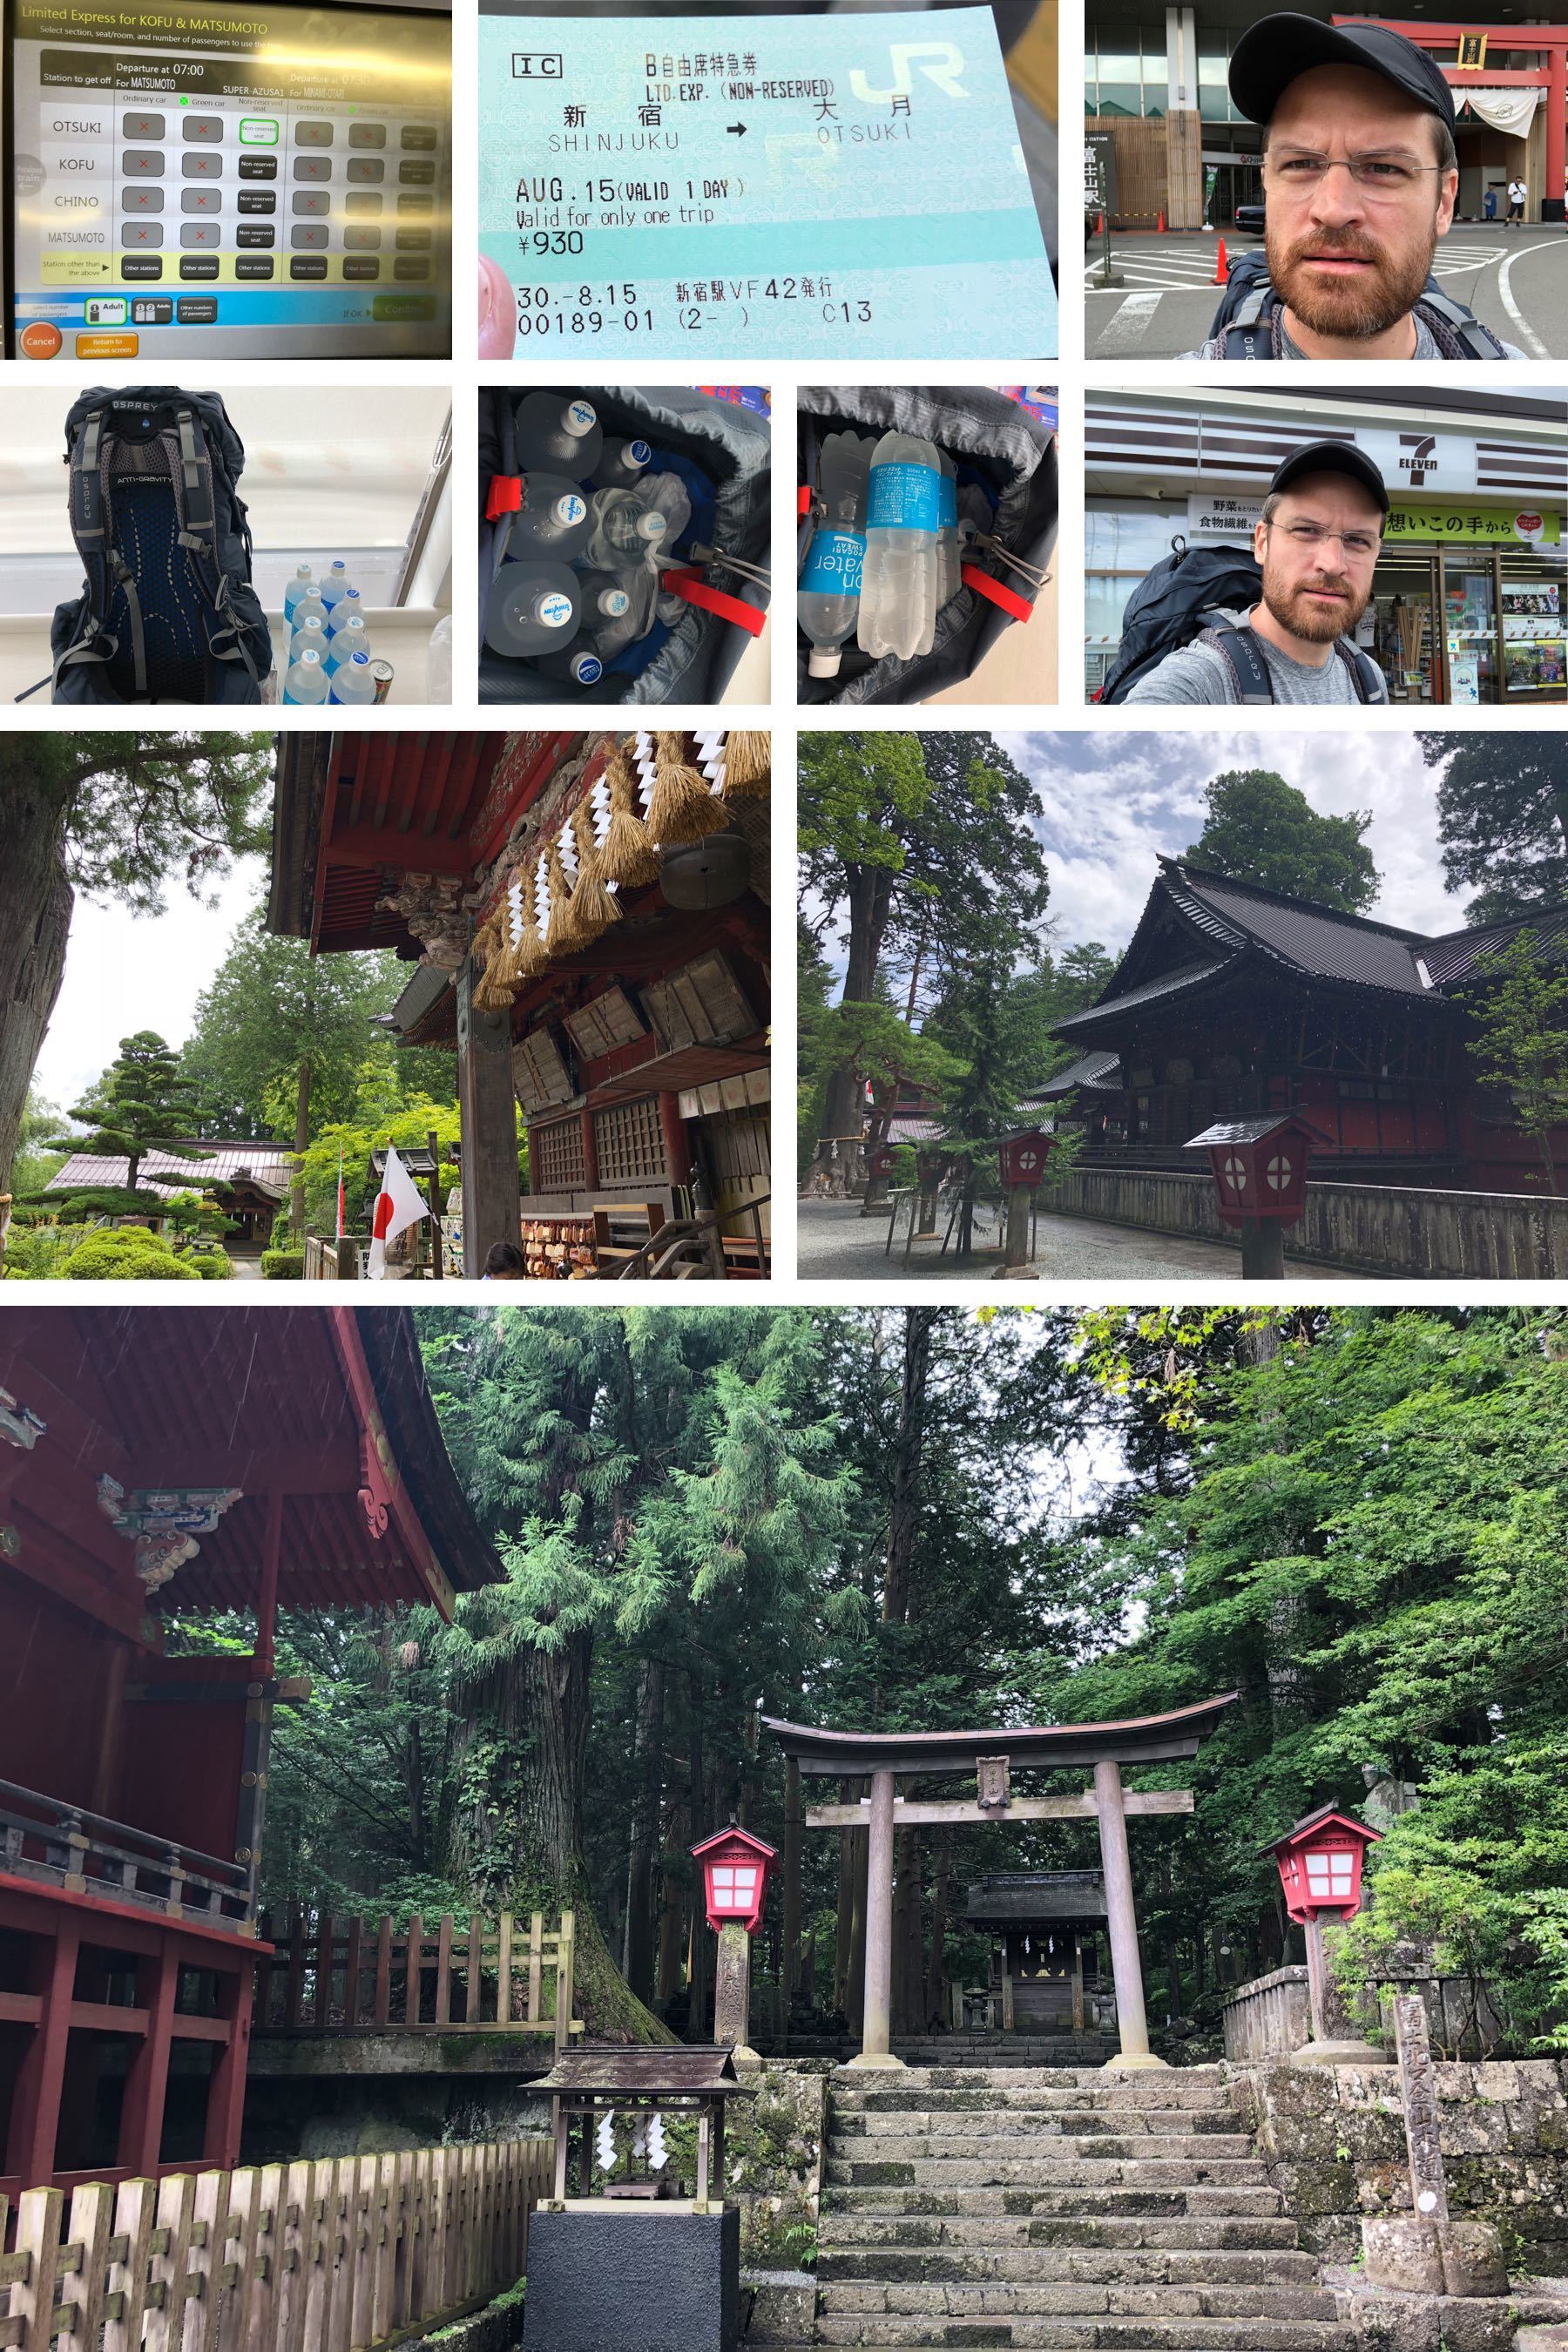
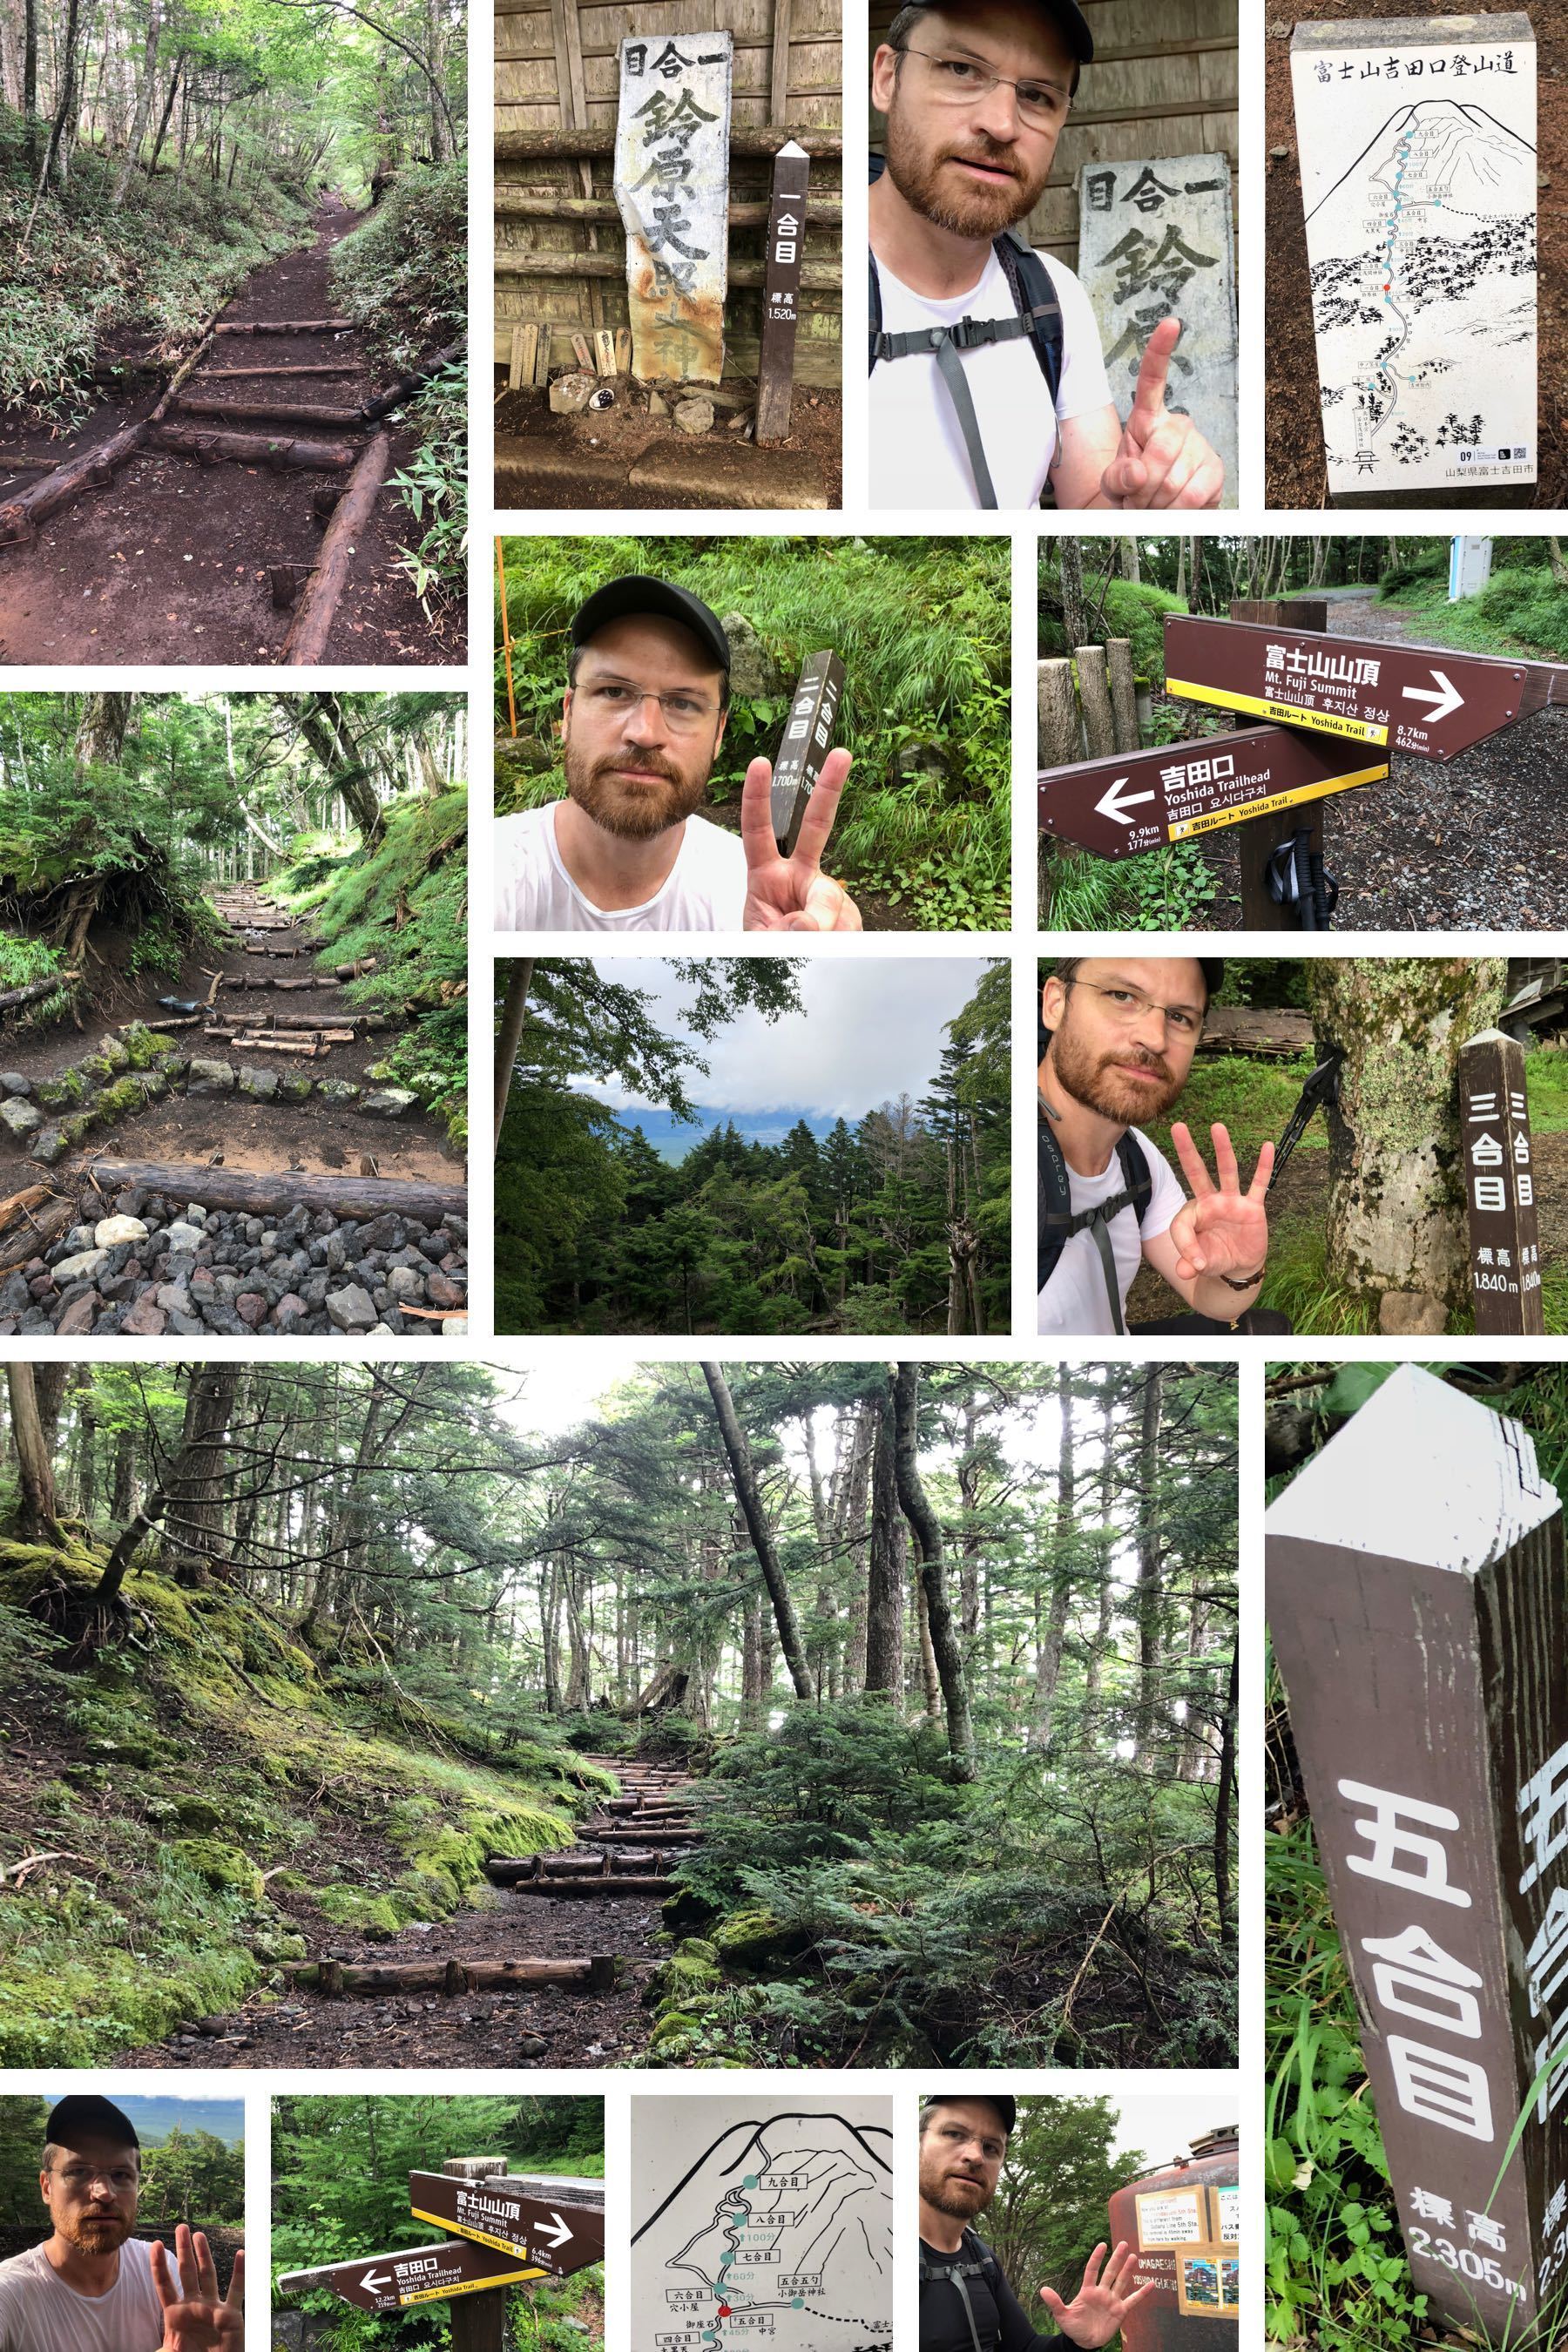
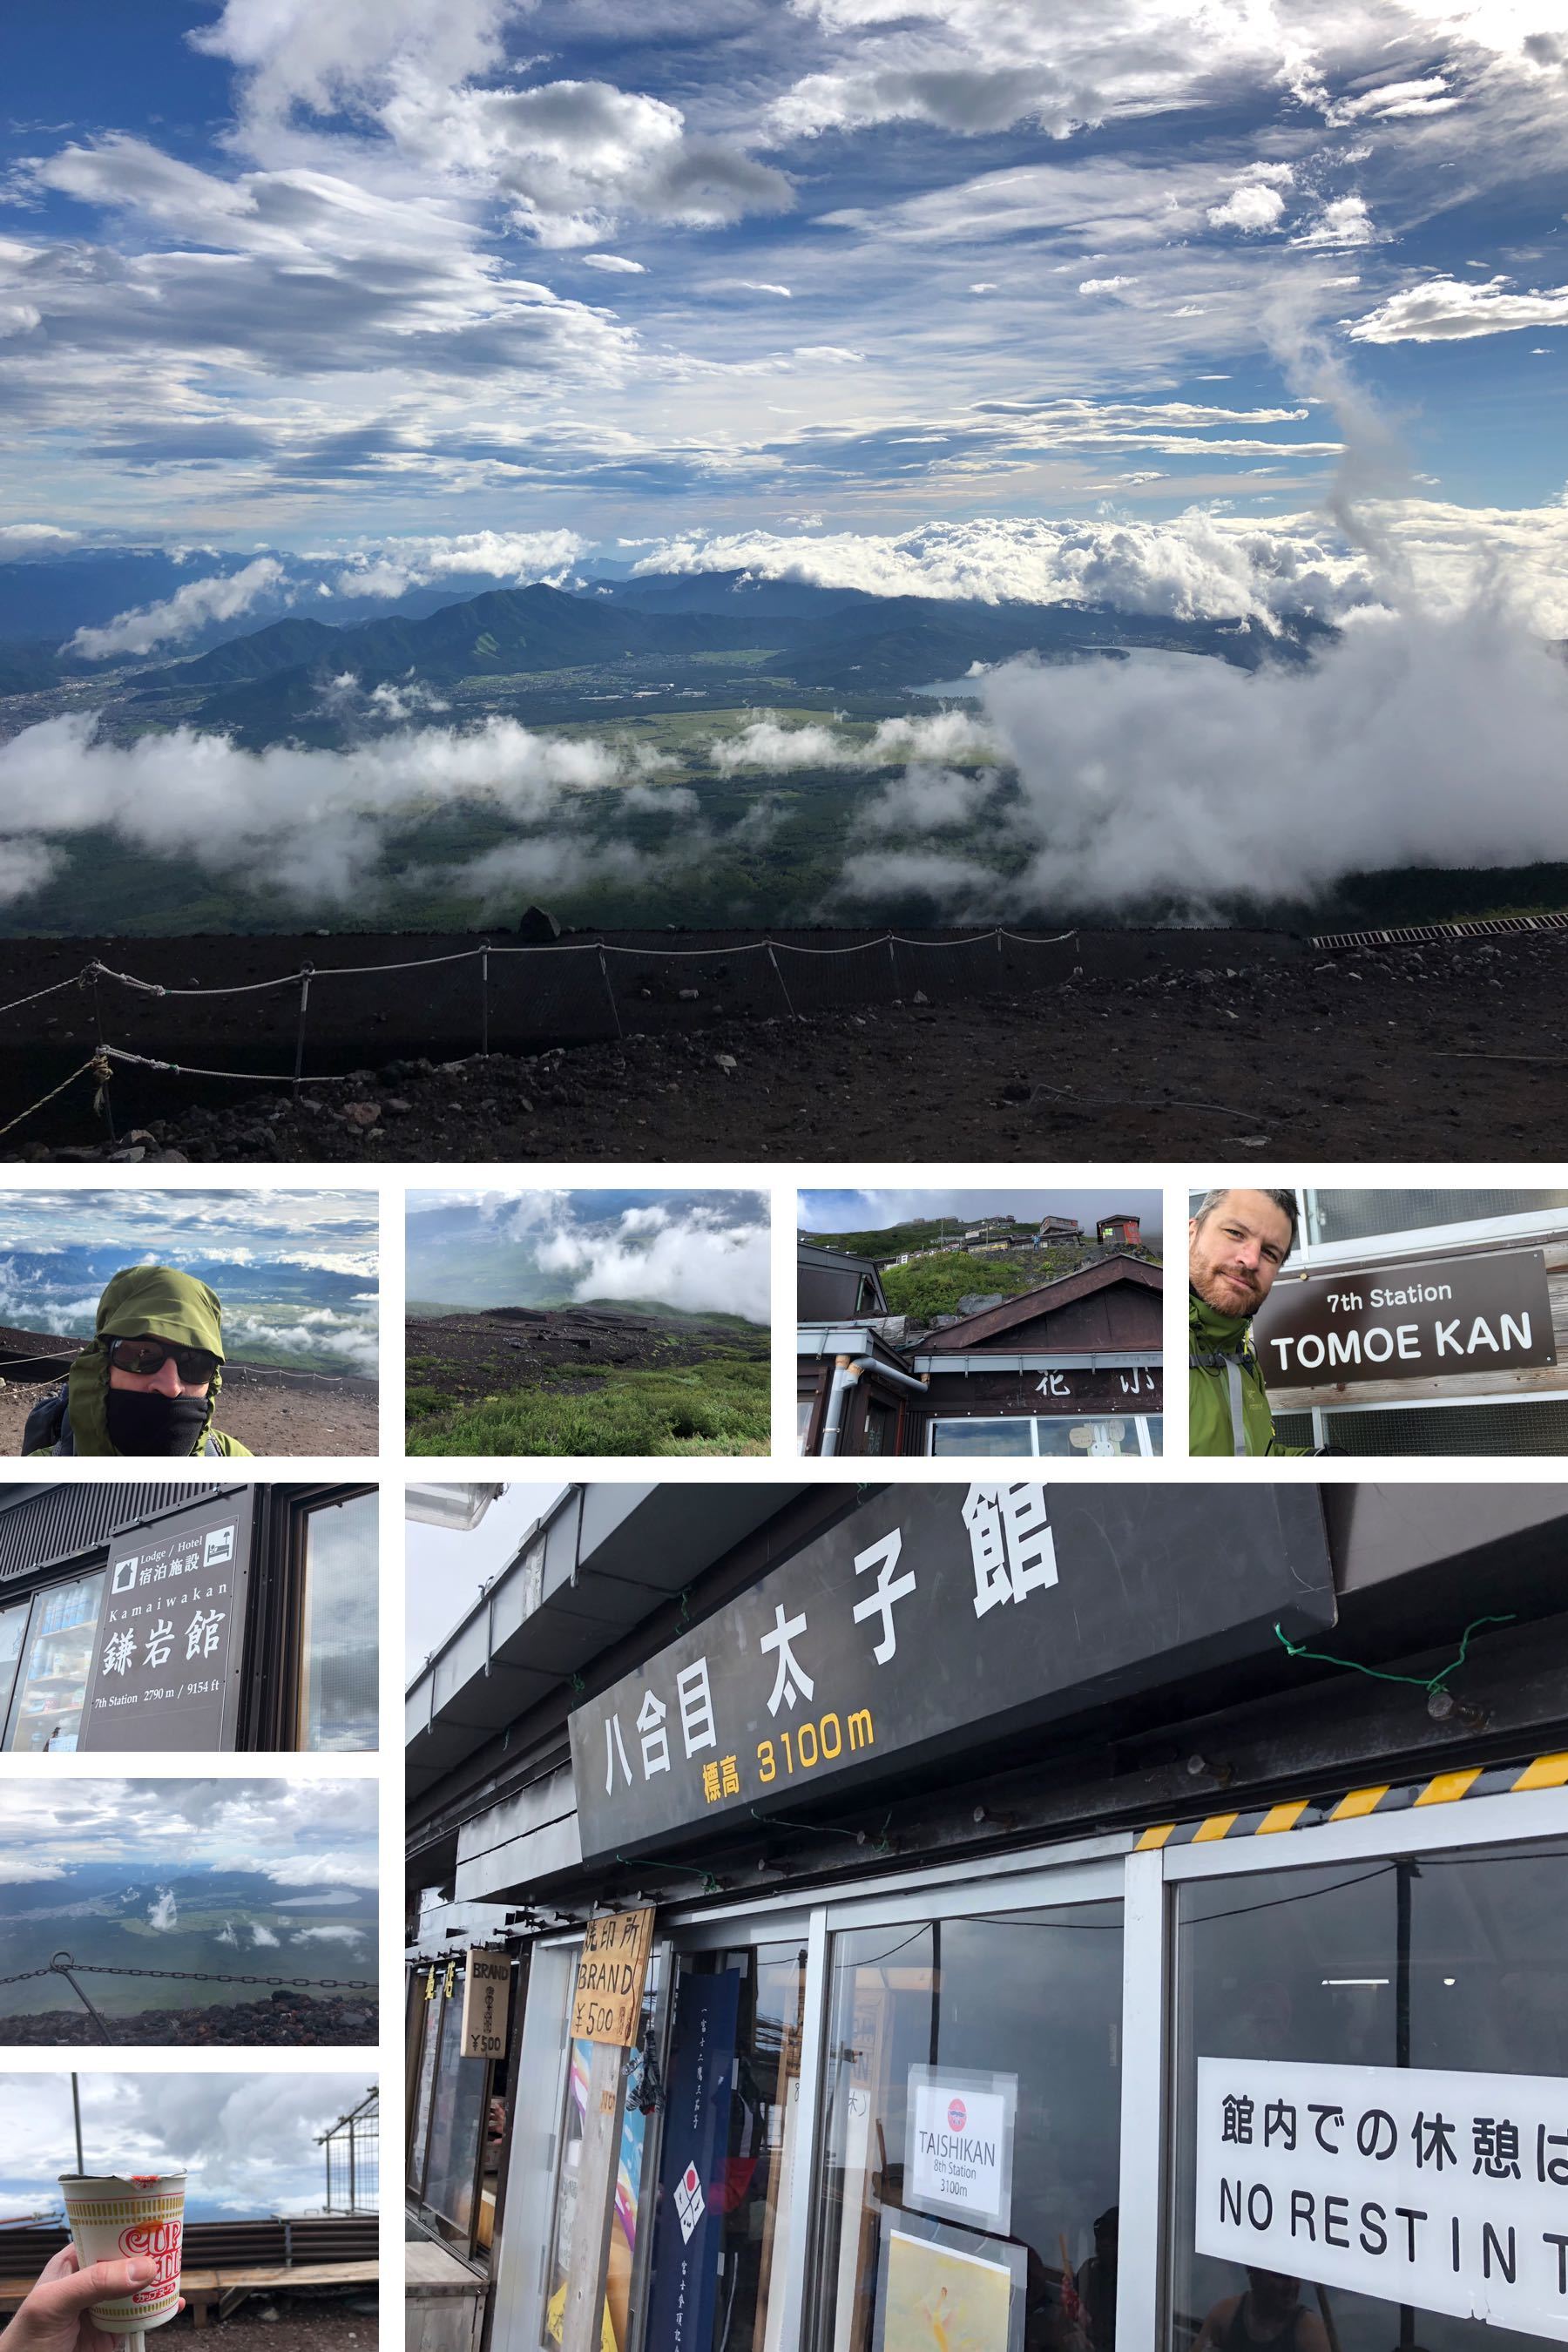
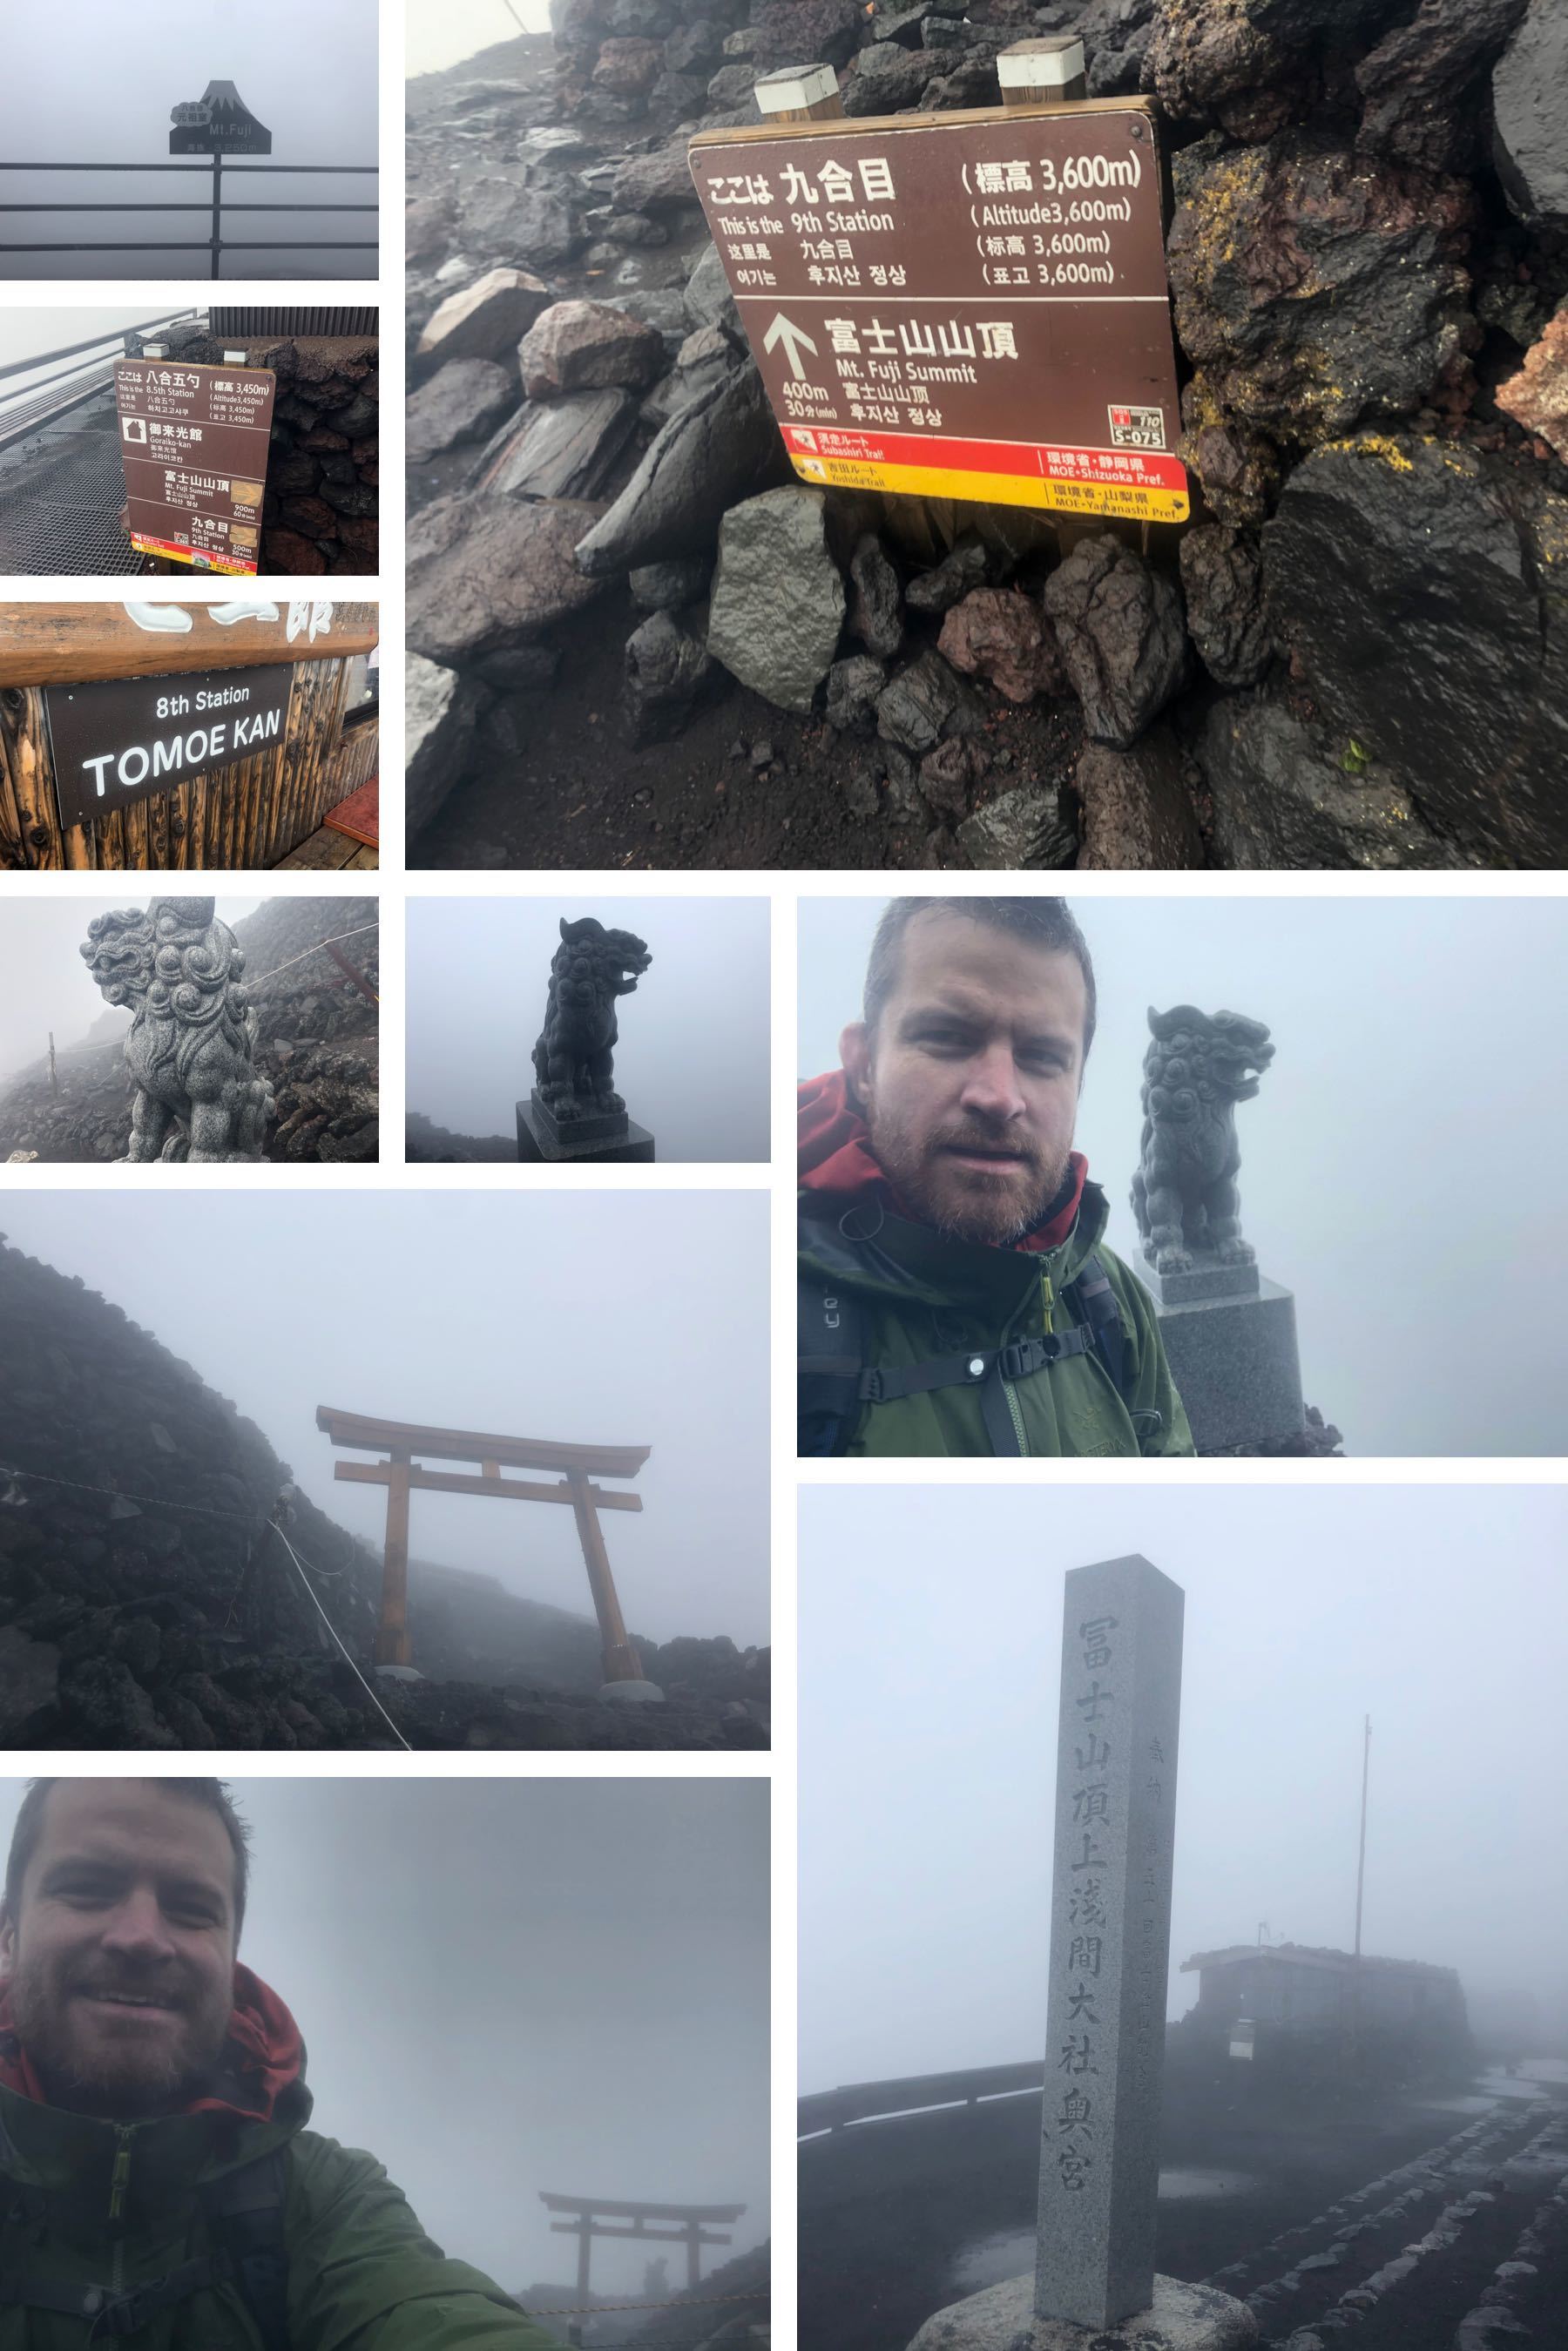
Temples and Shrines
Tokyo: Meiji Jingu
If you’re going to Kyoto, you’ll probably see enough temples and shrines there for your whole trip. However, Meiji Jingu in Tokyo is worth seeing. The grounds are a beautiful break from Tokyo’s endless skyscrapers.
Nikko
Nikko is a good day trip from Tokyo. It’s 2 hours each way, via the Yamagata Shinkansen and the JR Nikko Line.
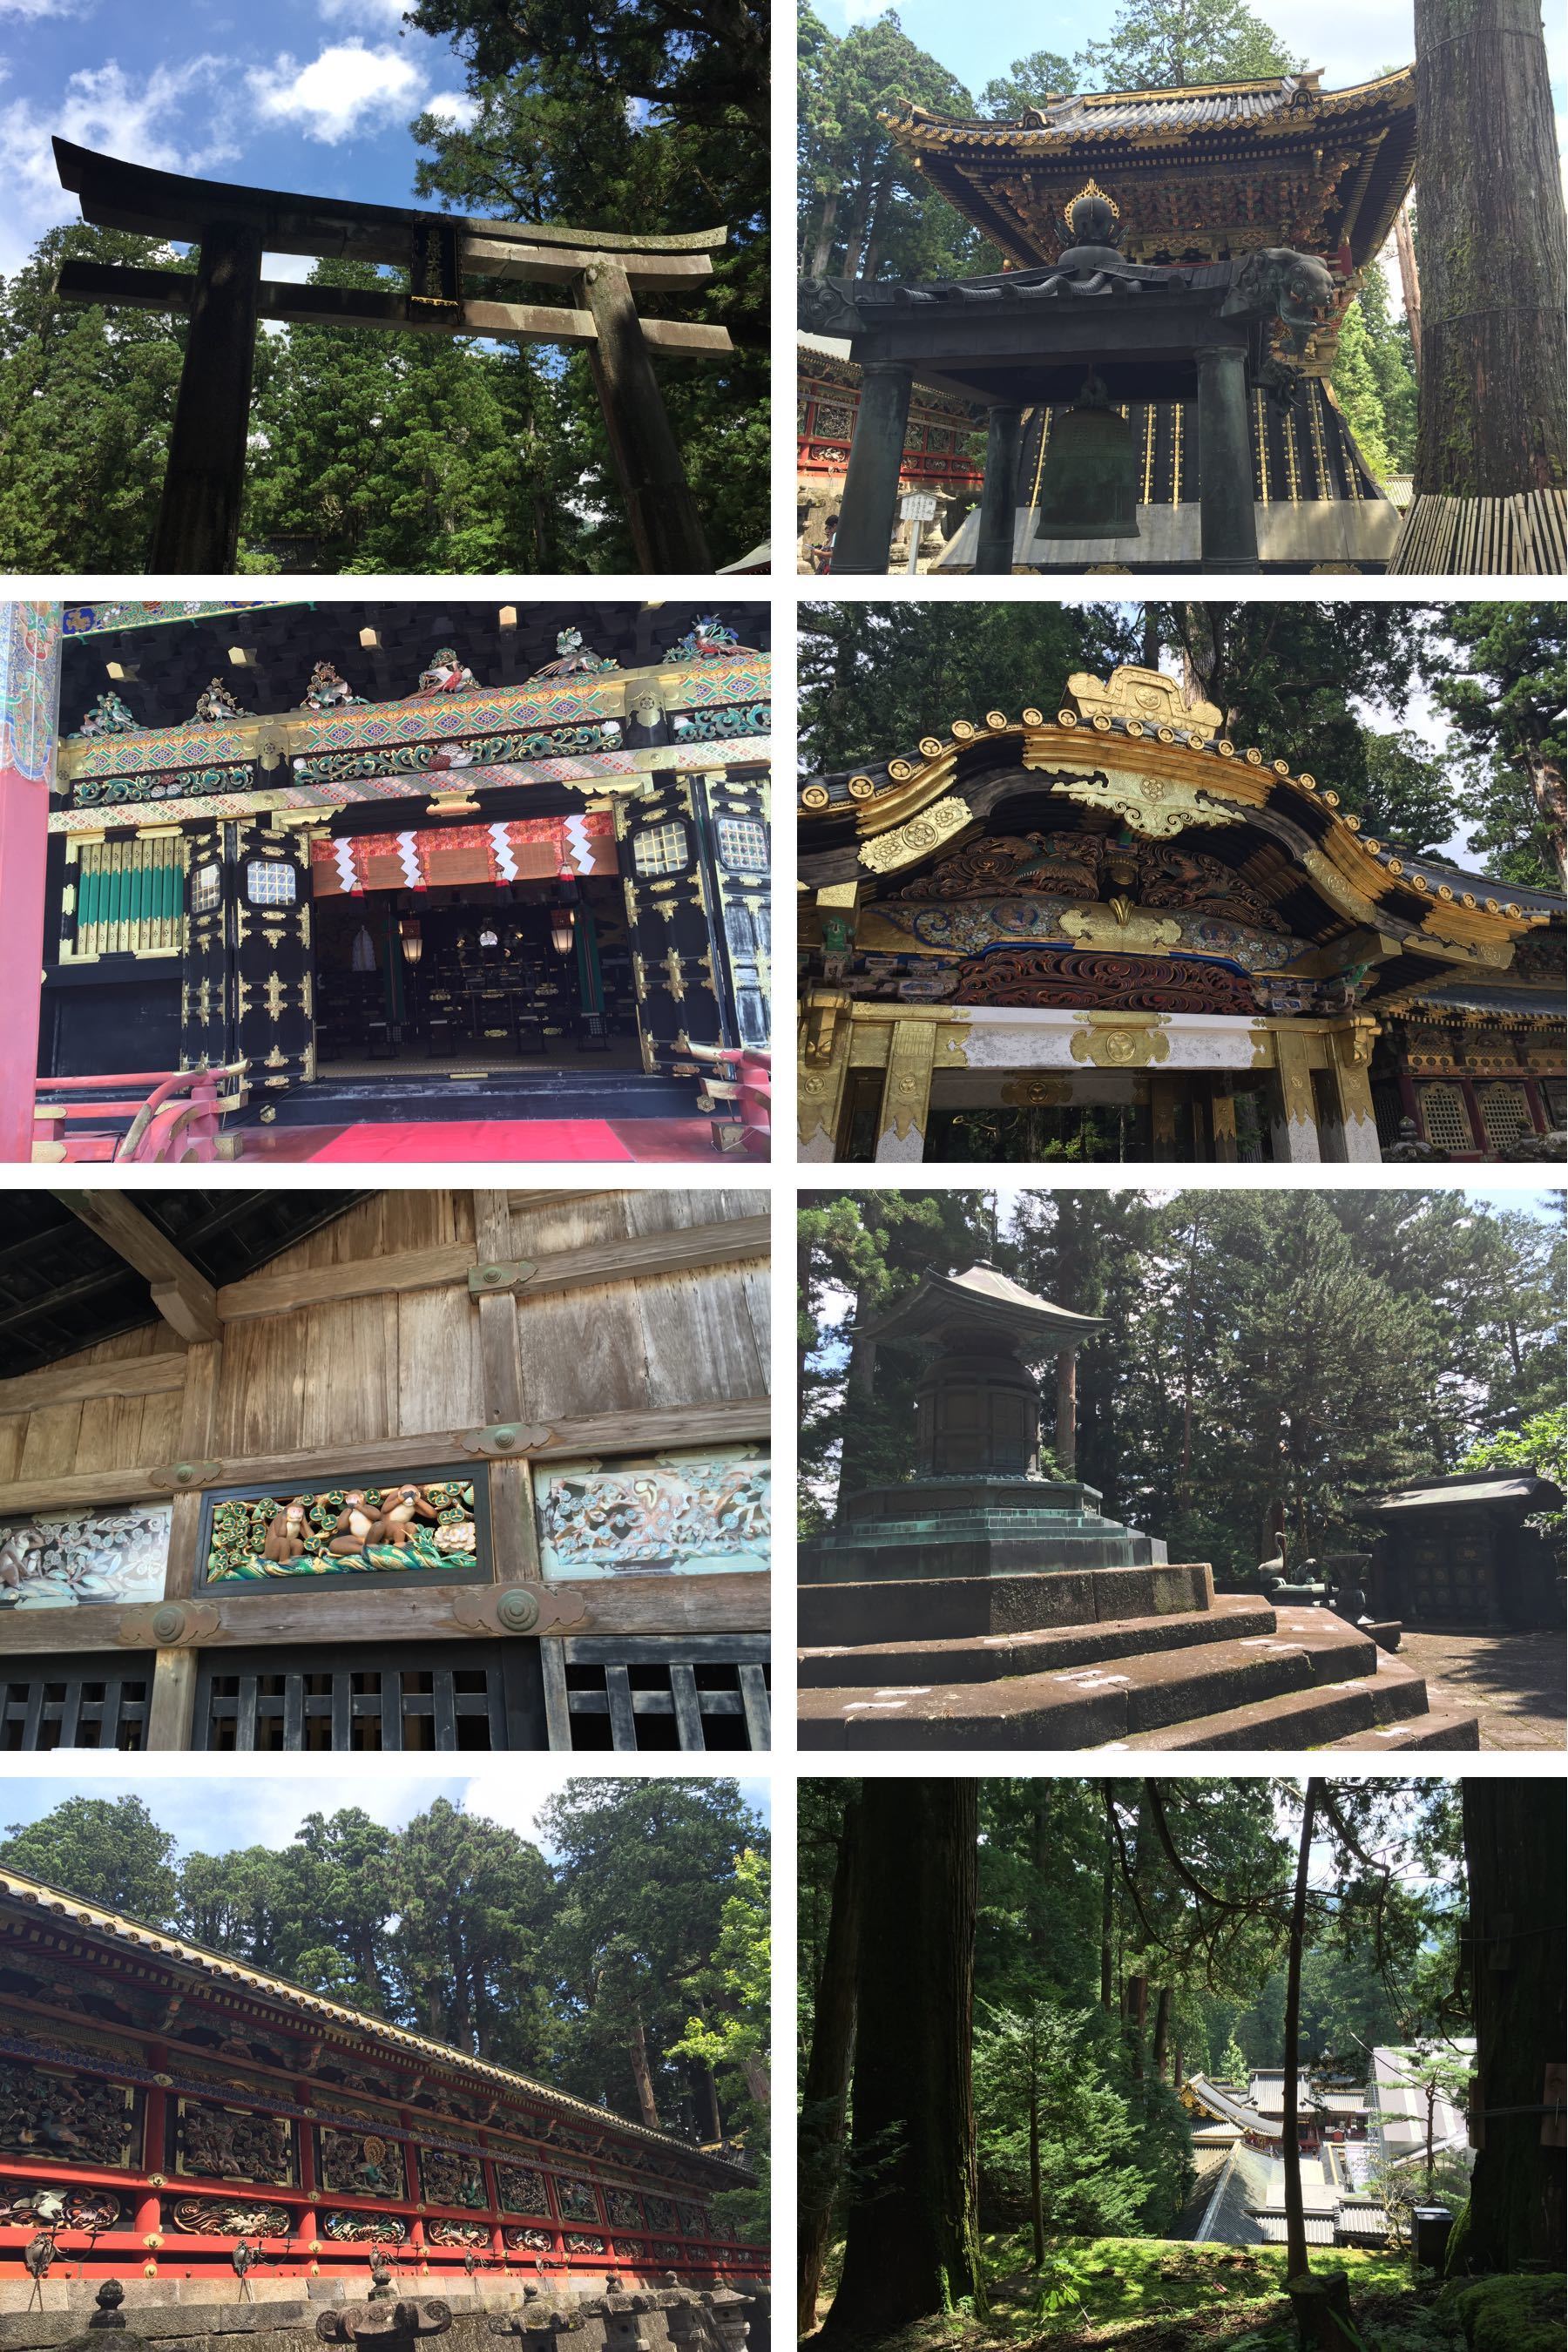
Kyoto
Kyoto has such an abundance of temples and shrines, that if Kyoto is included in your Japan itinerary, you probably want to do most of your temple and shrine visits there.
Don’t try to see all of them, however: you could do nothing but see temples and shrines in Kyoto for a week, and still not have visited ones which would be some of the most noteworthy sights of many cities. So, pick a handful which interest you. Chances are 2-3 days worth of temples and shrines is the right amount. Personally, I’m partial to the Zen temples, so most of the ones listed here are those ones. (Also, save enough time in Kyoto to see Nijo castle, which is discussed later.)
Nanzenji
Nanzenji is my favourite temple in Kyoto. It is a Zen temple with many lovely rock gardens, and it is a lot less crowded than Ryoanji. This is especially true early on a weekday morning, when it can be actually peaceful, even in summer.
After getting your Zen on at Nanzenji, you can also hike into the forest, if you walk under an old aqueduct and turn left, going past a cemetery. You will find a hidden Shinto shrine, and then a bit further you’ll find the “Saint Dojo”, which is a small waterfall that you can stand underneath for Takigyo (waterfall meditation). If you’re going to do Takigyo, there’s a small hut to change in, and a few rules to follow, so do some reading first.
After the Saint Dojo, you can hike up into the hills of Kyoto. I did this, but I’m not including it in the hiking section for two reasons:
- The trail is a bit confusing at places. Also, since Kyoto was in the middle of a 38 degree heatwave, I only spent about 1-2 hours exploring.
- A fairly large brown snake (about 4 feet long, and about an inch and a half thick) slithered across my path, about 3 feet from me. This may have been the Mamushi I subsequently saw signs warning me about on Mount Misen.
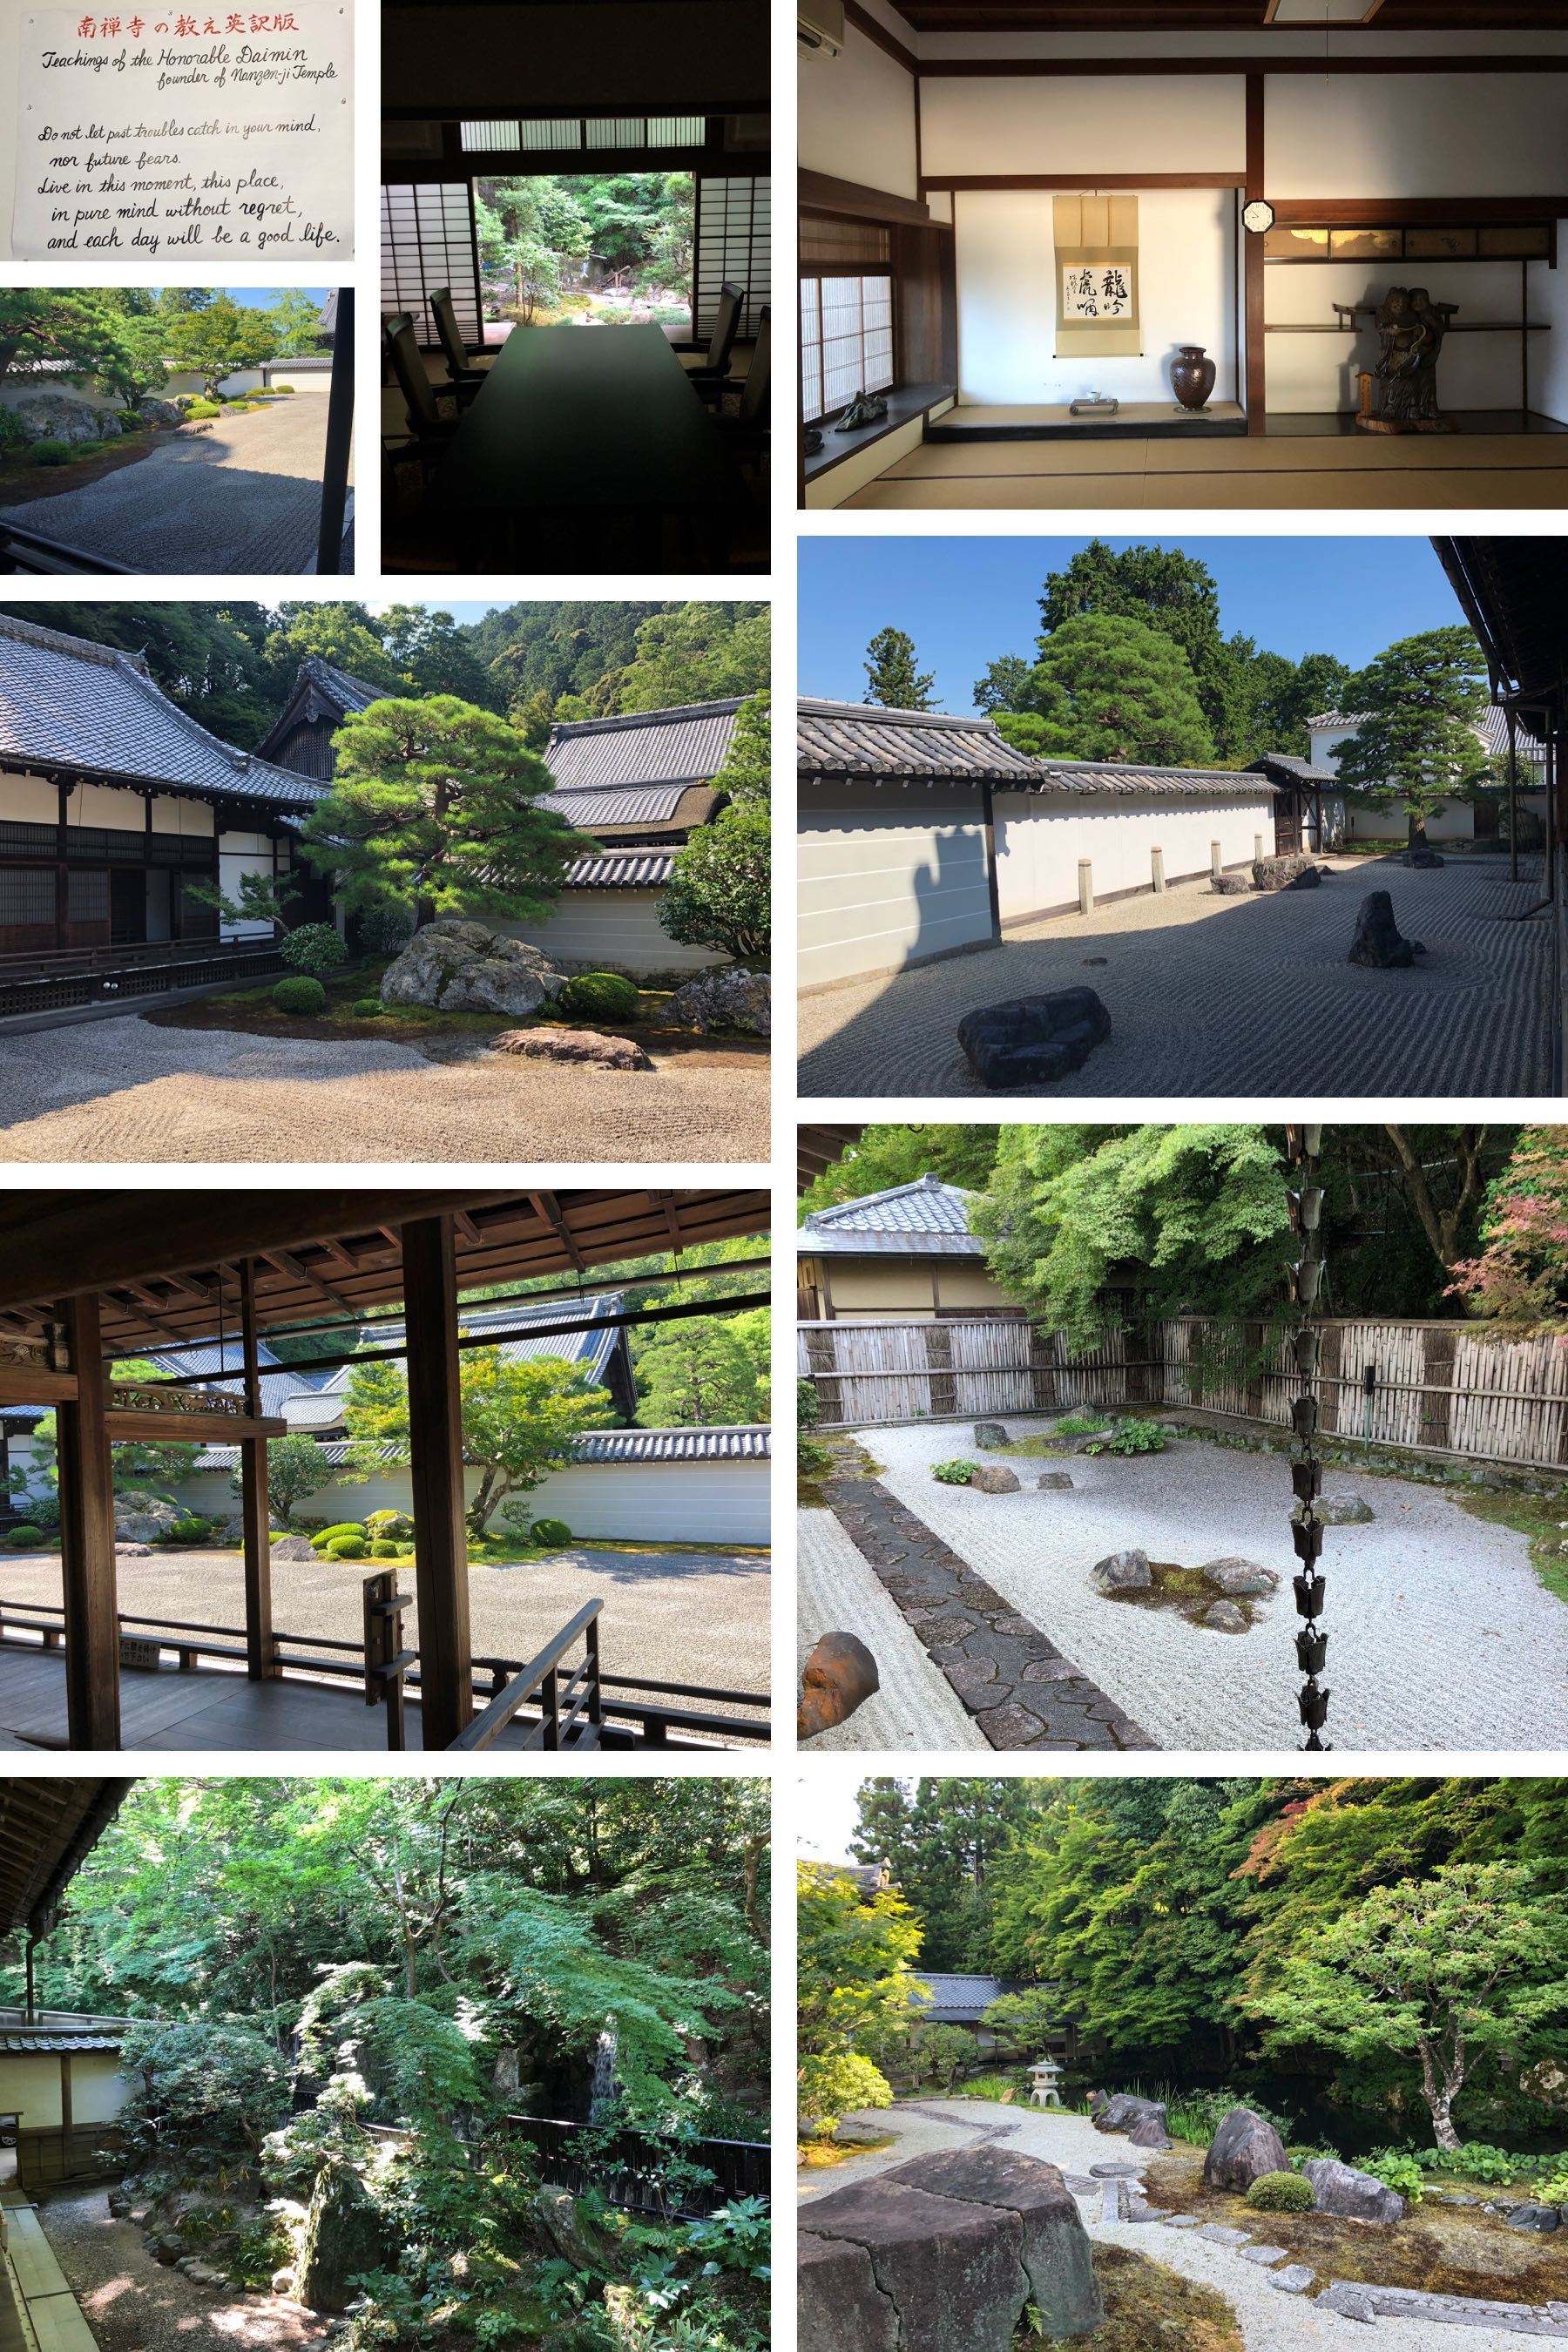
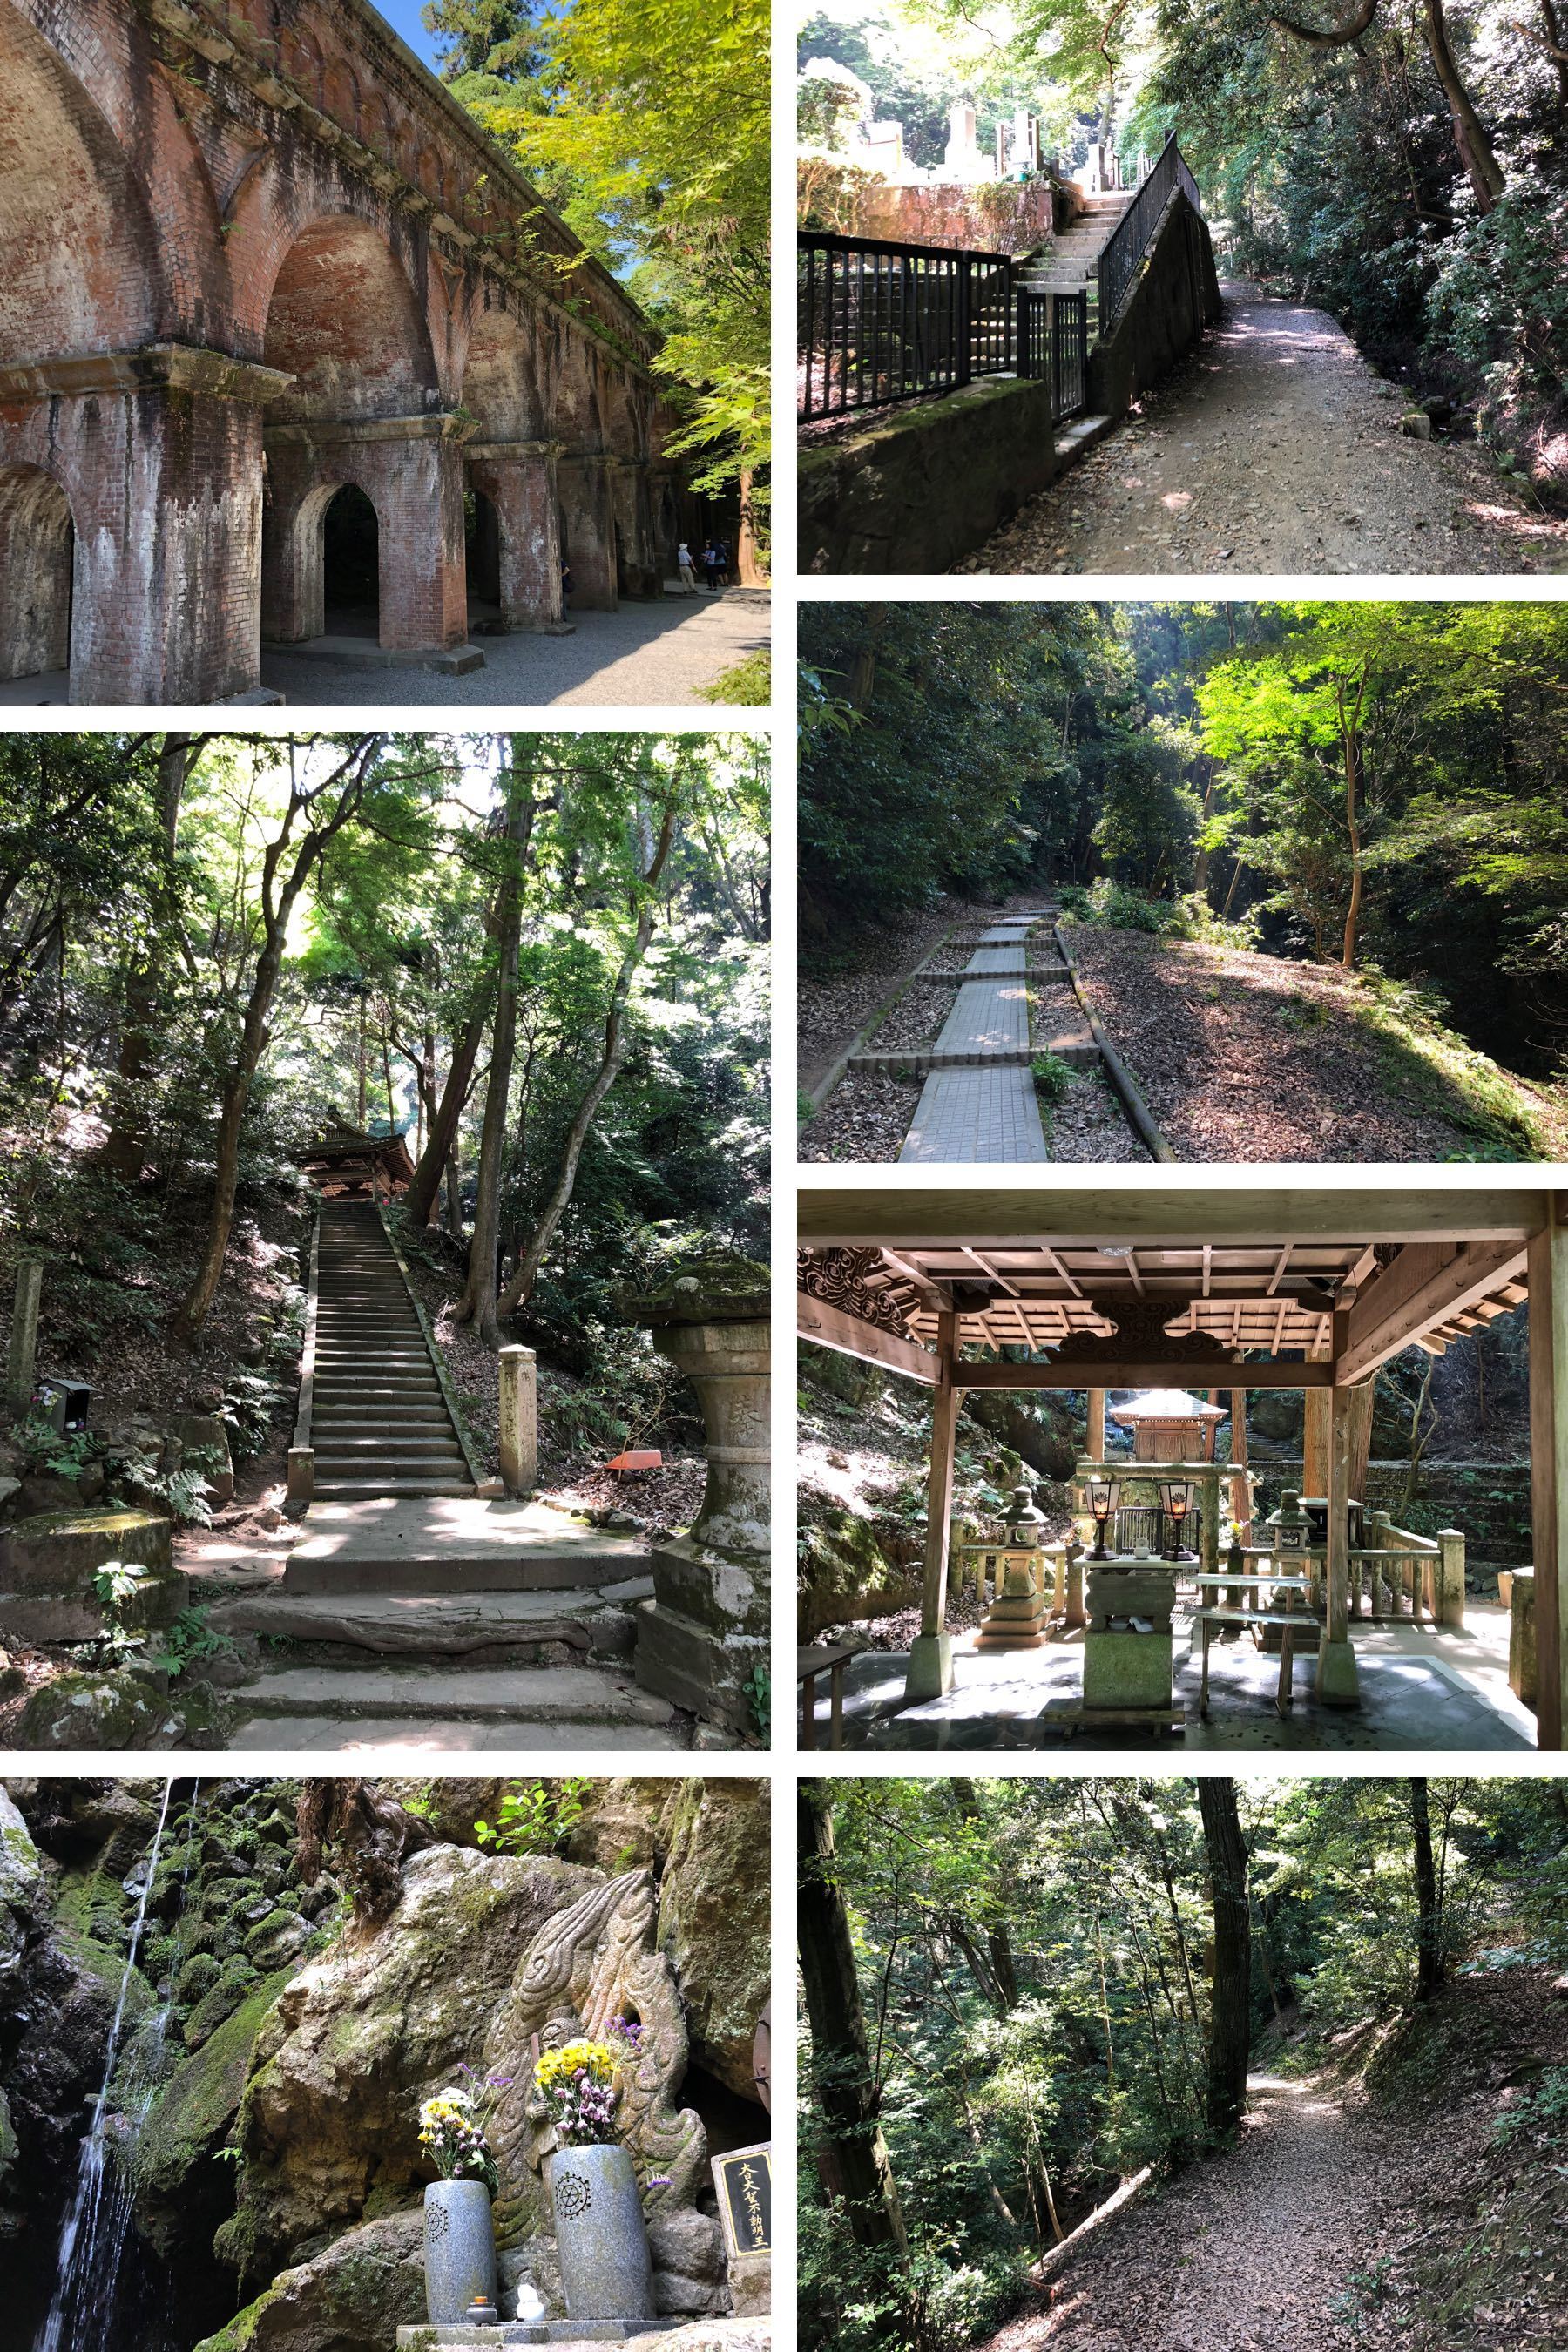
Honen-in
Honen-in is a Buddhist temple whose buildings are closed to visitors. Because of this, it is almost always virtually deserted, and a lot nicer of an experience than most temples which are open.
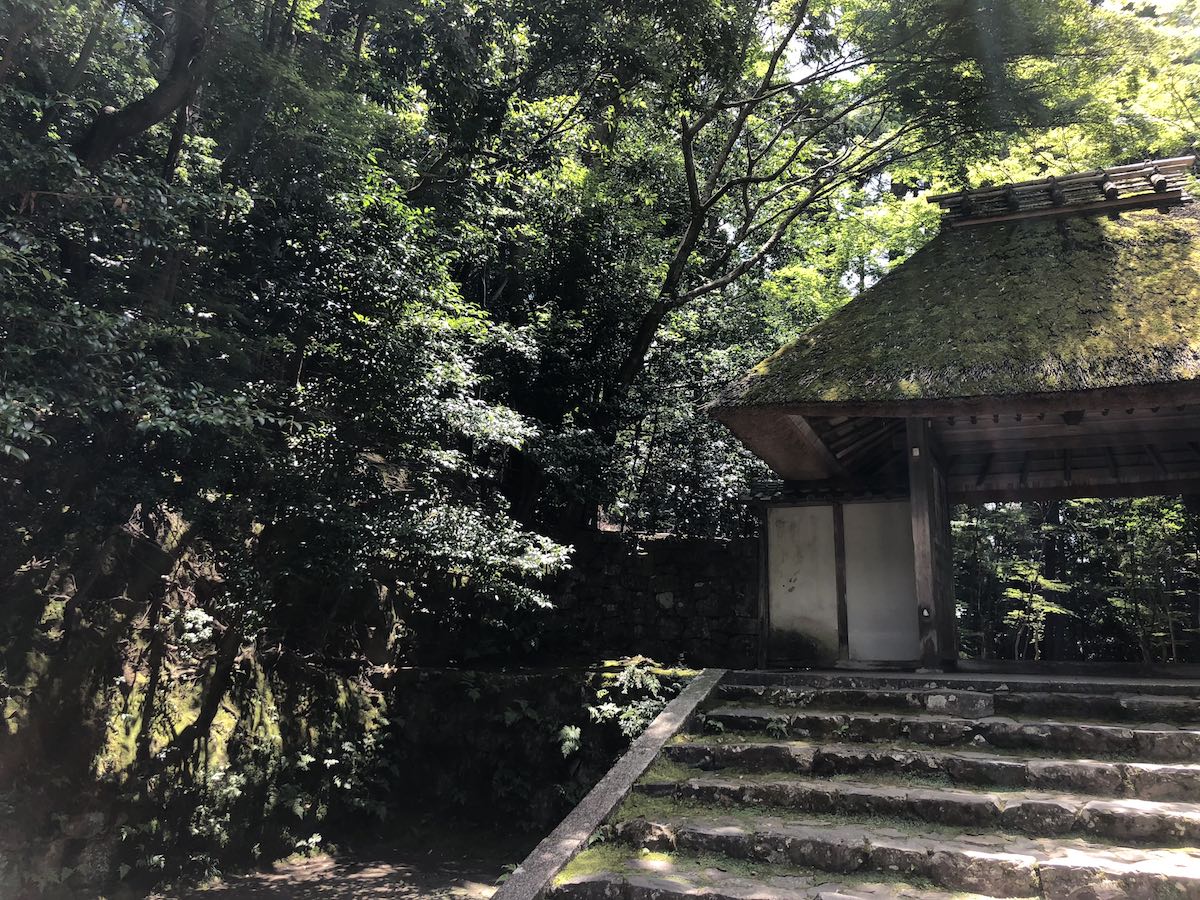
Ryoanji
Ryoanji. This is the temple with the rock garden that you’ll recognize from a Mac computer desktop background choice. Because of this, it’s much more crowded than Nanzenji.
It gets crowded, so try to get there first thing in the morning, right before it opens.
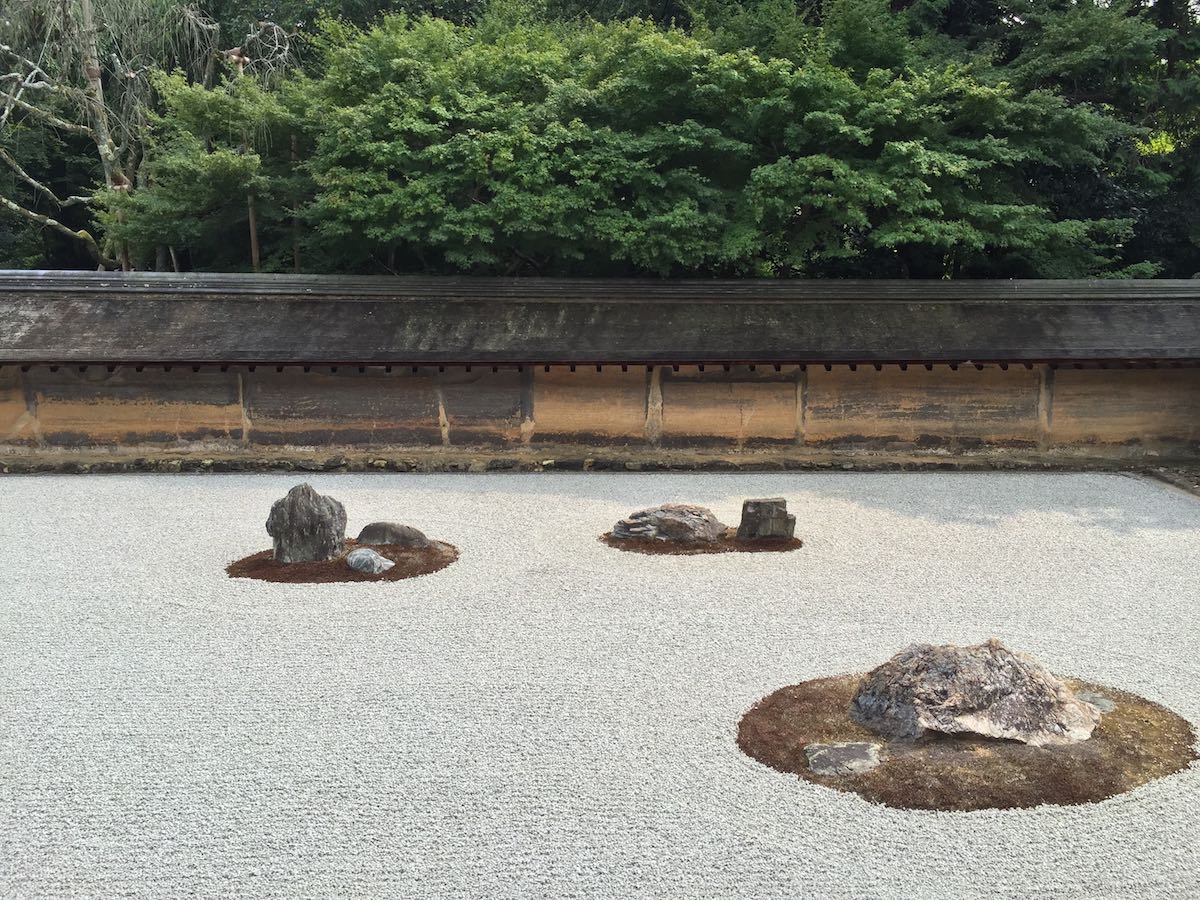
Kinkakuji (Golden Pavilion)
Kinkakuji, aka the Golden Pavilion. This is a reconstruction built in 1955, but chances are you’ll want to go there to photograph it like everyone else. (Seriously, in the afternoon it gets very crowded. Expect to spend 30 minutes tops, since basically there are two really good photo locations, and after that, it’s a reasonably short walk through the grounds. The grounds would be lovely, if it wasn’t for the crowds.)
The best thing to do here is to arrive 15 minutes before it opens, on a weekday. This way you can get in and out before it gets overrun.
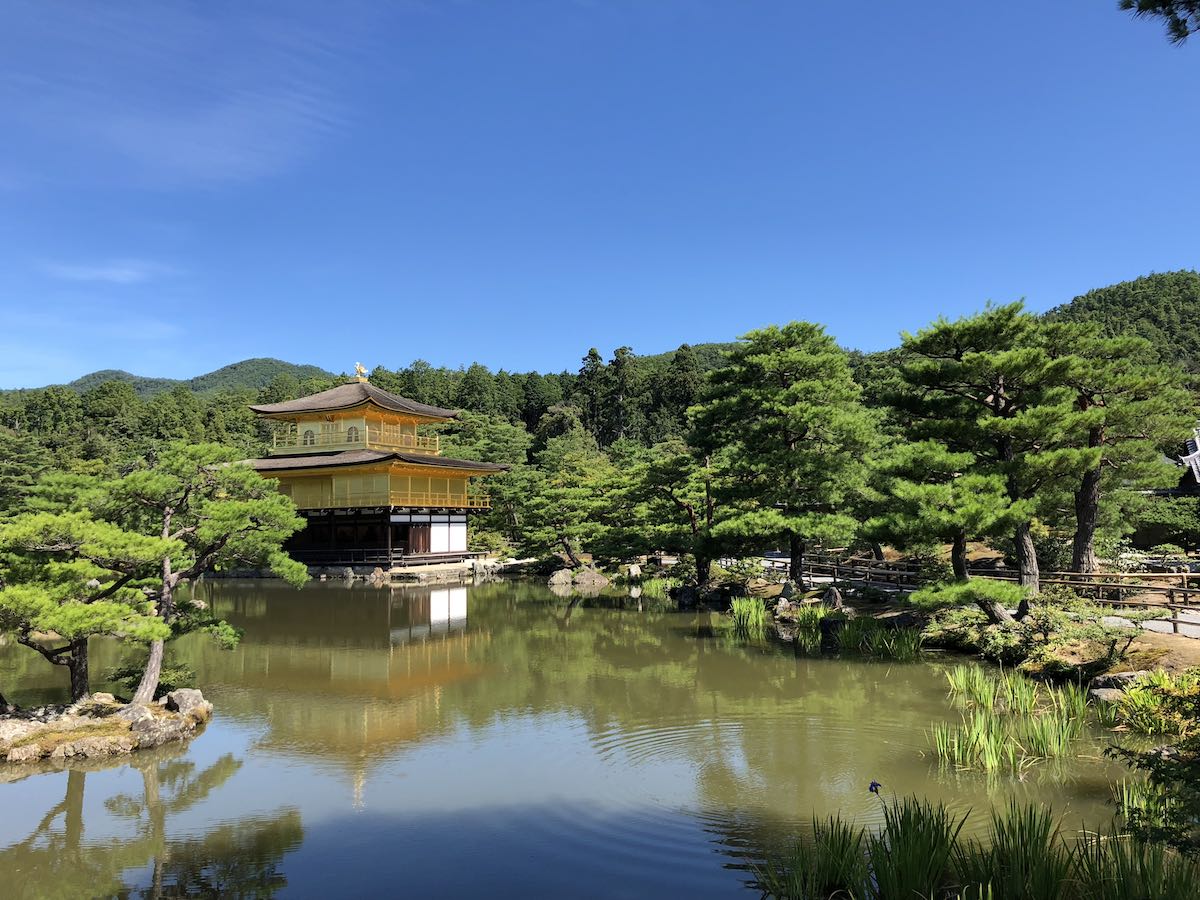
Ginkakuji (Silver Pavilion)
Ginkakuji, aka the Silver Pavilion. It’s not actually silver, and the rock garden has strange rock cones in it which didn’t do much for me. But the grounds are nicer than Kinkakuji and it’s slightly less crowded.
It’s still crowded though. After you’ve been to Ryoanji, Kinkakuji and Ginkakuji, you’ll appreciate the relative tranquility of Nanzenji and the actual tranquility of Honen-in.
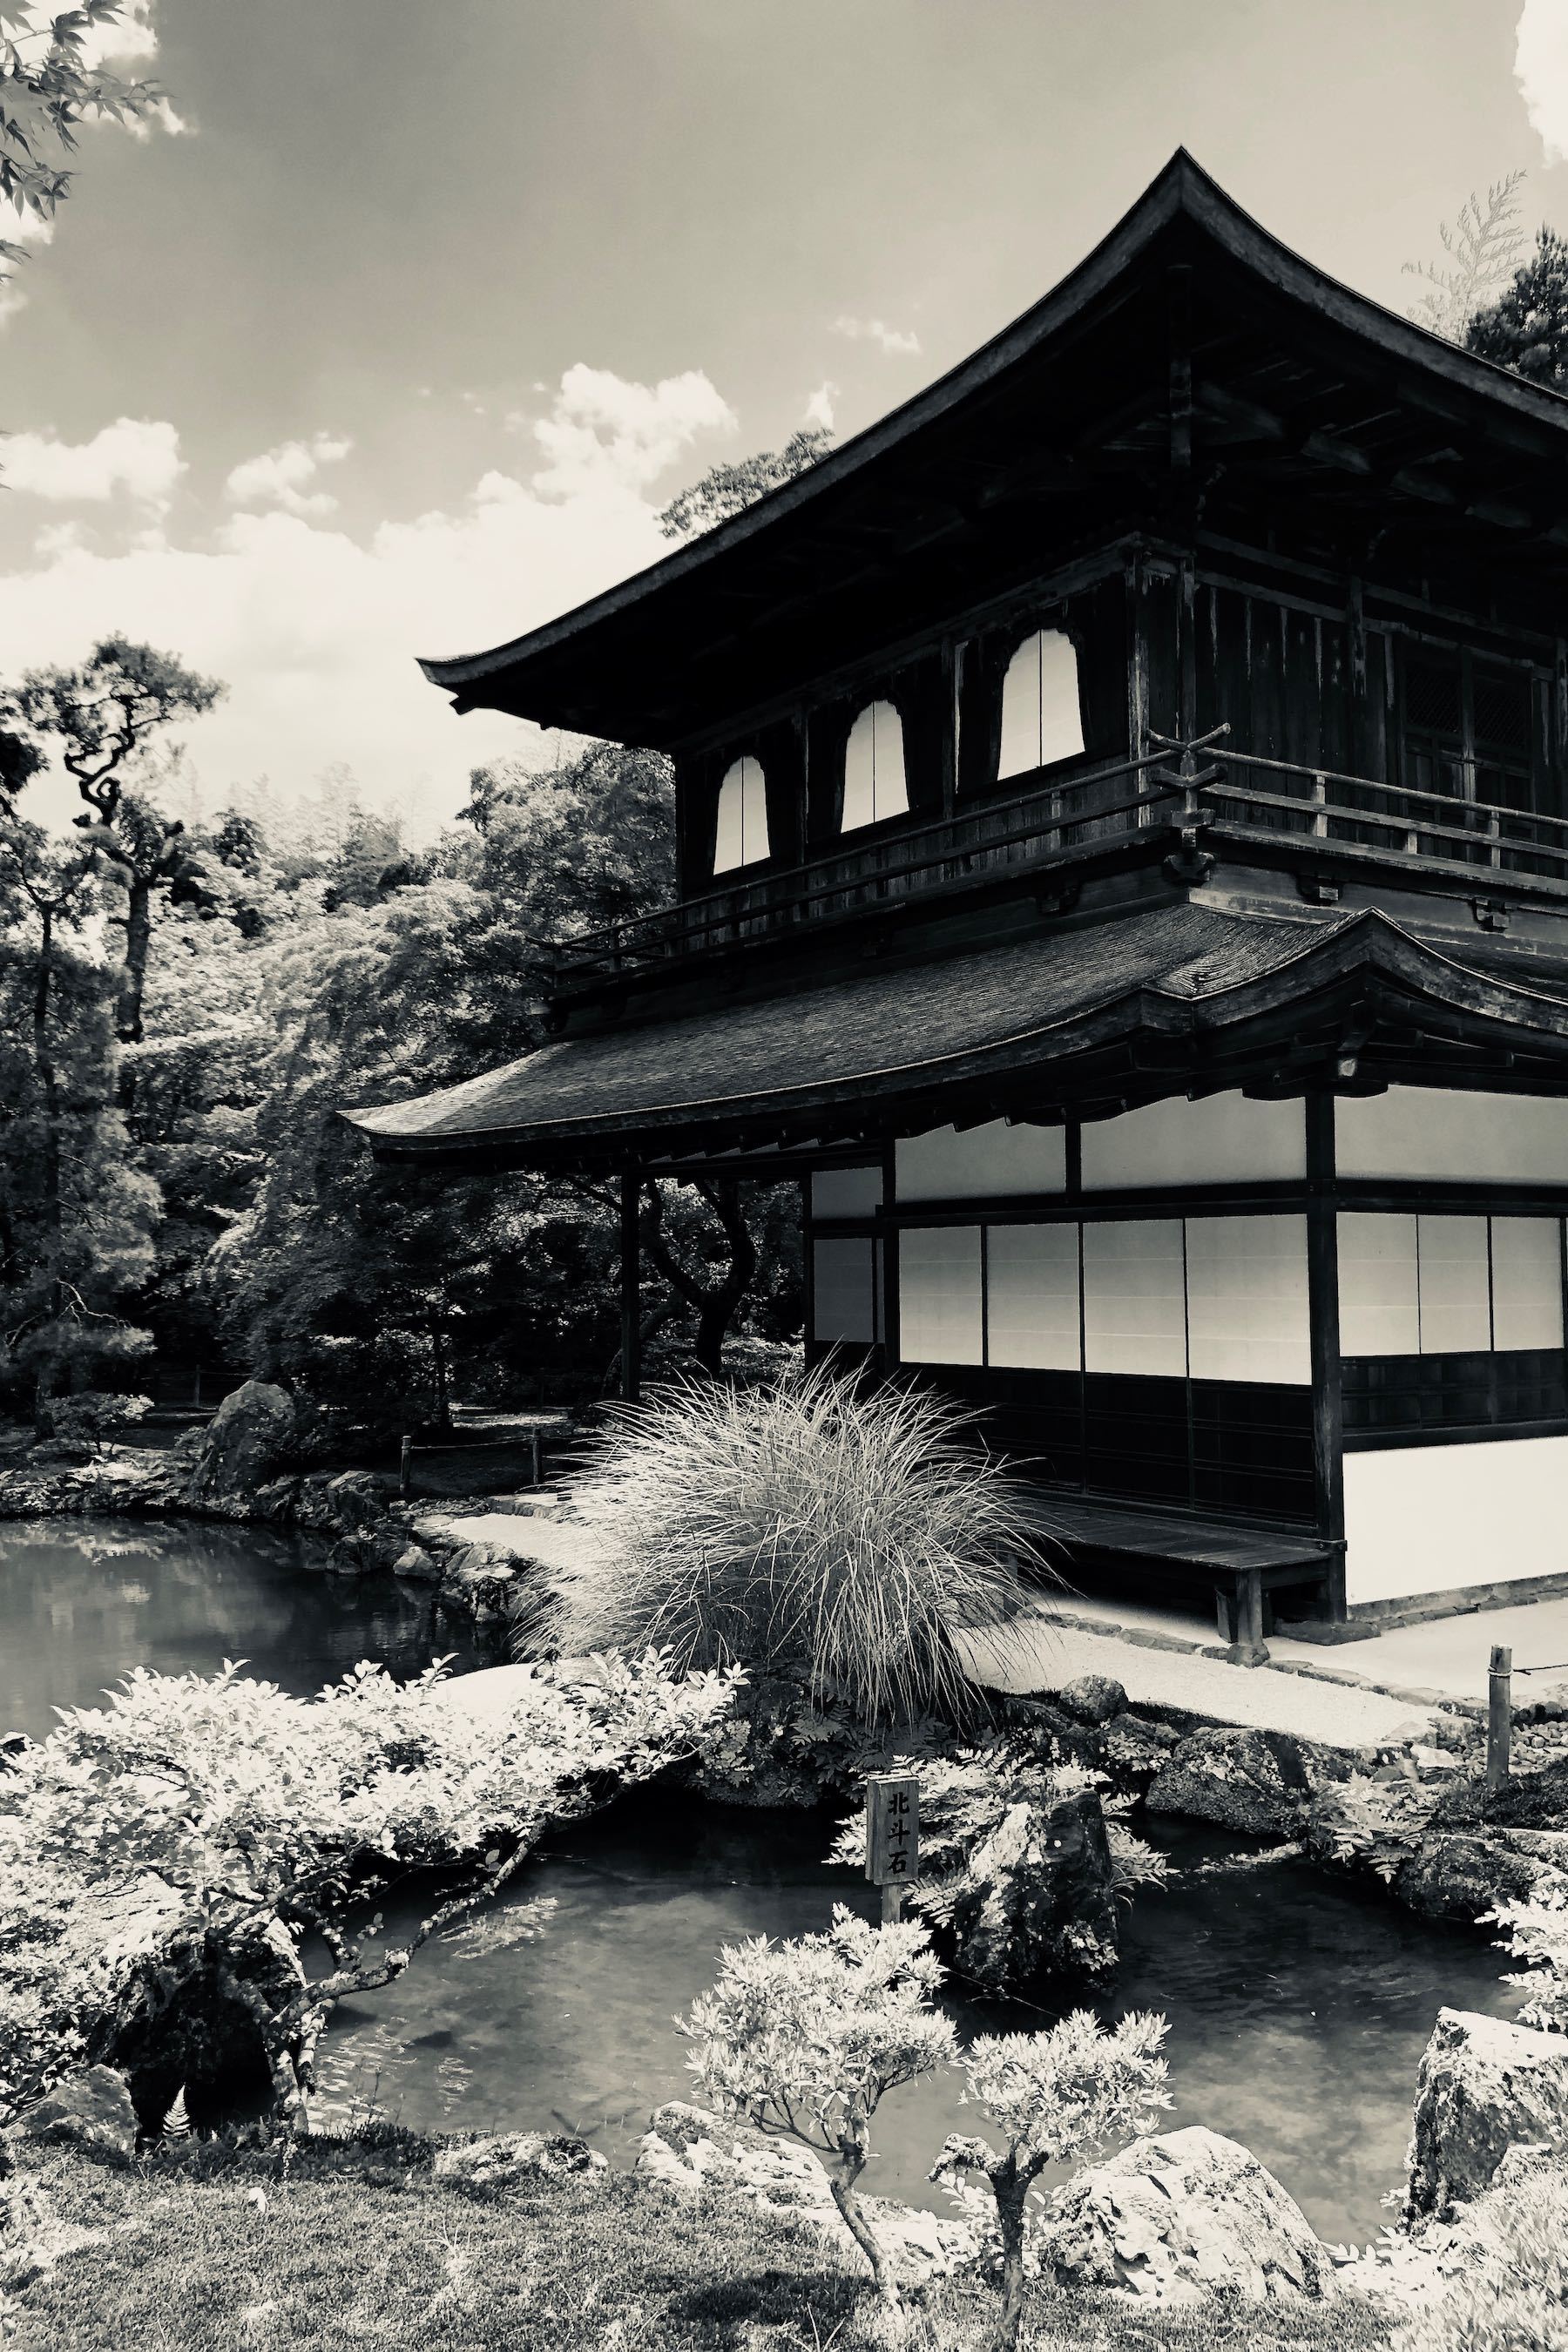
Nara
In Nara there is a big Buddha at Todaiji Temple. It’s actually a very historically significant Buddha statue–Japan maxed out its credit cards building it back in the 700s. (Nara was briefly the capital of Japan, before there was a bit of a scandal and the decision was made to separate temple and state a bit, and move the capital to nearby Kyoto.)
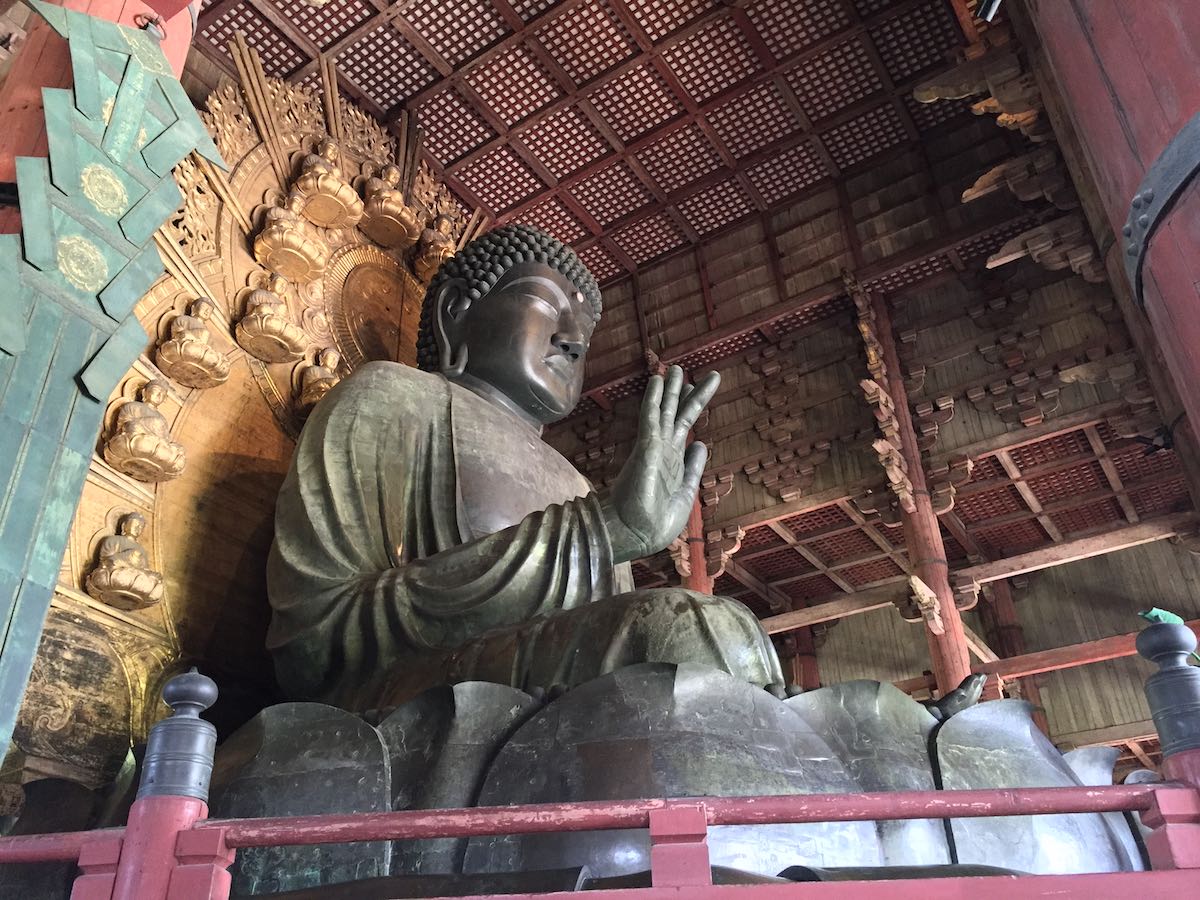
Frankly, the most memorable thing in Nara is actually the park near Todaiji, where you can feed some very entitled deer some crackers which are specially made for them to digest. (There are stalls of vendors selling the crackers, and the deer quickly get up close and personal once you’ve bought them.)
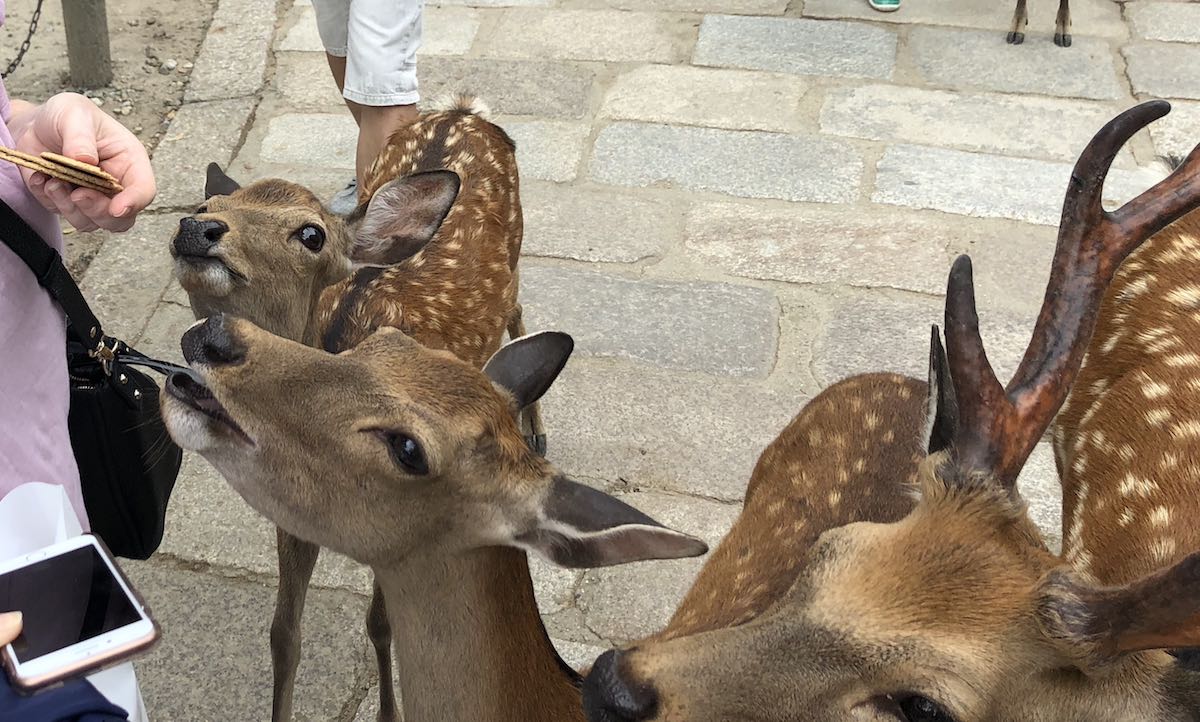
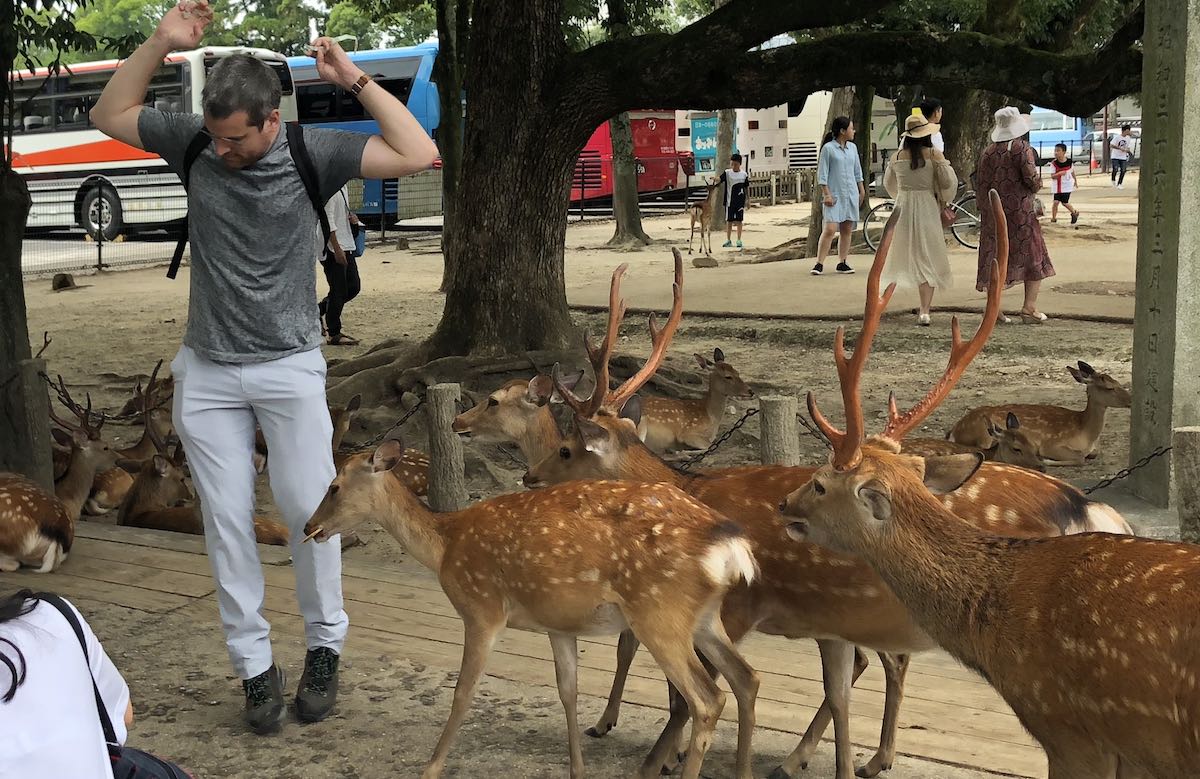
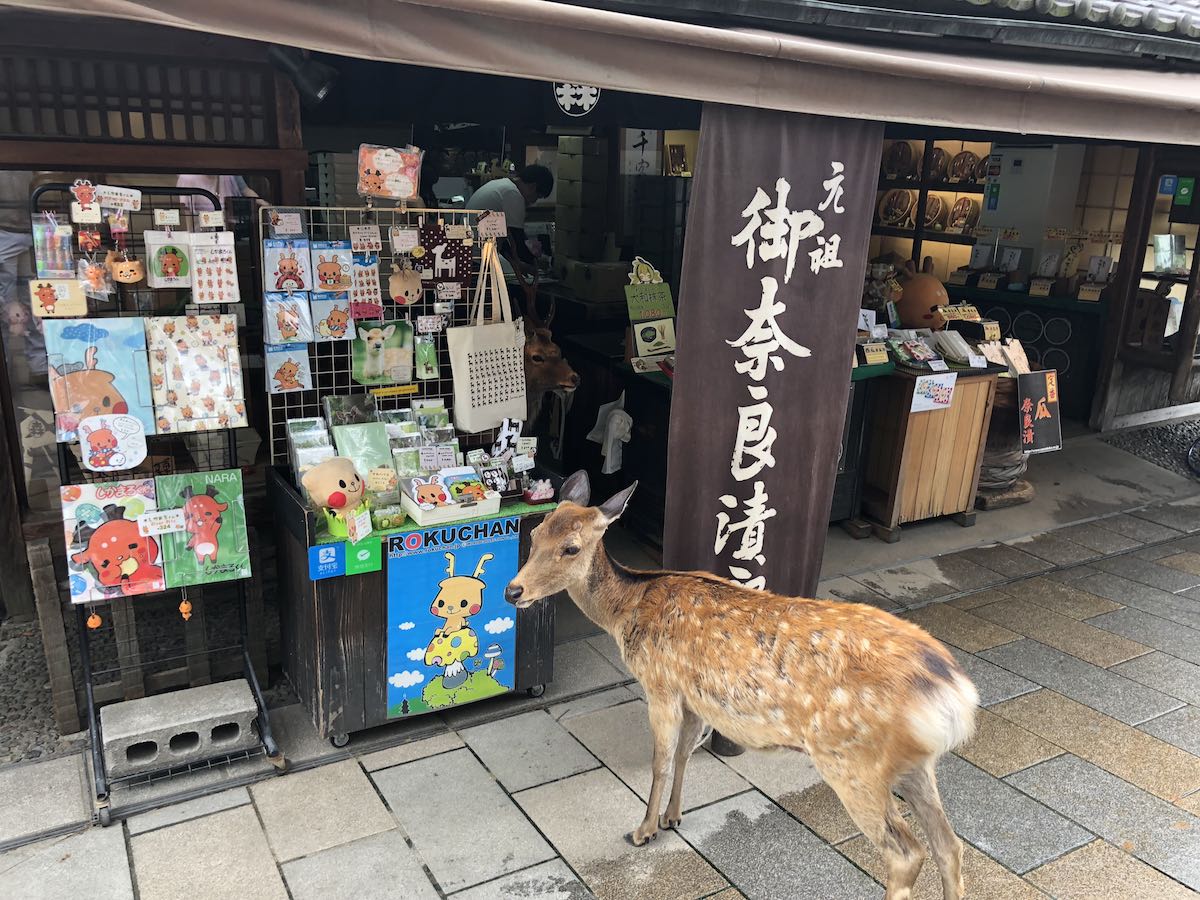
Ise
Ise is a good day trip from Nagoya.
The Ise Grand Shrine is the most sacred Shinto shrine. It’s also rebuilt every twenty years, the last time in 2013. If you have the time, it’s worth a day trip from Nagoya or Osaka.
Besides the Grand Shrine, there are a number of auxiliary shrines, and the entire complex is set in a very tranquil forest setting.
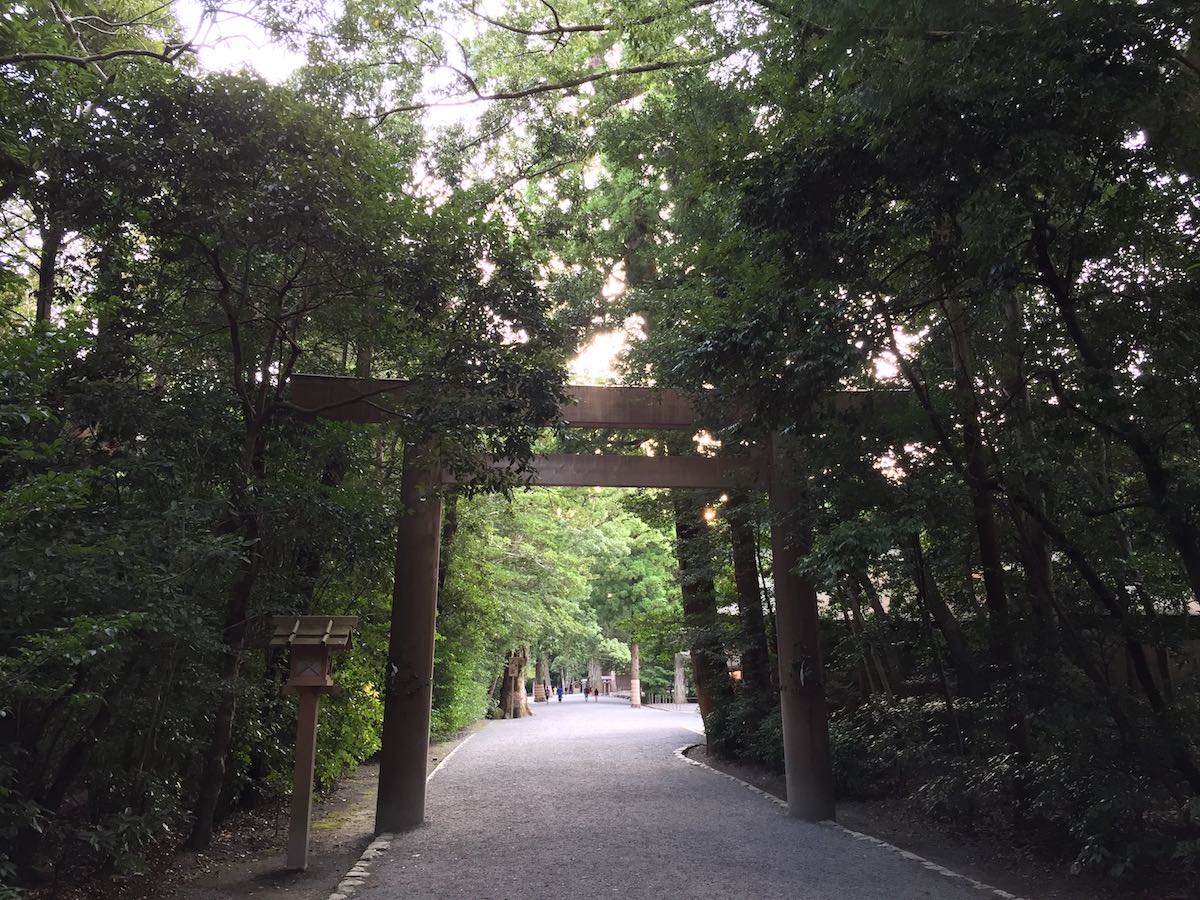
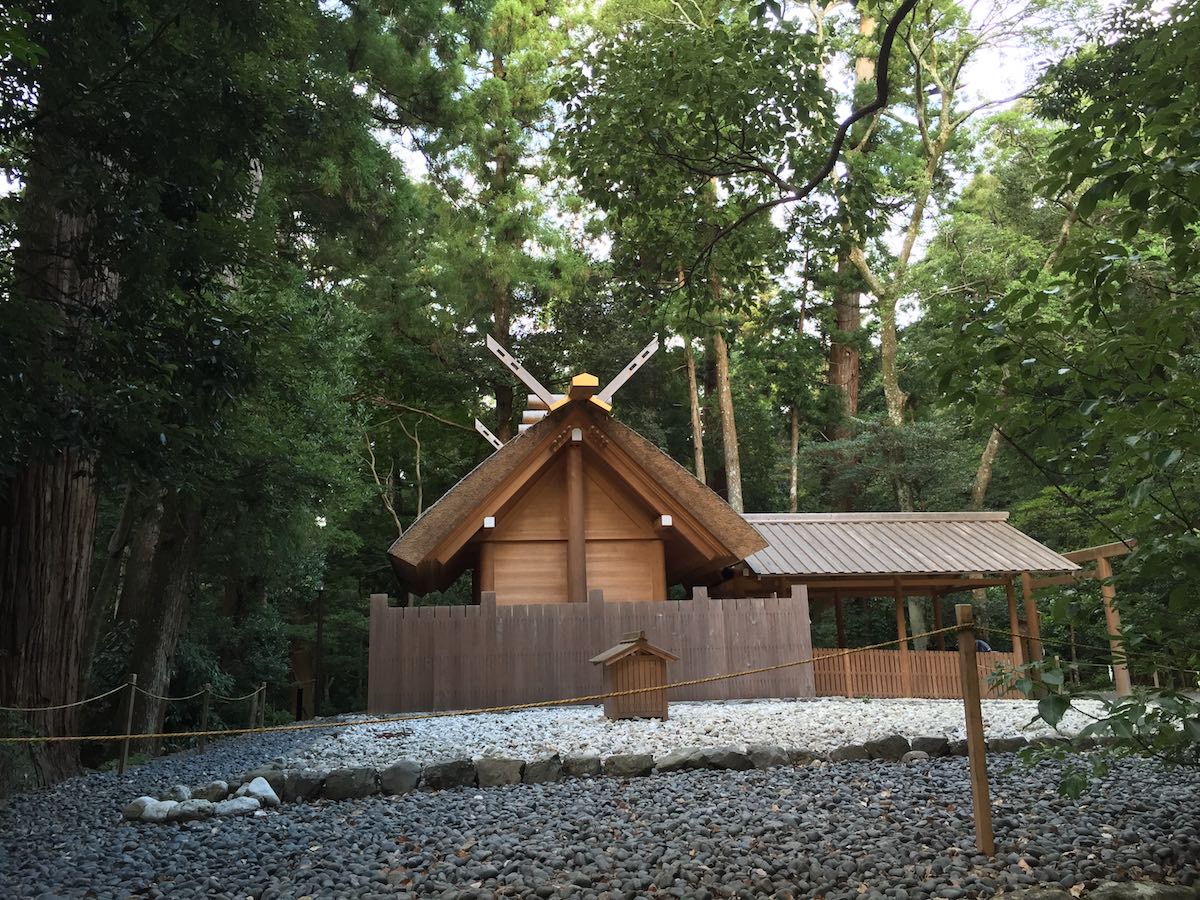
Castles and Gardens
Castles
Most of the castles in Japan were built in two periods:
- the Sengoku period, around 1467 - 1600
- after World War II, as reconstructions
Between the Tokugawa Shogunate’s restrictions on castles as a way of consolidating power, occasional fire damage over the centuries (these were wooden castles), and US bombing in World War II, almost all the castles you will see are reconstructions. Of the over 300 castles in Japan, only 12 maintain either their original keep, or even a very old reconstruction of it. Japan Guide has a good list of the best castles in Japan, separated into original castles, reconstructions and ruins.
Himeji Castle
Since this is your first trip to Japan, one of the two must-see castles is Himeji Castle. It’s original construction, and easily accessible via Shinkansen from Osaka.
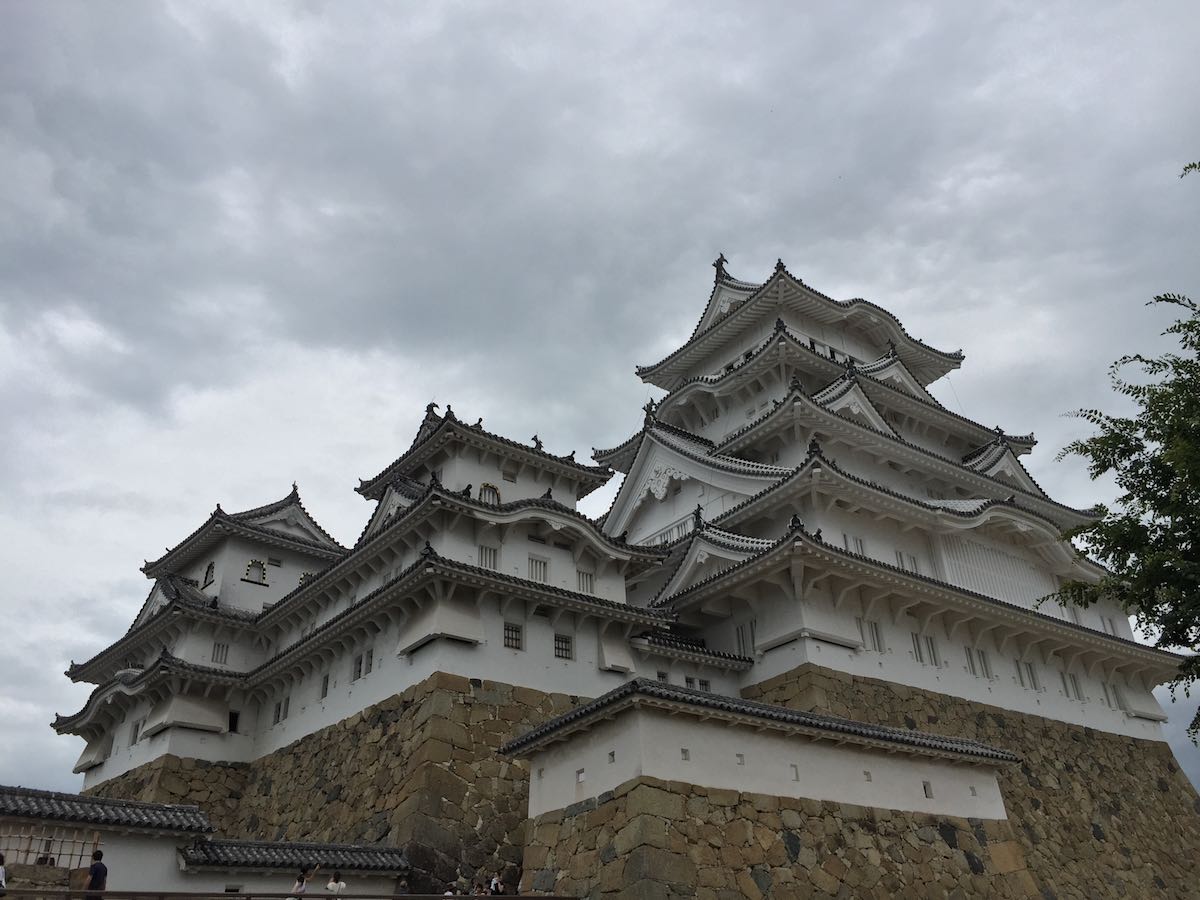
Nijo Castle (in Kyoto)
The other must-see castle is Nijo Castle in Kyoto. It was constructed in 1603 by Tokugawa Ieyasu (the first Tokugawa Shogun) as his temporary residence when he visited Kyoto, and it’s very well preserved with lovely grounds.
You can’t actually take pictures inside of Nijo Castle, but it is very much worth going inside and walking through it. It is very much like stepping into a scene from almost 400 years ago. Note that the sliding screens inside the castle are reproductions, and the originals are kept in a separate (climate-controlled) building nearby. (However, it’s actually more striking seeing the reproductions in their context than the originals in a gallery setting.)
Finally, the grounds of Nijo Castle are lovely as well.
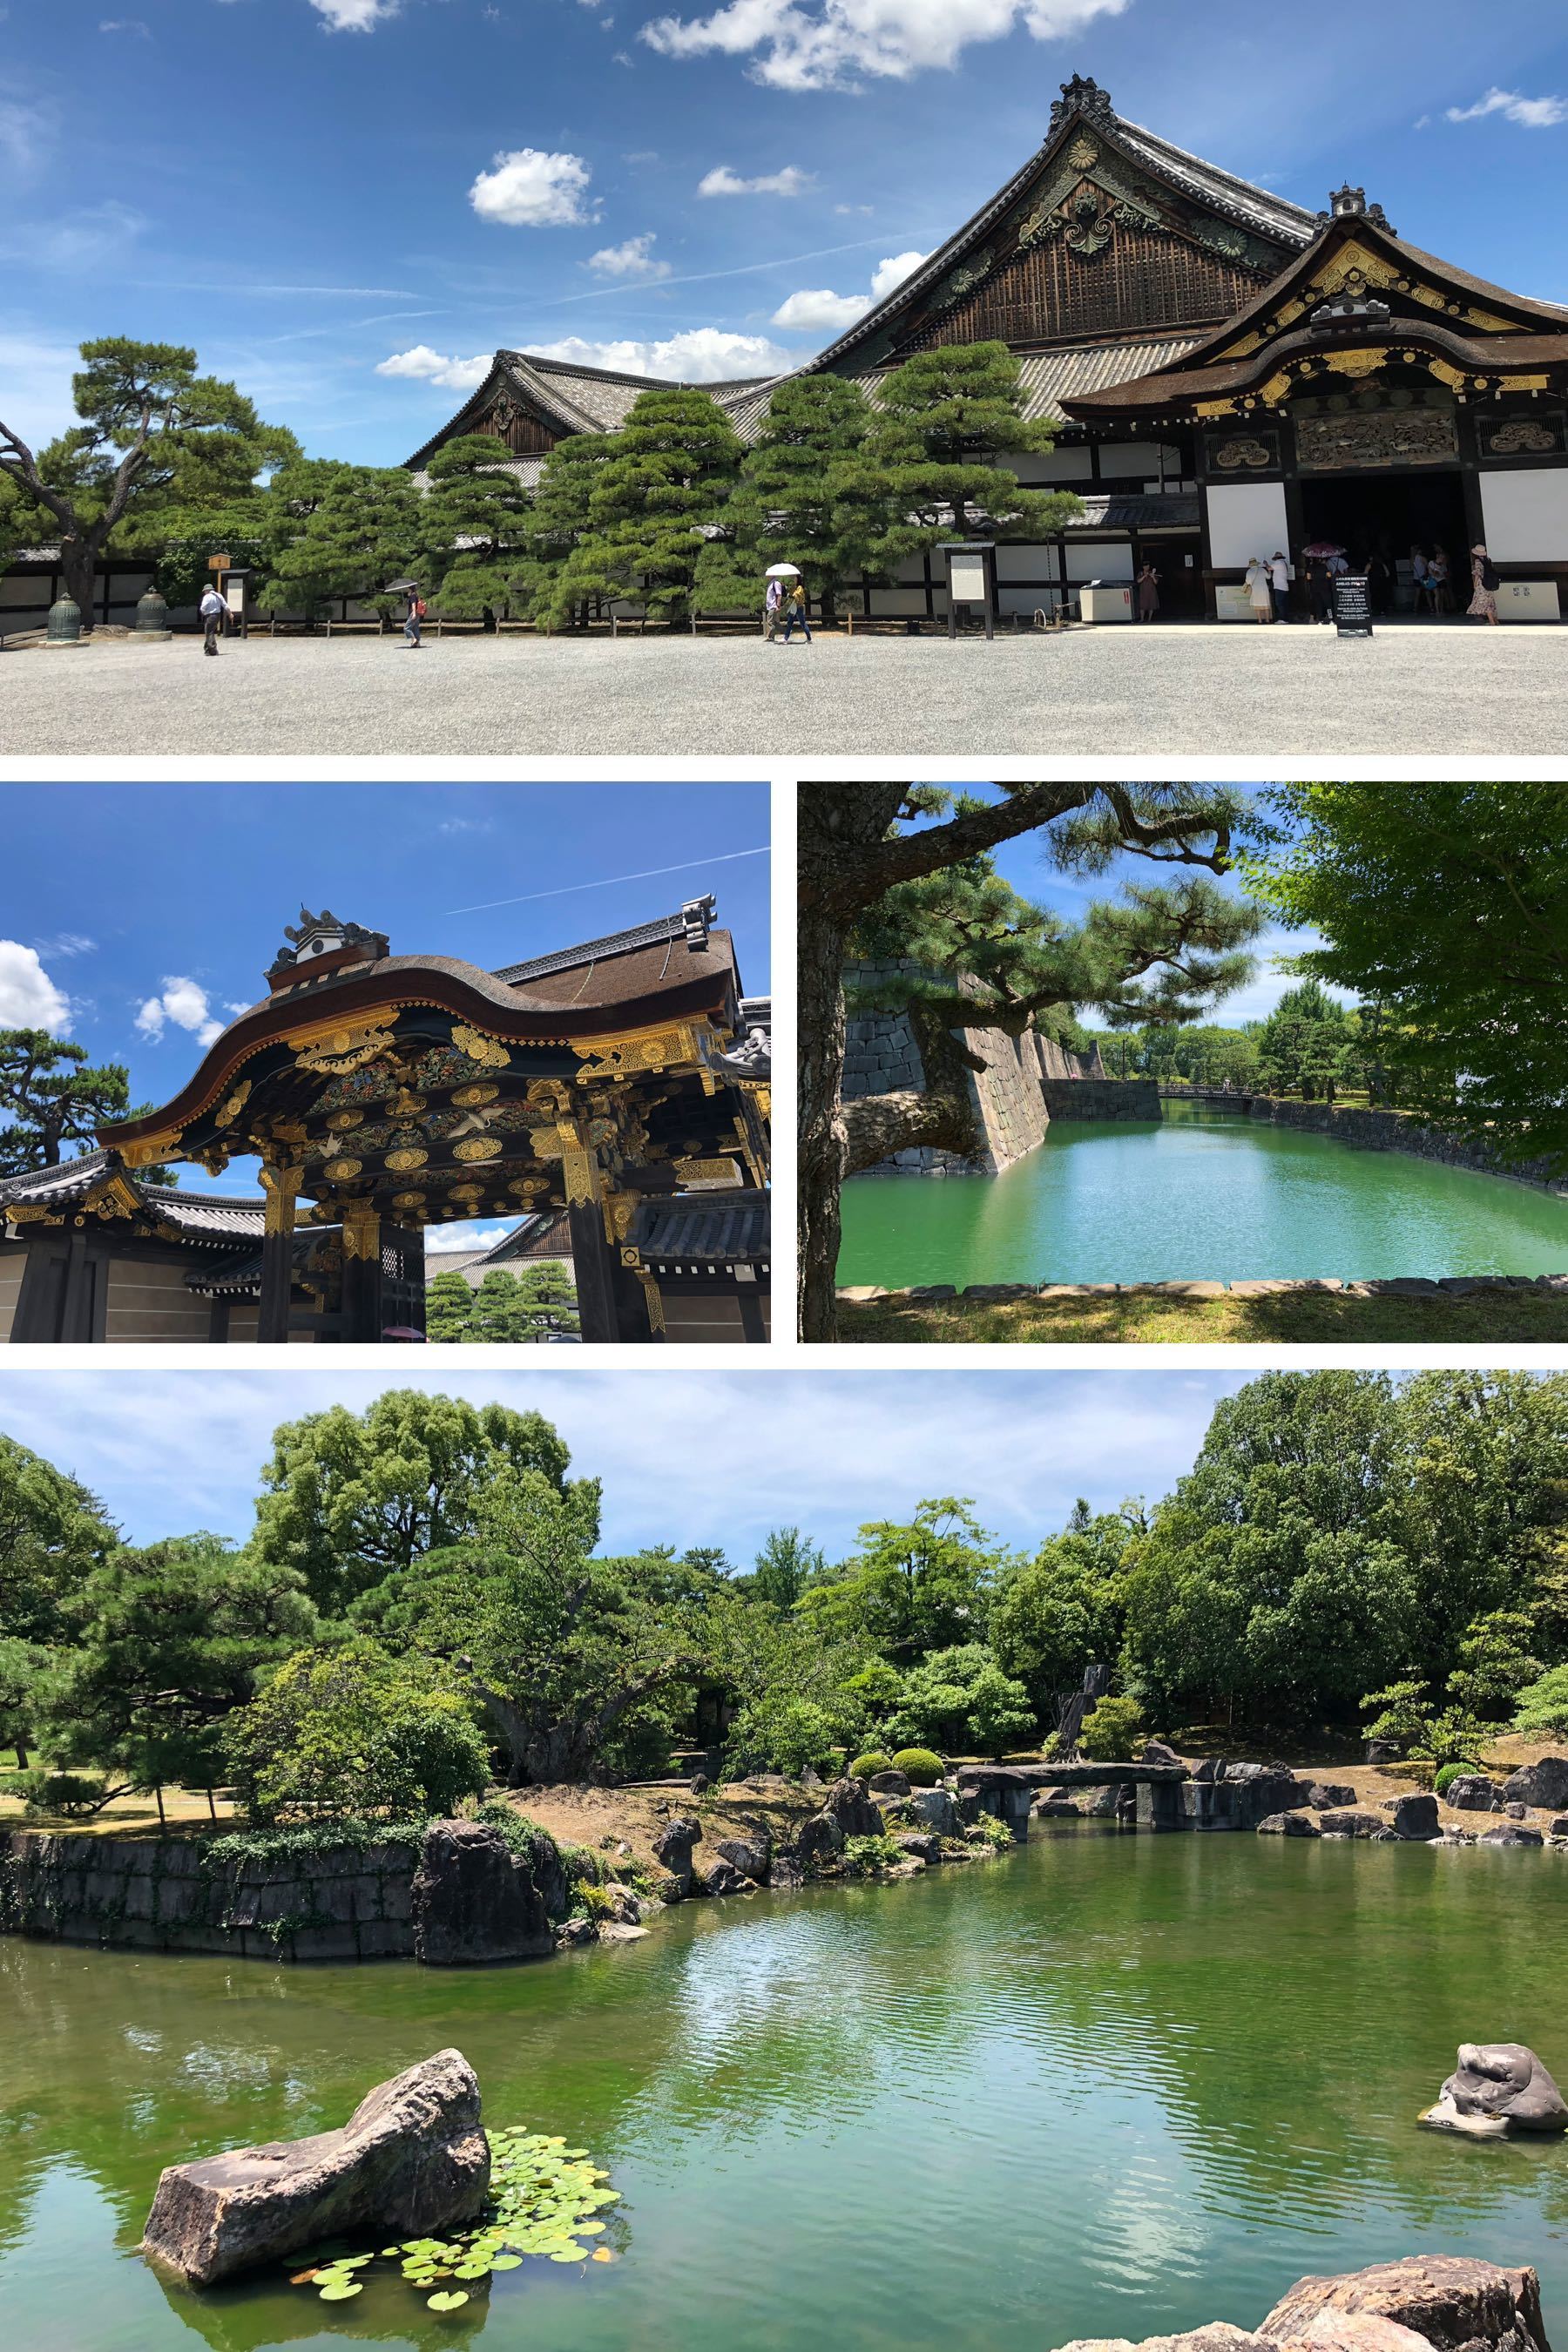
Matsumoto Castle
If you are a photographer, you may want to find an excuse (like hiking) to go to Matsumoto. My wife especially enjoyed photographing Matsumoto castle, both in the daytime and in the evening. It’s lit up nicely in the evening, and is particularly attractive then.
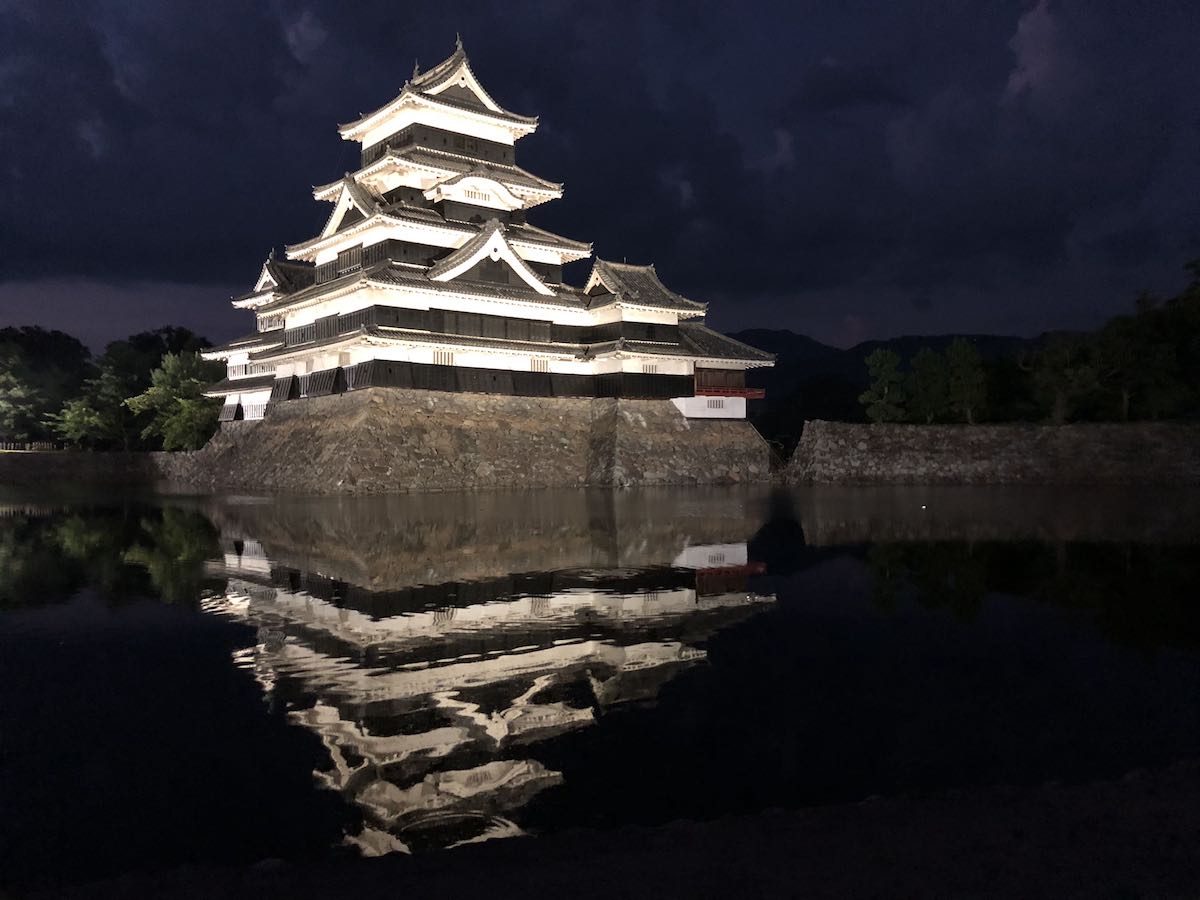
Osaka Castle
Yes, Osaka castle is a reconstruction. However, the displays inside it are very well-done and informative, the grounds are nice, and it happens to be very centrally-located in Osaka. So, it’s worth a visit.
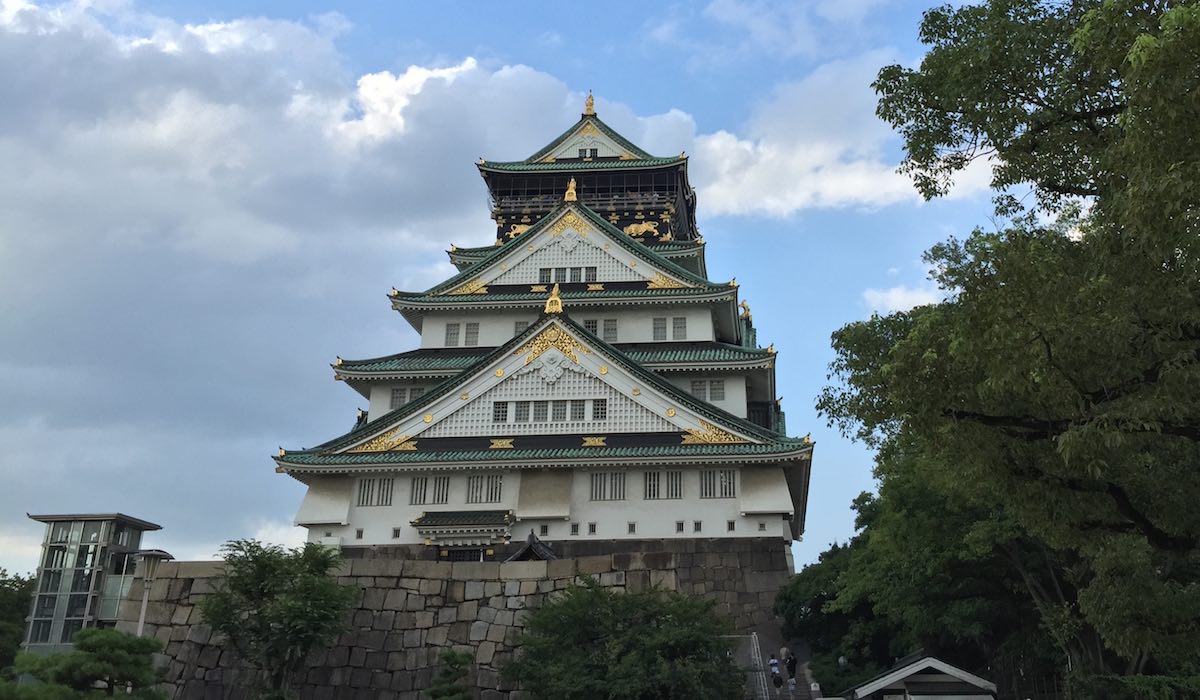
Kiyosu Castle (near Nagoya)
If you have children between 8 and 12 with you, you should probably consider visiting Kiyosu castle (in Kiyosu, near Nagoya).
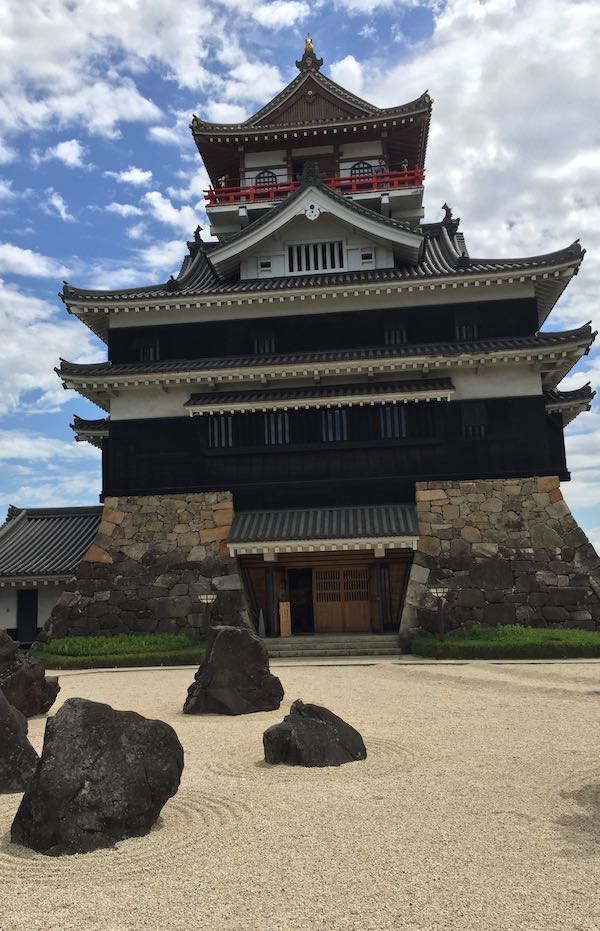
This is a reconstruction of one of the Oda castles. For the history buffs: Oda Nobunaga’s main castle was Azuchi castle, but it’s just a ruin today. So, as far as an Oda Nobunaga castle goes, this is as good as it gets.
The best thing about Kiyosu castle is that it can be very fun for kids: you can do a “Samurai training” thing, where you can dress up in full replica samurai gear (it’s heavy!) and have a swordfight. (They also have kimono for women to try on.)
We went there when our son was 12, and we had a great time together. This was particularly special since my son and I played Shogun 2 together, and his clan was the Oda–so being able to have a swordfight, in a replica Oda castle, wearing replica samurai gear (with Oda banners no less!), was just perfect.
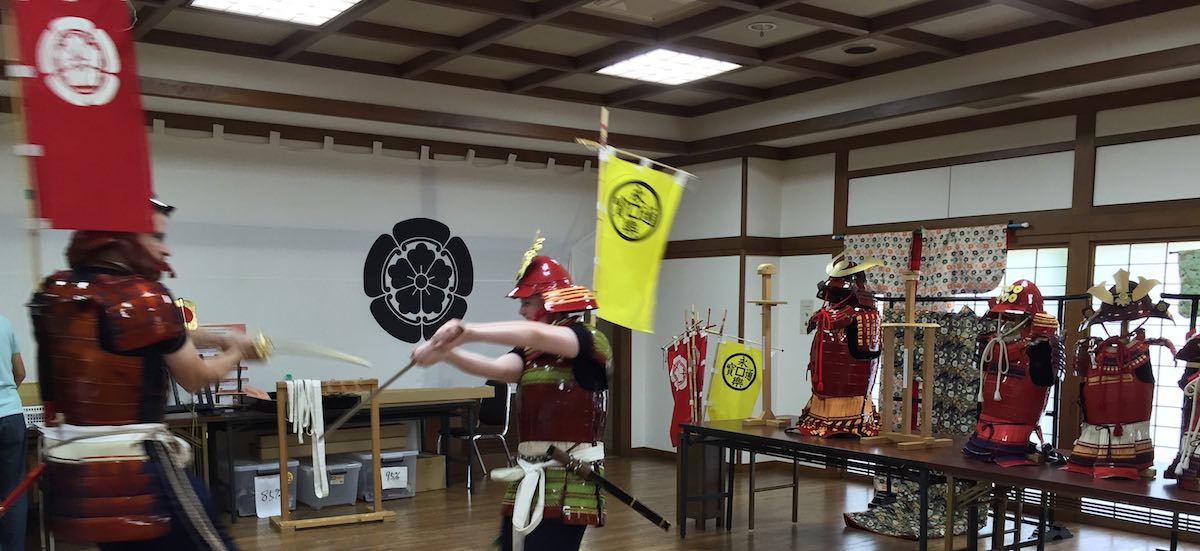
Gardens
Just as with Europe, many of the best gardens in Japan are attached to castles. Between these, and the grounds of various temples and shrines (such as Meiji Jingu in Tokyo, and the various Zen temples of Kyoto), you’ll probably find yourself spending more time in gardens than you had planned to–and probably enjoying it more than you planned to as well.
Now, unfortunately, summer isn’t the best time to visit many gardens in Japan: some parts of these gardens which would be absolutely spectacular in spring (e.g. fields of irises, the famous cherry blossoms) or fall (the reddish maple leaves) are just green and lush in summer. Even so, they’re still great.
Kenroku-en (in Kanazawa)
Kenroku-en in Kanazawa is considered one of the three best landscape gardens in Japan, and one which looks good in all seasons.
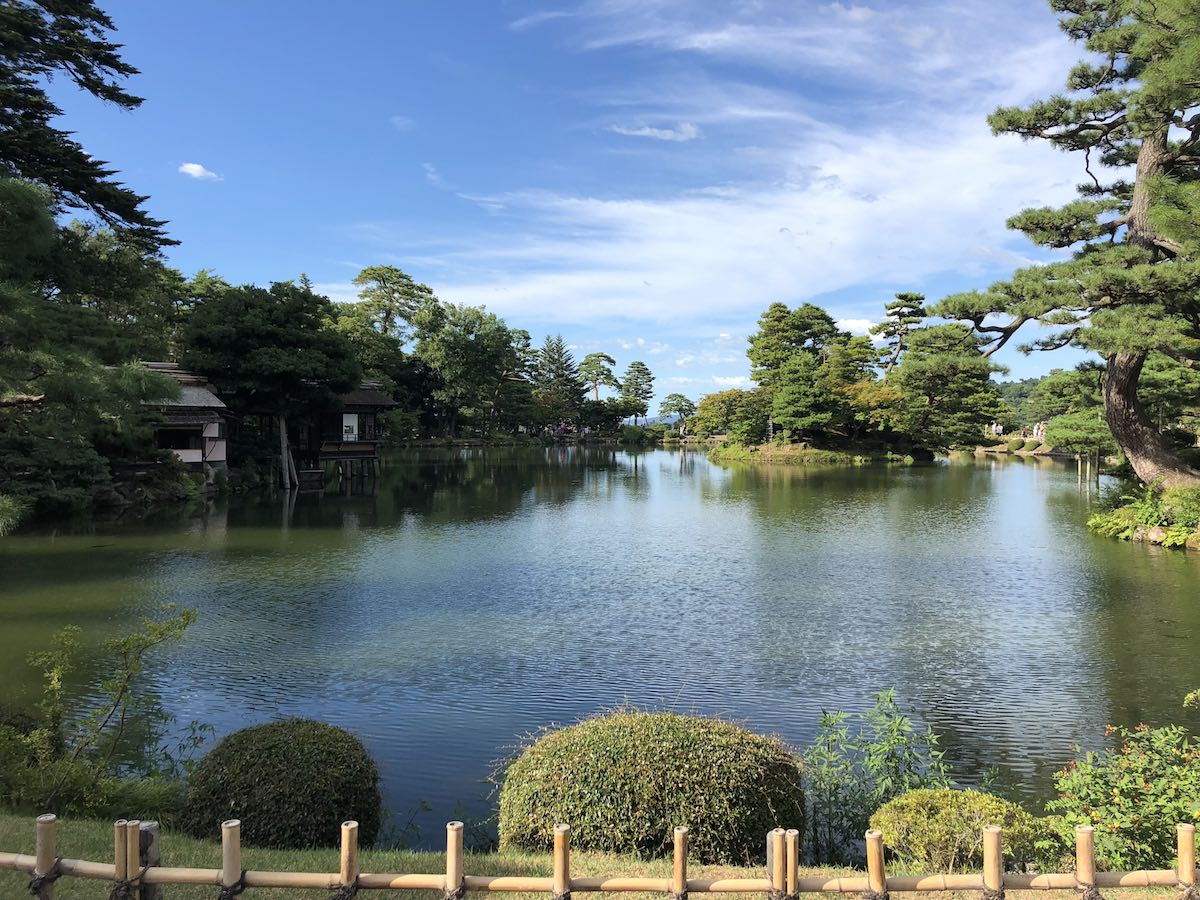
It’s not worth going to Kanazawa just for Kenroku-en, but it’s worth going to Kenroku-en if you’re in Kanazawa. Kanazawa is very similar to Kyoto, so plan accordingly.
Kabuki and Bunraku
Two of the most enjoyable cultural experiences in Japan are at the theatre, watching Kabuki and Bunraku. Both Kabuki and Bunraku date back to the 1600s, having their origins in Noh and Kyogen.
Kabuki in Tokyo
The place to go for Kabuki is Kabuki-za in Ginza.
Kabuki can be an all-day affair, and it can be expensive. However, it doesn’t have to be either. The best thing to do is to go late in the day, and line up for single act tickets for the third act about an hour in advance. One Kabuki act typically has two scenes, and it lasts as long as a movie with an intermission.
In 2016 we bought single act tickets in advance for an afternoon act, since we wanted to ensure we got tickets. In 2018, I just lined up on the same day I went. I was too late for the first act, but the attendant told me that evening act was the least busy, and that I’d be fine if I showed up an hour in advance. So, I lined up about 30 minutes before the tickets went on sale (which was about half an hour before the act started), and easily got a ticket.
Make sure to bring cash, as the tickets are cash-only. My ticket was about 2000 yen, and it was about another 1000 yen (about 500 yen of which was a deposit) to rent the device with English captions once I was inside. (Make sure to do this! It’s essential to follow what’s going on.)
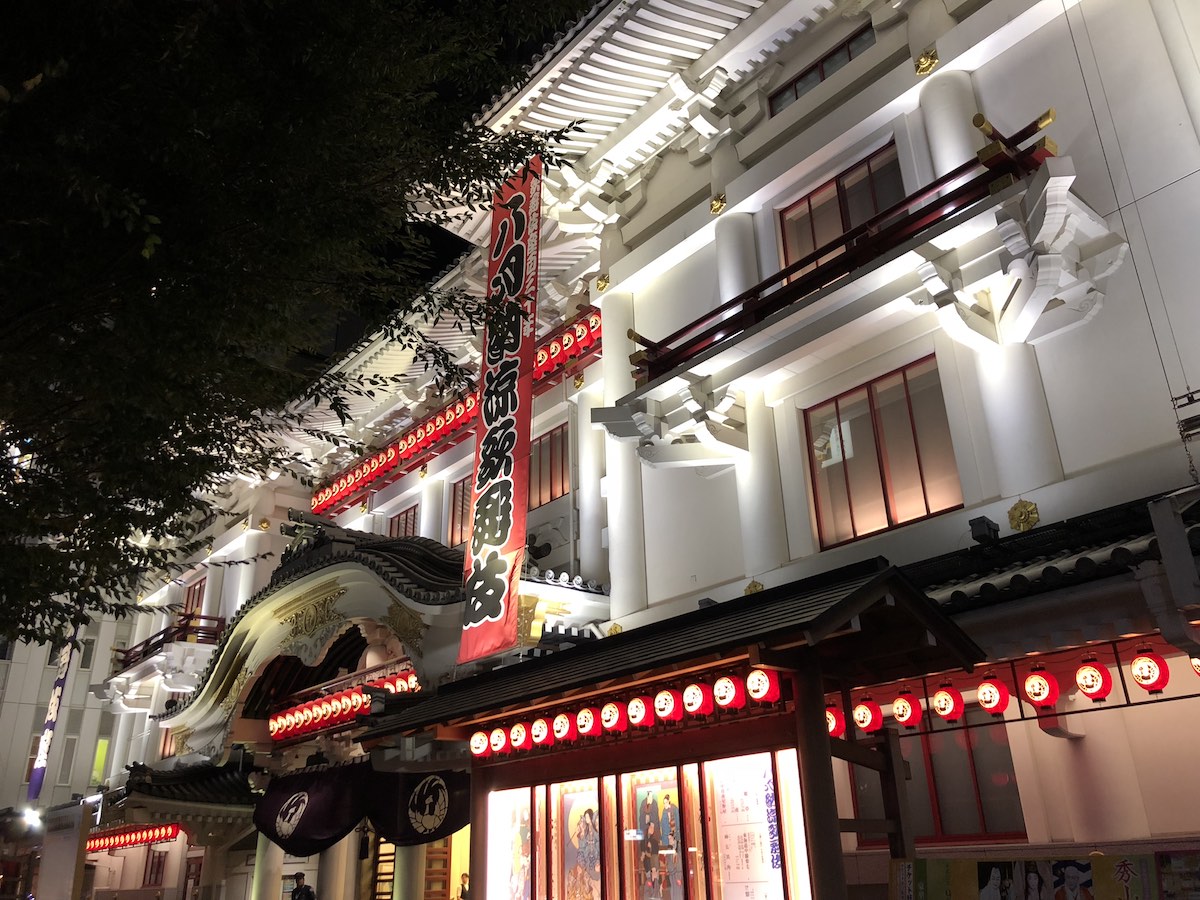
Bunraku in Osaka
Bunraku is essentially Kabuki with puppets.
If you go to Osaka, make sure to book tickets for Bunraku at the National Bunraku Theater in advance, if shows are on during the days that you are in Osaka.
It’s quite the intricate spectacle. The puppets are about half the size of people, and are controlled by three puppeteers each. Some of the puppeteers wear hoods, but at the National Bunraku Theater the main puppeteers (who control the head) are unhooded.
The process of booking a ticket on the website is a bit involved. If I recall correctly, you need to register first, then book the ticket. You then show up and pick up your ticket on site. Bring the credit card that you used to book the ticket. Also, the theatre is fairly small, and the prices for the best seats may be the same price as other seats. When we went there, I think this was the case, so we literally sat in the front row.
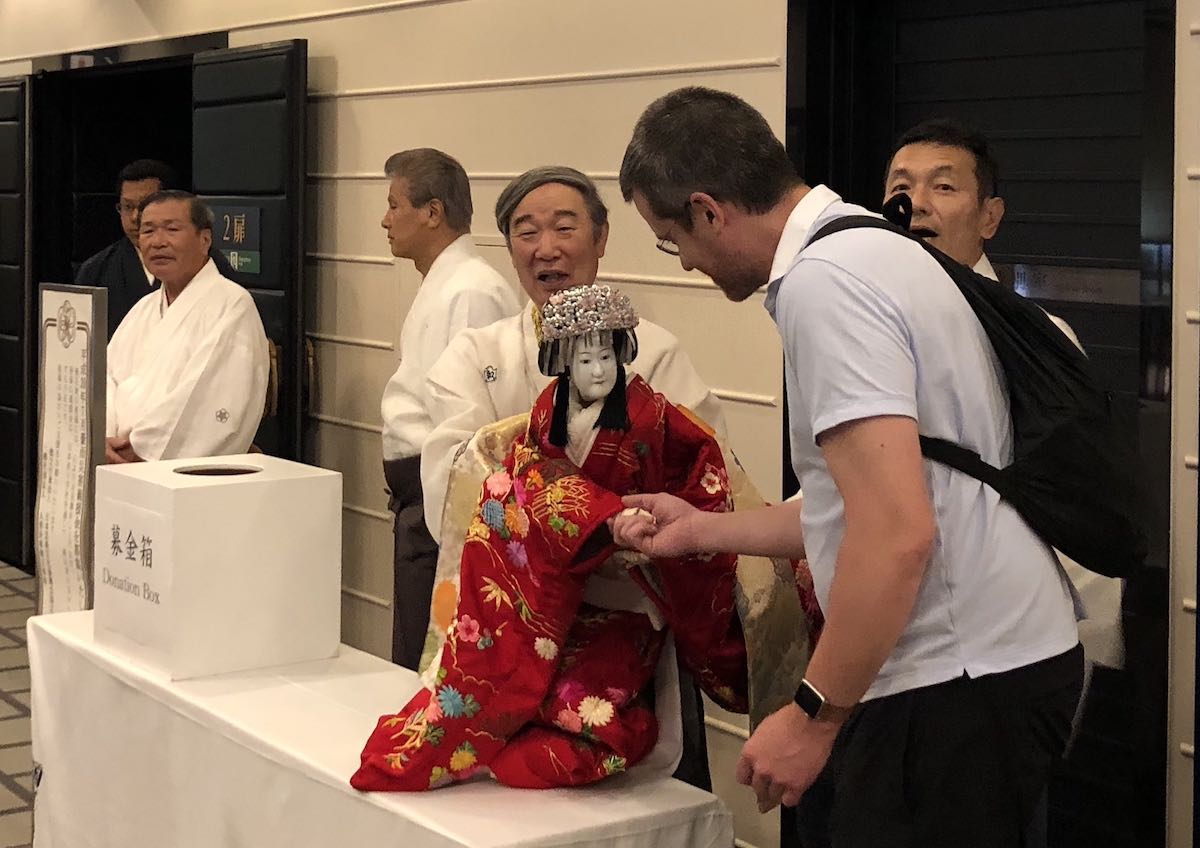
Onsen
Onsen are Japanese hot springs. They are either public baths, or part of ryokan. Since Japan is basically one big geothermal hotspot, there are natural mineral hot springs everywhere–over more than 25,000 natural hot springs throughout the country.
In some places, like Zao Onsen, the hot spring water literally runs along channels beside the roads. The entire town smells like sulphur! (I’ve hiked at Zao Onsen, but what I’m really excited about is the prospect of snowboarding there. While soaking in the onsen after a day of hiking was great, doing so after a day of snowboarding would be perfect.)
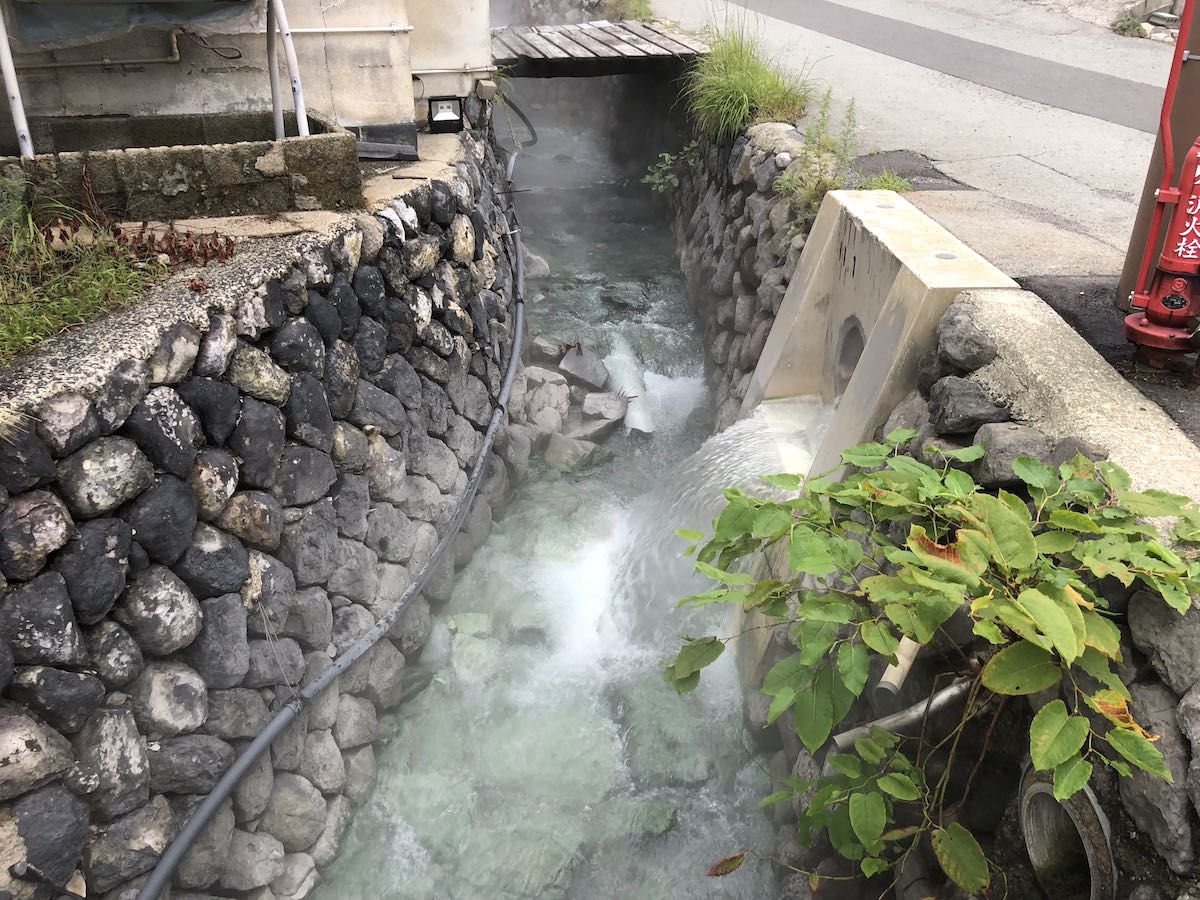
There are a number of etiquette primers available, so I’ll keep this brief:
- Onsen are for soaking after you are clean, not for cleaning yourself. You wash yourself first, typically sitting on a small stool and scrubbing yourself.
- Onsen are typically separated into male and female rooms. However, there are some mixed onsen, and at some ryokan you can book the onsen to yourself for a short period.
- Onsen are always naked.
- If you have any tattoos, you may be forbidden from using the onsen. (This is because tattoos have historically indicated ties to organized crime, and in Japan, rules are typically applied strictly.)
So, if you’re shy, you’ll find the process awkward initially, but once you get over yourself, you’ll probably greatly enjoy them. Also, since you are visiting Japan, you absolutely must try them in order to experience the culture: there’s almost nothing more purely Japanese than an onsen.
Museums
While I love history, I find a visit to a museum is a really good way to ruin half a day.
I’m not sure what specifically it is about museums which I hate so much. Perhaps it’s the slow walking surrounded by crowds, like being stuck on a subway platform for three hours.
Frankly, you’d learn more from watching a good documentary or reading a book than spending the equivalent time in a museum. And if you want to be surrounded by culture in Japan, you’re much better off visiting a castle, temple or shrine, or watching a Kabuki or Bunraku performance, than going to a museum.
Now, in Japan, the matter is made even worse by the fact that many museums are, first and foremost, catering to the Japanese. At many museums, the amount of information available in English is cursory at best.
However, that said, there is one museum which is worth visiting: the Tokyo National Museum. After visiting that, if you still want to see more museums, you’re in luck: since it’s located in Ueno Park, there is The National Museum of Western Art a 4 minute walk away.
Festivals (Matsuri)
Go to one even if (like me) you typically hate parades. Osaka has a big one, but even some of the smaller ones can be charming. For example, I went to the Yamagata Hanagawa Festival–primarily because I was staying in Yamagata that night, as I wanted to see Yamadera on my way to Zao Onsen. The amount of participation and enthusiasm is impressive.
Speaking of festivals, there are a number of fireworks festivals throughout Japan in the summer. Even if you typically find fireworks boring, you should go to one. However, if you do, make sure you get a good seat, and stay until the end. Some of the festivals can last over an hour, and it sucks to watch fireworks for about half an hour, think you’ve seen enough, and then, after you’re about 30 minutes away and no longer have a good view, look back and see glimpses of amazing displays. (That was me in Kanazawa.)
Advance Preparation
Usually when one thinks of preparing for a trip, one thinks of buying a guidebook (like this one!) or phrasebook, booking hotels, planning an itinerary, etc. These are useful things to do.
But if you’re going to Japan, and are going to spend any time looking at the historical or cultural sites, there are a number of optional “useless” things that you can do in advance which can actually greatly enhance your (or your kids’, if you have kids) enjoyment of the trip. These include playing Total War: Shogun 2, watching movies and reading books.
This chapter is about those optional things.
Total War: Shogun 2
Like its predecessor Shogun: Total War, Total War: Shogun 2 is a computer game set in the Sengoku Jidai, which is the warring states period from the mid 1500s until the unification of Japan by Oda Nobunaga, Toyotomi Hideyoshi and finally Tokugawa Ieyasu.
This is actually far more useful as a primer on a specific period of Japanese history and culture than you’d expect. Frankly, it’s a better primer to Japanese history than most books, since you think strategically about the conditions at the time. The initial conditions of the game are Japan in 1545. You can play as any number of the clans, such as the Oda, Takeda, Date, Shimazu, Chosokabe, etc.
Since essentially all the castles in Japan are either original or (more likely) reconstructions of castles from this period, it will give you an appreciation of the clans, castles, technology of the time, religion, etc., since all feature prominently in the game.
If you have kids of suitable age, make sure they play this. However, it’s more than that: if you play computer games at all, make sure you play Shogun 2. I’ve played a few hundred hours of Shogun 2, either single player or multiplayer with my son, and it’s worth it. Call it research for your trip.
Shogun 2 also comes with a “Rise of the Samurai” DLC campaign set in the Genpei War of 1180-1185, and a Fall of the Samurai expansion, set in the Boshin War period starting in 1864.
Movies
There are tons of great Japanese films to watch.
Samurai Movies starring Toshiro Mifune
This is a list of samurai movies starring Toshiro Mifune.
These can really get you in the mood to see more historical sights than you otherwise would have. If you have kids that are of an age that you are thinking of bringing them to Japan, chances are you can watch these movies with them. If they’re too young for these to be appropriate, they may be too young to enjoy Japan.
All of these movies are available on Apple TV, in Canada anyway.
- Seven Samurai
- Directed by Akira Kurosawa; starring Toshiro Mifune and Takashi Shimura. Chances are you’ve already seen it. If not, you need to.
- The Samurai Trilogy
- Directed by Hiroshi Inagaki; starring Toshiro Mifune. Fun fact: this is a fictionalization of the life of Miyamoto Musashi, the author of The Book of Five Rings.
- The Hidden Fortress
- Directed by Akira Kurosawa; starring Toshiro Mifune. Fun fact: this heavily influenced George Lucas’s Star Wars, so much so that he wanted Toshiro Mifune to play Obi-Wan Kenobi.
- Throne of Blood
- Directed by Akira Kurosawa; starring Toshiro Mifune. Shakespeare’s Macbeth in feudal Japan, with Noh drama influences. Great, of course, but less accessible than the above choices. My son thought the bit with the trees moving was stupid; I’m sure he’ll feel the same way when he reads it in high school as Macbeth.
Other Japanese Films
This is a different set of movies. These are movies which may not be suitable for your kids, and which are set in modern Japan (1980s-present).
Basically, if you let your kids watch Game of Thrones, you may be fine with these, and if you don’t, you may not. (My 14 year old son has watched these, but parenting styles vary.) All of these movies are available on Apple TV or Netflix, in Canada anyway.
- Hana-bi
- Directed by and starring ‘Beat’ Takeshi Kitano. A surprisingly moving and deep violent cop movie, and more complex than his debut movie Violent Cop. It won the Golden Lion at the 1997 Venice Film Festival.
- Tampopo
- Directed by Juzo Itami, starring Ken Watanabe, Nobuko Miyamoto and Tsutomu Yamazaki. A hilarious movie about ramen, among other things, and one of the best opening scenes ever.
- Battle Royale
- Directed by Kinji Fukasaku, starring ‘Beat’ Takeshi Kitano among others. This is the movie which is better than The Hunger Games, and inspired many other movies as well as the game Fortnite.
Books
Guidebooks
- Lonely Planet Japan
- At over 900 pages, this is a very comprehensive guidebook. The previous edition is what I used on my Japan trips. If you can only get one guidebook, get the latest version of this book. It’s worth bringing with you to Japan as a physical book–it’s that good. But at least get the ebook to have on your phone…
- Lonely Planet Kyoto
- If you want a city-guide for Kyoto, this is a good choice.
- Lonely Planet Tokyo
- If you want a city-guide for Tokyo, this is a good choice.
Other Books
- Anthology of Japanese Literature: From the Earliest Era to the Mid-Nineteenth Century
- Donald Keene. The newest edition of the anthology I read in university.
- Hagakure: The Secret Wisdom of the Samurai
- Yamamoto Tsunetomo. The highly quotable grumpy old samurai.
- I Am A Cat
- Natsume Soseki. Brilliant and hilarious, but slow in parts if (like me) your brain has been conditioned by the internet.
- Japanese Culture: 4th Edition
- Paul Varley. The newest edition of the textbook I read in university.
- Kokoro
- Natsume Soseki. His most famous novel. I loved it when I read it in university.
- Modern Japanese Literature: From 1868 to the Present Day
- Donald Keene. The critically acclaimed anthology which picks up where the other one leaves off.
- The Book of Five Rings
- Miyamoto Musashi. The Japanese answer to The Art of War, and a short, fun read. The Samurai Trilogy movies are about Miyamoto Musashi, so you may enjoy reading this before or after watching them. (I read it first.)